A Minecraft Movie Live Event
The specific instructions are: Remaining NPCs and animations

| Developer(s) | |
|---|---|
| Edition(s) | |
| Pack author(s) | |
| Release date |
|
| Closing date | |
| Article |
{
    "title": "A Minecraft Movie Live Event",
    "rows": [
        {
            "field": "\n* (link to Mojang Studios article, displayed as Mojang Studios)\n* (link to Spark Universe article, displayed as Spark Universe)",
            "label": "Developer(s)"
        },
        {
            "field": "(link to Bedrock Edition article, displayed as ''Bedrock Edition'')",
            "label": "Edition(s)"
        },
        {
            "field": "\n* (link to Mojang Studios article, displayed as Mojang Studios)\n* (link to Spark Universe article, displayed as Spark Universe)",
            "label": "Pack author(s)"
        },
        {
            "field": "<time datetime=\"2025-03-25T21:00:00+00:00\" class=\"localized-time\">March 25, 2025 21:00 UTC</time>",
            "label": "Release date"
        },
        {
            "field": "<time datetime=\"2025-04-14T21:00:00+00:00\" class=\"localized-time\">April 14, 2025 21:00 UTC</time>",
            "label": "Closing date"
        },
        {
            "field": "[https://www.minecraft.net/en-us/article/a-minecraft-movie-live-event \"''A Minecraft Movie'' Live Event\"]     – (link to Minecraft.net article, displayed as Minecraft.net).",
            "label": "Article"
        }
    ],
    "invimages": [],
    "images": [
        "A Minecraft Movie Live Event Screenshot 2.jpeg"
    ]
}
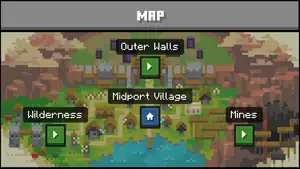
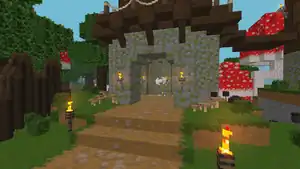
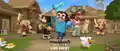
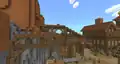
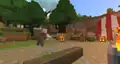
A Minecraft Movie Live Event, also referred to as the Movie Event, was an event server in which players could play several mini-games inspired by A Minecraft Movie and save Midport Village from a piglin attack.[1] It was first announced during Minecraft Live on March 22, 2025, where it was showcased in the aftershow of the live event. Players who completed the six quests in this server would receive the Yearn Cape which then could also be equipped in Java Edition.[2][3]
Lobbies
Instructions: Describe layout of the areas and the various details
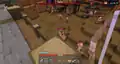
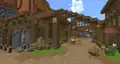
Midport Village


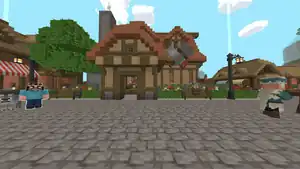
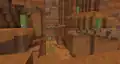
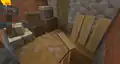
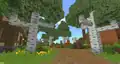
The player spawns in front of Steve, who explains the situation and points towards the whereabouts of the misfits. Behind the player is a large bell tower, which can be entered, filled with crates, chests, sacks, a pickaxe, and bottles. Behind the stairs is an emerald, which adds 80 emeralds to the player's count when collected. Climbing up the spruce stairs leads up several floors, one with a stone brick balcony, another with a metal railing with a hidden emerald on the back, which adds 100 emeralds to the player's count when collected. Eventually, the player can reach an apex with crates and a ladder up to a giant bell, where the saxophone item can be found. Beside the tower is a forge curiously staffed by a mason, with several displays of weapons, a barrel of coal, and an oven using magma blocks. A living quarters can be seen next to the building, even peeked into through windows, however there is no way to enter. Above this building, an emerald can be found hanging on a suspended cargo platform from a chain hanging from the roof. This emerald adds 400 emeralds to the player's count when collected. Also present is a bulletin board, which plays the credits for the server.
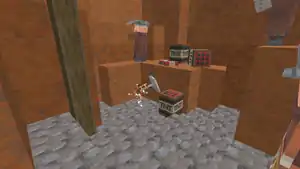
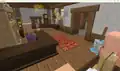
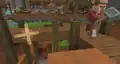
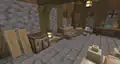
Passing by a nitwit janitor, the player can go down a flight of cobblestone stairs and find another forge, where a weaponsmith can be seen tinkering with an iron sword on an anvil. The outside is equipped with wheelbarrows, lumber, a display of swords, and two pairs of hammers. The inside contains several more racks, a wheel, a diamond pickaxe, several sacks full of raw iron, crates of bricks, a fireplace, and two full baskets of bread. An emerald can also be found inside, which adds 100 emeralds to the player's count when collected. Returning to the street, and heading up the stairs behind the bell tower, the player will stumble upon a shepherd in a rocking chair, telling a story to several baby villagers. Occasionally, a leatherworker will walk by. Behind these villagers, and to the left of the house, an emerald can be found on the grass along with flowers. The emerald adds 50 emeralds to the player's count when collected. Continuing down the street, back to the main area, a wandering trader's stall can be found left of the bell tower, selling several weapons with a pet parrot. Entering the building behind the trader will reveal a three level house, the first room hosting a fireplace, desk, diamond sword, and backdoor leading to a sack of apples.
Climbing up the stairs will reveal a room full of storage containers, leading to a bedroom with a yellow bed and balcony. Between the two rooms are stairs up to an attic, with several more desks, melted candles, crates, hanged bows, a cooked chicken on a tray, and a white bed. An emerald can also be found here, which adds 200 emeralds to the player's count when collected. Continuing back on the road will lead to a cleric on a bench, and then return to Steve, to the stash. In front of the window is a lone miner, relaxing, and across from them is a group of four villagers: a fletcher, a librarian, a snowy villager, and a savanna cartographer. In the middle of their conversation, a baby villager will run over and try to prank them with a piglin mask, before running off back to the Diamond Boot-ique and trying again.
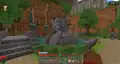
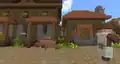
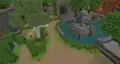
In the center of the village is a large fountain, with a large statue of Dennis on top. Behind the statue is Steve's Lava Chicken!, where an untamed wolf can be found, beside a farmer who finished their meal. A miner and a villager with glasses are sitting and chatting to the right, while a cartographer on the left is stuck in line, visibly angry. Inside the restaurant is the lava chicken item. To the right of the establishment is a small house with a fireplace, oak dresser, a painting of a badlands biome, and a bag of corn. Slightly further to the right is a small garden with a large tree, a grass path, fountain built into a hill, and two villagers talking outside. In this garden, an emerald can be found, which adds 80 emeralds to the player's count when collected.
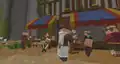
To the left of Steve's Lava Chicken! are two sales booths, one with a teal awning and another with red. The former is run by a leatherworker selling apples and carrots, the other a shepherd selling corn. To the left, a house is open, featuring two floors, with more corn on the first and a mirror on the second. The two buildings to the left are connected by a clothesline, though only the one to the left is accessible. The interior is noticeably darker with what appears to be spruce wooding, with metal containers, a painting of Dennis, and two mugs immediately visible. A narrow stairway leads up to an attic with a dining table. Here, an emerald can be found, which adds 100 emeralds to the player's count when collected. Two more booths are to its left side, one a fisherman selling cups and the other a toolsmith chopping bread with three sacks on the ground.
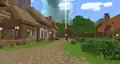
Lower Drop in Village

In order to reach Dawn and Natalie, the player must go past the stash down stairs into a more rural area, with dirt paths and darker buildings. Right behind the house is a wandering trader, selling various cups and bread. In front of it is a cat, staring up at an array of dead fish, while a villager sits under another clothesline. A butcher hosts an apple stand beside a suspended house that can't be entered, while behind the clothesline is a two story house with an emerald inside. Behind the house is an empty stable with several hay bales and functional fence gate.
Further still, players can find an adult cow and two babies, resting behind a piece of lumber waiting to be cut. Left of them is a large farmhouse, with visible wheat crops surrounded by dandelions. More cows can be seen inside, with a similar house right behind, with even more cows and a cat lying on hay. A carrot farm is right up against the border of the area, progressing past there leads to the Mine area. Between two houses is an emerald floating in mid-air, which can be accessed by climbing up a large rock onto a roof. Collecting the emerald rewards 80 emeralds.
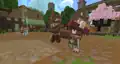
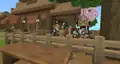
Behind the houses by the sea are more carrot farms, equipped with a scarecrow. Progressing down the path leads to a group of three fishermen on a dock, two chatting and drinking while the other is hard at work. An accessible farmhouse can be found beside them, covered in dead salmon, with a barrel suspended on a pulley. Returning to the right side, players can find a shepherd walking by, and find the largest farm yet, populated by many llama. Dawn and Natalie can be found right beside it, with a villager repairing a carriage beside them, foreshadowing their minigame.
Surrounding them are further structures, including an outdoor table with three villagers discussing their plans with what appears to be a map or blueprints, a well, an empty farm, a potato farm, and wheelbarrows of potatoes. Behind the potato farm is an emerald, beside a brick chimney, worth 80. A carrot farm beside a windmill can be found, however further entry is barred by an invisible wall. Beside Dawn and Natalie is a house area, containing two emeralds. One is inside the house, worth 100 credits, while another is on top of a large tree, worth 400. This can be accessed by a path of various cliff platforms behind it, leading up to another area.
The Pit

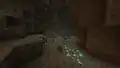
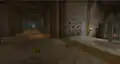
In order to reach Henry, the player must search out a large mining area, identifiable by granite surroundings. It can be accessed by walking left from Steve, down the stairs and under an elevated railway lined with redstone sconces. Entering from here, a large pile of TNT will be visible, beside a house with a brick chimney. Outside the house will be a large table with a diamond pickaxe and several small barrels, and inside a cramped living space with a unique bed color, not correlating to any dye at the time. Exiting the house will highlight more dynamite, with Henry right nearby. Behind him is what appears to be a mine entrance, done in by collapsed stone.
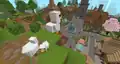
Progressing to the left will reveal a brazier, with a bench nearby. The path will then fork, a stairway up a mountain to the left and a spiral downwards to the right. The latter path will lead down into a pit, more and more dynamite being visible as the player progresses, culminating in a pile of raw iron sacks and gravel. Returning up towards the other path, the player can take a rest on a gray wood bench and look over fences. Here the player can get a clear look at the rails, several miner villagers riding in minecarts, some stuck upside down. From there the player will advance up a steep hill, leaving behind the quarry to a more temperate area full of sheep.
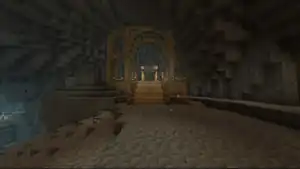
Most immediately present in the area is a large temple, made of stone bricks with doors resembling a mix between spruce and pale oak. Entering inside, many villagers are seen attending, sitting on regal benches. Curiously, the cleric is not hosting. Behind the temple are several more areas, including an open tomb decorated with several pots, and a cemetery. The graveyard has five identifiable tombstones. Returning to the entrance of the temple, the player can eye a bee flying beside another house, as well as sitting sheep. Inside is an emerald, worth 80 emeralds.
Exiting out the player can spot a bridge, passing by a brown sheep, leading to a larger house with several chickens in front of a garden with a faucet. However, it cannot be entered. To the right is a path to the Outer Walls, while to the left is a hill up to a pumpkin patch, with an active farmer perpetually watering the crops. A large house with pumpkins of many different sizes, as well as vines, can be found nearby, though it can't be entered either. Nearby are two chickens overlooking a cliff, one staring off at Steve's Lava Chicken.
Fortress District

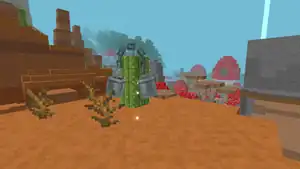
In order to reach Garrett, the player can cross underneath a large bridge into a slightly rural yet fortified area of the town, identifiable by a cherry tree that apparently dropped apples. Across from it, a bee will fly over, near an emerald worth 50 credits. Beside the emerald is a green house, where a miner can be seen trying to assemble an iron golem using blueprints. Inside the garage, many more blocks of iron can be found. A brick house lies close by, however it can't be entered.
Nearby, an iron golem stands before the gate to a garden area. Close to that entrance are hedge arches leading to statues of a writer and author, with a librarian seemingly explaining their history to two children. Close by is a white cat, and a bee pollinating white flowers. Beside a farmer on a bench is an oak tree, leading to a small moat where salmon and cod swim about. An iron golem stands patrol, marching to and from a spot near a viewing area for a guardian statue and villager head, referencing one from the film. On the opposite road the player can find an iron golem swinging on a swingset built into a dark oak tree, under a bee nest. Progressing from there the player will enter into a cavern stairway, walking up into a cramped installation with stone brick pillars, a drawer, and many pots. Further still the player will reach the church area.
Left of the center area of the district is another mine, with many villagers managing cranes and carrying cobblestone, depositing them onto platforms. Two stands can be found, one a fletcher under a green awning with a diamond axe, the other a librarian with a hammer and toolbox under a cyan awning. Another emerald can be found nearby under a worker area, worth 80. Garrett is standing guard by the gate to the village, where two villagers are throwing eggs at target blocks. Right of him is a cleric with a bow, and behind them a mini forge, with a melting chamber and attic. Garrett can be met, who explains he needs help in fighting the piglins from entering the gate.
Behind the leftmost houses is another area, hidden off but easily reachable. In this area is a melon farm, with another apple bearing cherry tree, and a storage shack with dripstone roofing. Inside a ladder down into a hidden area can be found; a mysterious mineshaft basement, with granite walls and several tight pillars. A lantern is present, but emits no light, and a few blocks away from it is an emerald rewarding 200. Another entrance can be found inside a fountain, across from a lit furnace, a sign blocking the water.
Wilderness

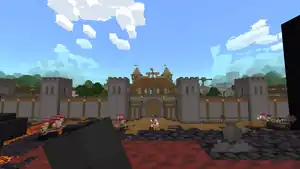
Dawn and Natalie can be met saying they are very low on supplies and need the payload to get their materials. If the player agrees to help they will be sent to another, smaller village, specifically a fortified section surrounded by pikes. Traveling up into a stone castletown and under a portcullis, Dawn and Natalie can be found again, and can return the player to Midport if desired. Surrounding them is a marketplace, with stalls such as a bookstore, an ore dealer, a cleric's water shop, a pile of food, and pens of colored sheep.
Right of the heroes are more shops, including a butchershop with uncooked chicken, and a bridge over to two shops of contrasting size. One is a masonry, selling clay, terracotta, a stair block, and pots.The other is a disorganized pile of books on the ground, a chest, and a small table, without even a stall. Down the stairs leads to a farmer's stall, with cows near several hay bales, before returning to spawn. Left of spawn is another bridge, leading to several wooden houses, the one facing the player having two open doors, containing iron ore. These are explained by the presence of a mine to the right. Behind the house to the left is the start of the minigame.
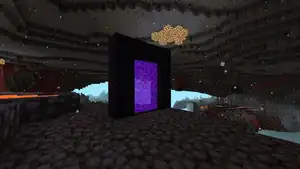
Venturing out into the Wilderness, the player will pass by pike barricades, and come to a fork in the road. The path they're on is labeled as A, while another is B, referring to the villages. Down the hill, the player can find a shortcut into a later area, and the first Nether portal, with leaking netherrack and blackstone. A bridge over a waterfall leads into a quarry rich in coal, with an emerald placed slightly above. Here, the first pillager patrol will appear. Giant mushrooms will begin to appear after crossing under an arch, before an outpost becomes visible above, complete with a dark oak bridge. This bridge can be reached by venturing beyond the initial signpost, leading to the battleaxe item. Venturing further, past more detailed mushrooms and dark oak leads uphill, over another bridge, and finally to chopped trees, one over the road.
The path ends by transitioning into a mushroom village, establishing itself with a tower built out of a large red mushroom. Right of the tower is a small dock, but inside the tower is a spiral stairway to a ladder, itself into a bedroom area, seemingly referencing a location in the film. Another mushroom house is nearby, with several bows hung on the wall, and two paintings, one of a badlands and the other a vertical version of Unpacked. Nearby are several villagers, one watering some, and two others showing each other red and brown species. On a cross shaped intersection is an iron golem watching two kids run in a circle. To the right of the golem is another house, similar to the second.
To the left is a brown house, with a fireplace inside and a room full of food. On the second floor is a dimly lit room. Outside is another golem playing with two more kids, while a third does something. Behind the golem is a mooshroom, and behind the kids is a series of mushrooms on a clothes lines. The section is littered with crates, an axe, and mushrooms, and ends on a return from the next area. The forward path leads to the formal way there, while to the right is a way back to the entrance.
The return path begins with a bridge, passing by a waterfall over another hill and then to another portal. Crossing over yet another bridge the road forks, one path leading up onto a cliffside area with an emerald under trees. The other leads to another portal beside another quarry with less coal, returning to the rural area. The forwards path is a long road over to a badlands biome.
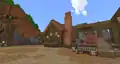
Players can embark on the next hike by passing by more barricades, up a hill towards a hoodoo. From there the area will gradually turn into a badlands biome, with large mushrooms growing out of the surrounding area. An emerald can be found by platforming across several brown mushrooms. The transition will complete by walking across brown mushrooms like a bridge, entering into a full badlands with flowering cacti and several turns. Passing by the first Nether portal, the player might notice a pair of bridges, which can be accessed by climbing up a hill of red sand, leading to a mineshaft containing an emerald worth 80 points. Following a track in this area can lead to the top of a canyon, where the buck-chuckets can be found. Another area can be found to the right, up a slight elevation, over to a set of halved bridges. Inside a shaft is an emerald, worth 100 credits. Opposite to it is a wheelbarrow with a barrel on the other side of the broken bridge.
Returning to the normal path, the mine can still be accessed, however a different area. Four miners can be found, one constructing a minecart with visible spark particles upon hitting it. Below is a stone cave, littered with gold ore, where an emerald can be found, worth 200. This secret can be exited via a ladder beside the villagers' area. Even more villager miners can be found nearby, chatting in an organized area, where a formal ladder can be used to drop down to another cave. In this area another emerald is available, worth a whopping 500 emeralds. A third emerald is available beside a secondary ladder into this spot, worth 200. Climbing up from there, the player will emerge up a stairway, and from there return to the top of the mine.
It's in this mine where the llamas will be traveling to and from, as opposed to a village. On the way back, the player will encounter a portal, before getting ambushed by illagers. The biome will resume to the mushroom field, crossing over red mushrooms now, with plentiful spiders. Another emerald is hidden on a mushroom platform, harder than the last.
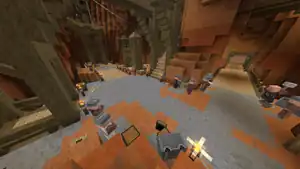
Mines

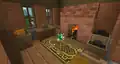
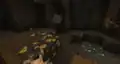
The Mines is the third map, in which the player can encounter Henry, who is right behind the spawn point in the dark of the cave. He says he wants the player to gather some ores found in different levels. When going straight, the player can eye a board tracking the amount of ores delivered in the minigame, beside a pile of gravel. At the end of the platform is an elevator, used to begin the minigame, however several things can be seen outside of reach. To the left, many villagers are mining, a shepherd wandering around and hitting the wall over and over. Below, the player can drop down and find a villager mining with a wooden pickaxe. On the trip back up, a nitwit can be found sleeping on a rock, beside another railway, several villagers marching up behind it while passengers look up. Above the area are several cranes and lit up bridges, with some villagers working to install beams.
An elevator that leads down to Level 1 or Level 2 can be seen and some mobs can be fought. Players are rewarded at the elevator based on the items collected.
There are various dungeon structures with chests containing ore and treasure items, and there are also railway paths only accessible with minecarts leading back towards the elevator. Certain areas that are further away from the elevator can have a higher concentration of more valuable ores, but will be harder or more dangerous to reach.
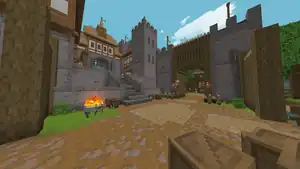
Outer Walls


The Outer Walls is the last map of the event, players spawning at the tip of the steps in front of Garrett. Beside him is a weaponsmith forging a sword and armor on a loop, before handing them over to a mason with a wheelbarrow. To the right is a village area, where a nitwit with glasses is resting, watching the carnage. A cleric will walk back and forth past 50 emeralds. Several villagers are visible in the marketplace, including a trio consisting of a farmer, fisherman, and fletcher. A farmer will be seen talking to a savanna villager, and then appears to sneeze before the fisherman walks over with a sack. A nitwit will be talking with a second fisherman. A lumberjack hut is nearby with logs ready to be cut, while a mason and shepherd talk beside an emerald worth 100.
Walking down the stairs, the player can find a large red and white tent, where a fisherman, farmer, and miner can be seen eating a lava chicken and apple. Another farmer can be found around the corner, tending to a wheat farm with a unique scarecrow. To the right is a lake with what appears to be a dock with a dead salmon, a miner resting in the shade of several trees. Across a bridge the player will find several villagers working on a wall. A pink house is nearby, however it cannot be entered. Behind it, past a nitwit worker and stone chimney, an emerald can be claimed, worth 200 points.
To the left of the center, a villager will push a wheelbarrow. Underneath a yellow house, a villager is manning a rope crane, lowering iron down to a miner trying to repair an iron golem. Their detached arm is too heavy. Two more tents can be found here, the first being used to read a paper with three villagers relaying information. Beside the cartographer is an emerald worth 100. Beside the tent is a brazier campfire beside two log seats and a rack of weapons. The second tent is beside the stairs to the minigame, with the fletcher from the other tent leaving the weaponsmith to speak with a cleric and snowy villager, seemingly exchanging notes.
Another town area is nearby, uphill. A snowy villager and shepherd will be chatting with two sacks. A butcher and wandering trader will run stalls. A savanna leatherworker is resting on a stairway, irreverently. An earthen area similar to the pit in the main village is at the peak of this area, a large netherite crane being operated by two villagers. Here, the player can go up a set of narrow stairs onto a scaffolding platform where large deposits of bricks can be found, as well as an emerald worth 80. Behind the third tent is another emerald, in a house very similar to one in the Wilderness with lots of iron, worth 100.
The deepest area of the map is below, where villagers are returning a minecart with chest in and out of a cave in the ground. Water and raw iron ore can be retrieved from the chest. Passing by what appears to be copper ingots, many villagers will be seen mining granite. It is here, beside TNT, where the player will find the tot launcher. Nearby, atop a granite rock, is another emerald, worth 50.
The Nether
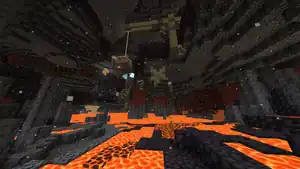
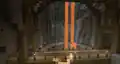
Although it is not meant to be possible to enter the battlefield and kill the attackers with melee weapons,[4] the battlefield can be entered through a glitch by running off the right balcony in front of the gate with the lava chicken speed effect, then crouching once glitched off. The portal in the blackstone rock on the right when looking towards the battlefield from the gate can be entered and will transport the player to the Nether in the basalt deltas biome. All other Nether Portals in all other regions (including the other portals in the Outer Walls region) will not transport the player to the Nether.
After being transported to the Nether, the emeralds box in the top-right corner will appear blank, but the Gate's boss bar will still be visible. If the player restarts their device their emerald box will have their emerald count back.
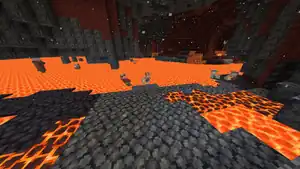
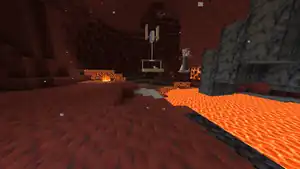
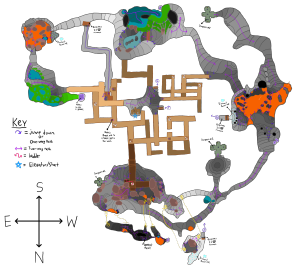
In the Nether there are two possible portals the player can spawn at, both in similar areas. One is on an isolated island area near lava falls. The second has a ruined portal nearby and is connected to the rest of the landscape. There is a ruined portal near the Nether spawn, and its chest contains usual loot which can be taken into the inventory. Additionally, it is possible to travel to a fortress or bastion remnant. No mobs spawn naturally in the Nether, the only encounters will be with blazes or magma cubes spawned from spawners in fortresses and bastion remnants. Magma, lava, and fire damage is disabled. The only way of taking damage in the Nether here is with fall damage or by fighting blazes or magma cubes from still active spawners. Blazes will give the player blaze rods upon defeat but the loot cannot be carried outside of the Outer Walls making their use purely cosmetic. The working portal was removed in the Outer Wall that can be explored from Midport.
When fighting attacking piglins after glitching down, it is not possible to take damage from the piglins. Since hoglins do not reward EXP on death, they make the sound that occurs when a player takes damage.
When glitched down, the piglins will not attack the player as they are coded to only attack the iron golems and the gate.
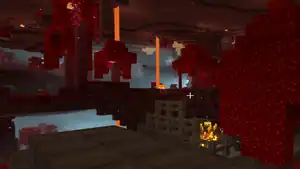
A few hundred blocks away from the portal is an area with multiple villager animations and decorations. Several pairs of villagers are in lava or the ground, some with only hats visible. A crane animation seen in Midport and the Outer Walls area is present, as well as yellow banners on a nearby wall. There are also other animations partially or fully in nearby blocks as well.
Leaving the nether portal and swimming in lava for a while, you can find villagers, that have been found by ZazzuX and WavingGold (or u/PrizeObligation1144 on reddit) in the Nether. It is not known why they spawn in the nether, but they do and they play their animations like normal while still floating or clipping through the ground.
Using a battle axe, it was possible to get iron golems or piglins (and presumably also hoglins) into the Nether by attacking nearby piglins while facing the portal.
The seed for the world the Outer Walls server is in is 611176660671273042. This includes the same Nether as on the live event.
Daily Changes
Every day at a specific time throughout the event (14:00 PT, 21:00 GMT), there will be changes. These texts were supposed to appear as a hint in the chat, but initially didn't appear until Day 5 of the event. These strings are found inside of the resource pack.
| Day | Date | Text |
|---|---|---|
| Day 1 (Quest 1 unlocked) | March 25 | The village is under attack - talk to Steve to help out! |
| Day 2 | March 26 | The enemy received a buff - they're stronger today! |
| Day 3 (Quest 2 unlocked) | March 27 | The Outer Wall is in trouble - ghasts have appeared! |
| Day 4 | March 28 | The Outer Wall is holding strong - the village received a buff! |
| Day 5 (Quest 3 unlocked) | March 29 | We're overwhelmed by the enemy - push back now! |
| Day 6 | March 30 | The enemy received a buff - they're stronger today! |
| Day 7 (Quest 4 unlocked) | March 31 | The wandering trader's route has grown longer - check out the Wilderness! |
| Day 8 | April 1 | The trade routes are well protected - the village received a buff! |
| Day 9 (Quest 5 unlocked) | April 2 | The village is short on iron golems - protect them at the Outer Wall! |
| Day 10 | April 3 | The enemy received a buff - they're stronger today! |
| Day 11 (Quest 6 unlocked) | April 4 | A new level in the mines was reached, with more valuable ores! |
| Day 12 | April 5 | Many ores have been mined - the village received a buff! |
| Day 13 - Day 20 | April 6 - April 14 | The piglins breached the walls - our enemies received a buff! |
Buffs
![]()
![]()
All four areas may receive buffs for the enemies and/or the players. Buff will give players and enemies Resistance II and Haste II for as long as the buff is in effect. The buff icon will appear at the top right near the Emerald currency, showing which side has a buff. Particle effects surround the enemy mobs or players when they receive a buff.
The buff for enemies is represented by an icon of a piglin head surrounded by an orange aura, and the buff for players is represented by an icon of a villager head surrounded by a green aura. When no buffs are active, no icon is displayed next to the emerald count.
Games
Instructions: Describe the layout of the areas and the various details. Adapt the bullet points into proper paragraph format with these descriptions in mind.
Mining With Henry


Players can mine ores and bring them back to the elevator to receive emeralds and experience. Additionally, players can find dungeons with chests containing treasures that are also worth emeralds and experience. Some chests are trapped and spawn either mobs or primed TNT.
If the player dies before bringing these items back to the elevator, they lose all of them and respawn on the surface. Trying to use the map to return to the lobby without reaching the elevator will count as a death and will result in the loss of the ores and the treasure.
In some areas of the mines, mobs can spawn individually near players, in small groups of 1–4 from spawners, or in larger groups of 4–6 from trapped chests. The ores and chest loot will also be replenished if no players are nearby.
The mines are made up of 3 levels. These levels can be accessed by walking into the elevator at the Surface level and clicking the button on the elevator screen.
Surface
- No ore, treasure or mobs can be found here.
- Has a sign indicating the number of ores the player has brought back to the shaft.
- From there, jumping down into the abyss causes the player to appear at a random location of the level 1 mines, losing roughly half of their current health. The player will most commonly land in the water of a dripstone cave biome and at the deepest points of the level 1 mines.
- From the wooden bridges, villagers can be spotted mining on stone ledges, but they are not mining real ores. Jumping onto these ledges does not provide any ores; therefore no easy way out.
- No mobs spawn here, but a creeper in a minecart can be seen periodically on one set of minecart rails.
Level 1
- Only coal, iron, and redstone ores are generated here.
- Redstone ore can be found behind other ores and is less frequently exposed, but is more abundant in a few specific areas that are further from the elevator or harder to reach.
- Mining Redstone ore with a Stone pickaxe will not give the player any redstone. Mining it with a Stone pickaxe will cause the player damage sound to occur with red X particles.
- Going in the elevator to Level 1 will spawn the player with the elevator behind them. In front of the player will be 3 mineshaft sections, each with different challenges such as mob spawners and lava pits.
- Zombies, Creepers, Spiders, Skeletons (Spawners) and the Great Hog spawn here.
- 5 different dungeons can be found here, each of which contain 1 or 3 mob spawners and 3-5 loot chests.
- 2 different locations with lots of cobwebs can be found here, each of which contain 1 mob spawner and 1 loot chest.
Level 2
- Unlocked on Day 11 of the event.[note 2][5]
- Only lapis, gold and diamond ores are generated here.
- Amethyst clusters can also be found here, but cannot be mined.
- Diamond ore can be found behind other ores and is less frequently exposed, but is more abundant in a few specific areas that are further from the elevator or harder to reach.
- Mining gold or diamond ore with a Stone pickaxe will not give the player any of the latter. Mining it with a Stone pickaxe will cause the player damage sound to occur with red X particles.
- In addition to all Level 1 mobs, Endermen also spawn on Level 2.
- Zombies, Creepers, Spiders, Skeletons, Endermen and the Great Hog spawn here.
- Level 2 is constituted by deepslate instead of stone in Level 1.
- Level 2 is similar in size to Level 1. There are plenty of long caves connecting one opening to another, and each cave is bigger with higher concentrations of ore.
- 3 different dungeons can be found here (fewer than the 5 dungeons present in Level 1), each of which contain 1 or 3 mob spawners and 2-4 loot chests. One dungeon contains 2 empty chests.
Level 2 was accessible before it was officially opened. A resource pack could enable the button for level 2 on the elevator. This also allowed some players to get the Yearn Cape earlier than intended even though the quest was locked. Additionally, diamonds can be obtained by defeating the Great Hog 3–4 times or rarely in small quantities from the chest loot.
Items
All listed items can be found as loot in chests, although diamond and redstone are rarer than others.
| Image | Model | Item | Class | EXP | Emeralds |
|---|---|---|---|---|---|
 |
N/A | Lapis Lazuli[note 3] | Ore | 5 | 2 |
 |
N/A | Redstone | 5 | 2 | |
 |
 |
Coal | 5 | 4 | |
 |
 |
Raw Iron | 10 | 8 | |
 |
 |
Raw Gold | 12 | 12 | |
 |
N/A | Diamond | 20 | 14 | |
 |
 |
Emerald | Treasure | 5 | 2 |
 |
 |
Minecart | 30 | 10 | |
 |
 |
Saddle | 30 | 10 | |
 |
 |
Golden Apple | 40 | 10 | |
 |
N/A | Prismarine Crystals | 40 | 14 | |
 |
 |
Spyglass | 70 | 30 | |
 |
 |
Compass[note 4] | 50 | 20 | |
 |
 |
Clock | 60 | 20 |
Mobs
Zombies, spiders, and creepers in the mines have the same amount of health. Skeletons have slightly less health, and endermen have more health. The Great Hog has significantly more health than any of the other enemies, but does not have a boss health bar.
| Image | Name | Type | Health | Floor | Rewards |
|---|---|---|---|---|---|
 |
Zombie | Enemy | 14HP |
First, second | 5 EXP
1 EXP (assist) |
 |
Spider | Enemy | 14HP |
First, second | 10 EXP
3 EXP (assist) |
 |
Creeper | Enemy | 14HP |
First, second | 10 EXP
3 EXP (assist) |
 |
Enderman | Enemy | 35HP |
Second | 20 EXP
6 EXP (assist) |
 |
Cave Spider (Unused) | Spawner Enemy | N/A | N/A | |
 |
Skeleton | Spawner Enemy (first floor), Enemy (second floor) | 10HP |
First, Second | 15 EXP
4 EXP (assist) |
 |
Great Hog | Boss Enemy | 280HP |
First, second | 800 EXP
264 EXP (assist) 15–20 Diamonds (if nearby)[note 5] |
Protecting The Payloads with Natalie and Dawn
Once a group is found, the player needs to protect the payload cart from from pillagers, spiders, chicken jockeys and piglins as they travel from Midport Village (point A) to Mushroom Village (point B) and a mine in a mesa biome (point C) and back. The payload will not move unless at least one player is nearby and enough enemies have been cleared from the predetermined areas along the payload's path. The reward for successfully transporting a payload depends on how many enemies the player killed. Piglins spawn near portals, and pillagers spawn on large trampled areas. The enemies go in the following order:
- From A to B: pillagers, piglins, pillagers, pillagers, piglins, pillagers.
- From B to C: pillagers, pillagers, piglins, pillagers.
- From C to B: pillagers, piglins, pillagers, pillagers, pillagers.
- From B to A: pillagers, piglins, pillagers, piglins.
Chicken jockeys and spiders can spawn at any time in any location. The payload's health is represented as a red boss bar at the top of the screen when the player is close enough to it.
Pillagers, Evokers (only spawned on path from B to C or C to B), Vexes (only spawned by Evokers), Spiders, Chicken Jockeys, Piglins, Hammer Brutes, Hoglin Jockeys and Armored Hoglin Jockeys spawn here.
Mobs
| Name | Image | Type | Rewards |
|---|---|---|---|
| Pillager |  |
Enemy | 5 EXP
1 EXP (assist) |
| Evoker |  |
Enemy | 5 EXP
1 EXP (assist) |
| Vex |  |
Enemy | 15 EXP
4 EXP (assist) |
| Spider | |
Enemy | 5 EXP |
| Chicken Jockey |  |
Enemy | 10 EXP |
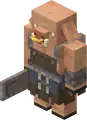
| Piglin |  |
Nether Enemy | 5 EXP
1 EXP (assist) |
| Warrior Piglin Brute |  |
Nether Enemy | None |
| Hammer Piglin Brute |  |
Nether Enemy | None |
| Chef Piglin Brute |  |
Nether Enemy | None |
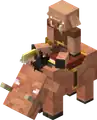
| Hoglin Jockey |  |
Nether Enemy | 10 EXP
3 EXP (assist) |
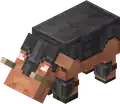
| Armored Hoglin Jockey |  |
Nether Enemy | 10 EXP
1 EXP (assist) |
| Payloads |  |
Ally | N/A |
Defending The Walls with Garrett
Players have to go through a series of waves and protect the gate from piglins, hoglins, and ghasts. Each mob's health is shown above themselves as a colored bar (red for enemies and green allies) roughly sized relative to their total health. The gate's health is represented as a red boss bar at the top of the screen.
The aim of the game is to shoot the piglins coming out of the nether portal with a bow or tot launcher and keep them away from the gate. The walls are lined with barrier blocks on the battlefield-facing side, making melee combat with the piglins impossible. However, by exploiting a glitch by running off the right balcony in front of the gate with the lava chicken speed effect and crouching when glitched off, it is possible to clip through the barrier blocks and enter the battlefield to fight the piglins with melee weapons.
Piglins (No sword), Wilbur, Drum Piglins, General Chungus, Chained Ghasts, Snortilla, Hoglins, Torch Piglins, Spear Piglins, Piglins (Sword), Snowball, Pickaxe Piglins, Hoglin Jockeys, Baby Torch Piglins, Netherite Hoglins and Netherite Hoglin Jockeys spawn here.
Mobs
Each enemy has varying amounts of health and movement speed. The iron golems are immobile and are fixed to their spawned positions (unless knocked back by using a battle axe on a nearby piglin), but can still attack back at enemies. They are immune to most attacks from players, although fire aspect swords and somehow buck-chuckets can still damage them.
| Name | Image | Type | Rewards |
|---|---|---|---|
| Piglin |  |
Enemy | 5 EXP
1 EXP (assist) |
| Wilbur | |
Enemy | 5 EXP
1 EXP (assist) |
| Drum Piglin |  |
Enemy | 5 EXP
1 EXP (assist) |
| Fireball |  |
Enemy Projectile | N/A |
| General Chungus |  |
Enemy | 5 EXP
1 EXP (assist) |
| Chained Ghast |  |
Enemy | 10 EXP
3 EXP (assist) |
| Snortilla | |
Enemy | 5 EXP
1 EXP (assist) |
| Hoglin |  |
Enemy | None |
| Torch Piglin |  |
Enemy | 5 EXP
1 EXP (assist) |
| Spear Piglin |  |
Enemy | 5 EXP
1 EXP (assist) |
| Piglin | |
Enemy | 5 EXP
1 EXP (assist) |
| Snowball | |
Enemy | 5 EXP
1 EXP (assist) |
| Trotsky |  |
Enemy | 5 EXP |
| Hoglin Jockey | |
Enemy | 10 EXP
3 EXP (assist) |
| Seeker (unused) |  |
Enemy | 10 EXP |
| Baby Torch Piglin |  |
Enemy | 10 EXP
3 EXP (assist) |
| Netherite Hoglin |  |
Enemy | None |
| Netherite Hoglin Jockey | |
Enemy | 10 EXP
3 EXP (assist) |
| Iron Golem |  |
Ally | N/A |
Shop
Instructions: Describe layout of the areas and the various details
Steve's Shack
Inside is a downsized recreation of the area, with two villagers. Besides an array of furnaces and blast furnaces with an anvil and chainmail armor stand. Behind the crafting table, featuring items like a turtle shell, boots of swiftness, golden carrots, and TNT. To the right is a wider area, where players can upgrade and enchant their armor, sword, pickaxe, and bow with the emeralds they earn.
Upgrade Sword
| Level | Cost | Sword | Enchantments | Render |
|---|---|---|---|---|
| Default | None |  | ||
| Tier 1 | 1200 | Iron Upgrade | None |  |
| Tier 2 | 1500 | N/A | Sharpness 1 | |
| Tier 3 | 1700 | Diamond Upgrade | Sharpness 2 |  |
| Tier 4 | 2000 | N/A | Sharpness 3 |
Upgrade Pickaxe
| Level | Cost | Pickaxe | Enchantments | Render |
|---|---|---|---|---|
| Default | Stone Pickaxe | None |  | |
| Tier 1 | 1200 | Iron Upgrade | None |  |
| Tier 2 | 1500 | N/A | Efficiency 1 | |
| Tier 3 | 1700 | Diamond Upgrade | Efficiency 2 |  |
| Tier 4 | 2000 | N/A | Efficiency 3 |
Bow Upgrades
| Level | Cost | Bow | Enchantments | Render |
|---|---|---|---|---|
| Default | Bow | None |  | |
| Tier 1 | 1200 | Bow | Power 1 | |
| Tier 2 | 1500 | Bow | Power 2 | |
| Tier 3 | 1700 | Bow | Power 3 | |
| Tier 4 | 2000 | Bow | Power 4 |
Armor Upgrades
| Level | Cost | Tier | Enchantment | Render |
|---|---|---|---|---|
| Default | Leather Armor | None | ||
| Tier 1 | 1200 | Gold Upgrade | None |  |
| Tier 2 | 1200 | Chainmail Upgrade | None |  |
| Tier 3 | 1500 | Iron Upgrade | None |  |
| Tier 4 | 2000 | Diamond Upgrade | None |  |
Enchantments
| Item | Cost | Enchantments |
|---|---|---|
| Sword Enchantment | 4000 | Fire Aspect |
| Pickaxe Enchantment | 5000 | Fortune 1 [sic] |
| Bow Enchantment | 3000 | Punch |
| Armor Enchantlment | 3000 | Thorns |
Diamond Boot-ique
The Diamond Boot-ique is a place where players can purchase cosmetics, such as plushies, musical instruments, hats, and balloons. Aside from taking up a slot of inventory space, they are all cosmetics and do not have any effect on gameplay.
| Name | Icon | Render | Cost | Notes |
|---|---|---|---|---|
| Empty Cosmetic Slot |  |
N/A | N/A | |
| Bucket Hat |  |
 |
800 |
|
| Lava Chicken Hat |  |
 |
800 |
|
| Villager Head |  |
 |
800 |
|
| Arrow through Head |  |
 |
800 |
|
| Piglin Head |  |
 |
800 |
|
| Bass Guitar |  |
 |
1,000 |
|
| Acoustic Guitar |  |
 |
1,000 |
Plays the sound of an acoustic guitar when used. |
| Triangle |  |
 |
1,000 |
|
| Keyboard |  |
 |
1,000 |
Plays the sound from the piano keys when used. |
| Drums |  |
 |
1,000 |
Plays the sound of a drum when used. |
| Party Popper |  |
 |
500 |
Plays a party horn sound with confetti when used. |
| Creeper Plushie |  |
 |
500 |
Plays a creeper hiss when used. |
| Sheep Plushie |  |
 |
500 |
Plays a sheep sound when used. |
| Llama Balloon |  |
 |
300 |
|
| Ghast Balloon |  |
 |
300 |
Collectible items
These items can be found across various locations (excluding the Map and Quests items) and can be used in the inventory (excluding the Emerald).
| Name | Icon | Render | Location | Notes |
|---|---|---|---|---|
| Saxophone |  |
 |

|
Found at the top of the bell tower behind spawn in Midport Village. When played, it releases white pulses, periodically repelling nearby enemies. It has no effects on enemies in the Outer Walls. Can also be seen in the cosmetics shop. |
| Battle Axe |  |
 |
|
Found inside the pillager outpost in the Wilderness. In addition to having +5 Attack Damage, it has a special sweeping attack with upward knockback if used. |
| Tot Launcher |  |
 |
|
Found at the bottom of a mine at the Outer Walls. When used, it can launch a potato for roughly the same damage as a fully charged unenchanted bow. If charged for longer, it fires 5 potatoes in a burst before entering a significantly longer cooldown. |
| Buck-Chuckets |  |
 |
|
Found on a high point in the Wilderness on the route between Point B and Point C.[6][note 6] In addition to having +7 attack damage, players can repeatedly strike an enemy multiple times to daze them, applying a heavy Slowness effect for a few seconds. Hits during immunity frames still count towards applying the daze effect. |
| Cactus Ball |  |
 |

|
Found in Triple Spawner rooms in the Mines (except for one in the Lush Caves). Starts with 3. Use to throw, doing no damage but placing a Cactus Ball entity that constantly deals low damage to enemies within one block. Disappears after hitting too many enemies or after 30 seconds have passed since the cactus ball landed (not since it was thrown). Each individual cactus ball has a 60-second cooldown. When all 3 cactus balls have been used, a gray version of the item is placed in the inventory until the cooldown has passed. |
| Lava Chicken |  |
 |

|
Found in the Hot Lava Chicken Shack, located in Midport Village north from spawn. Grants Resistance III for 10 seconds and propels the player forward rapidly for 5 seconds upon consumption. This propulsion only applies while grounded and not in the air, making flat terrain ideal for maximizing total movement speed. |
| Emerald | |
|
Can be found in specific locations across each area. Rewards 50, 80, 100, 200, 400 or 500 emeralds based on how difficult it is to find. | |
| Map |  |
N/A | Map of the area. Used to quickly warp from lobby to lobby without the need for the NPCs. | |
| Quests |  |
N/A | Used to view the quests available on the server. |
Quests
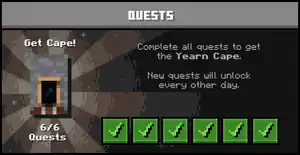
During the event, a new challenge appeared every other day but, every quest has now been unlocked. Players can complete these quests to earn exclusive character creator items. Each quest awards a character creator item, 500 emeralds, and 1000 EXP. They can be completed at any point during the event and can be viewed in-game by using the quests item found in the hotbar.
| Quests | Description | Challenges |
|---|---|---|
| #1 Defend the Village! | Help each of the characters to get the Boots of Swiftness Dressing Room item. | Complete three tasks in each mini-game:
|
| #2 Ghasts Incoming! | Piglin reinforcements have arrived at the Outer Walls - help defend it to get the Battle Cry emote. | Kill 20 Ghasts at the Outer Walls. |
| #3 Farm Mobs, Not Crops! | The fight is going well. Make sure it stays that way to get the Mushroom Hat Dressing Room item | Kill 200 enemies in any of the mini-games. |
| #4 Protect the Cart! | The wandering trader's route has expanded, defend the cart to get the Kadoosh! emote. | Deliver three carts, with at least 40% health, in the Wilderness. |
| #5 Low on Iron! | Protect the iron golems at the Outer Walls to get the Jet Pack Dressing Room item! | Defend five waves at the Outer Walls with at least two Iron Golems left. |
| #6 Mine Diamonds! | The village needs more diamonds! Finish all quests to get the Yearn Cape! | Complete the five quests and retrieve 60 diamonds in the Mines. |
Rewards
| Name | Image | Type | Rarity | |
|---|---|---|---|---|
| Icon | Render | |||
| Boots of Swiftness |  |
 |
Footwear
|
Rare
|
| Battle Cry Emote |  |
 |
Emote
| |
| Mushroom Hat |  |
 |
Headwear
| |
| Kadoosh! Emote |  |
 |
Emote
| |
| Jet Pack |  |
 |
Back Item
| |
| Yearn Cape |  |
 |
Cape
|
Legendary
|
Quotes
There are interactable NPCs that give hints and mention some quotes from the movie. Some of these quotes are accompanied by an in-game sound file.
Steve
| Sounds | |
|---|---|
| Sound | Description |
| "I... am Steve!" | |
| "We're ready, let's go save the Overworld!" | |
| "Creativity in this world is key to survival!" | |
| "There are dark forces who want to destroy this world!" | |
| “ |
|
„ |
| — Steve when the player first enters Midport Village
|
Hey friendo! How go the villagers? Are they still eating bread while we fight? Protect the village, save the world!
Nice work! You're truly a bodacious warrior! We can craft our way out of any danger.
Hi there, partner. How are things going outside the village? How's my pal Henry getting on? I bet he's doing us proud!
Henry
| Sounds | |
|---|---|
| Sound | Description |
| "Who are you?" | |
| “ |
|
„ |
| — Henry when the player first enters Mines
|
| “ |
|
„ |
| — Henry in Midport Village |
| “ |
|
„ |
| — Henry in Mines |
Garrett
| Sounds | |
|---|---|
| Sound | Description |
| "Fear is just weakness hijacking your body's cockpit." | |
| “ |
|
„ |
| — Garrett when the player first enters Outer Walls
|
| “ |
|
„ |
| — Garrett in Midport Village |
| “ |
|
„ |
| — Garrett in Outer Walls |
Dawn & Natalie
| Sounds | |
|---|---|
| Sound | Description |
| "Let's go fight some pigs!" | |
| "What am I doing here?" | |
| "This place makes no sense." | |
| “ |
|
„ |
| — Dawn and Natalie when the player first enters Wilderness
|
| “ |
|
„ |
| — Dawn and Natalie in Midport Village |
| “ |
|
„ |
| — Dawn and Natalie in Wilderness |
Tips
While the player is in the server, tips will appear in chat periodically.
The following tips may appear in any lobby the player may be in:
Defeat enemies, complete quests and help the village to level up!
Upgrade your gear at Steve's Shack in Midport Village!
Purchase accessories from the Diamond Bootique in Midport Village!
Watch out - on some days, Piglins or Players will be buffed!
Talk to Steve in Midport Village to find out what's new!
Find event collectibles hidden throughout the world!
Come back daily to check out new quests, areas, rewards and more!
Unlock Dressing Room items by completing quests!
Fast-travel to different regions with your map!
Turn on music in your settings for the full experience!
The following tips may only be appeared when the player is in Midport Village:
Steve's Saxophone is hidden somewhere in the village - can you find it?
Have you tried the famous Lava Chicken from Steve's Fried Chicken shop yet?
The following tips may only be appeared when the player is in Mines:
Henry lost some cactus balls in the mines - can you find them?
Watch out for the Great Hog - he's hunting down players in the Mines!
You only receive rewards for ores and treasure when you exit the Mines - be careful of venturing too deep!
Some chests are trapped and might spawn enemies!
The deeper you go into the Mines - the more rewards you'll find!
The following tips may only be appeared when the player is in Wilderness:
Piglins have stolen a Battle Axe from the blacksmith and hid it in the Wilderness - can you find it?
Garrett's Buck-Chuckets were lost somewhere in the Wilderness - can you find it?
The more a trader cart is damaged, the fewer rewards you receive!
The trader cart won't move if monsters are nearby!
The following tips may only be appeared when the player is in Outer Walls:
Garrett lost Henry's Tot Launcher near the Outer Wall - can you find it?
The more the gate is damaged, the fewer rewards you receive!
Avoid fireballs coming from the Nether Portals!
Protect the iron golems - they're our last line of defense!
Sounds & Music
Instructions: Add tool music
| Sound | Identifier |
|---|---|
| ambience_main_village1.ogg | |
| ambience_main_village2.ogg | |
| ambience_main_village3.ogg | |
| ambience_main_village4.ogg | |
| ambience_main_village5.ogg | |
| ambience_main_village6.ogg |
| Sound | Identifier |
|---|---|
| ambience_outer_wall1.ogg | |
| ambience_outer_wall2.ogg | |
| ambience_outer_wall3.ogg | |
| ambience_outer_wall4.ogg | |
| ambience_outer_wall5.ogg | |
| ambience_outer_wall6.ogg |
| Sound | Identifier |
|---|---|
| ambience_forest1.ogg | |
| ambience_forest2.ogg | |
| ambience_forest3.ogg | |
| ambience_forest4.ogg | |
| ambience_forest5.ogg | |
| ambience_forest6.ogg | |
| ambience_mesa1.ogg | |
| ambience_mesa2.ogg | |
| ambience_mesa3.ogg | |
| ambience_mesa4.ogg | |
| ambience_mesa5.ogg | |
| ambience_mesa6.ogg |
| Sound | Identifier |
|---|---|
| ambience_mining1_1.ogg | |
| ambience_mining1_2.ogg | |
| ambience_mining1_3.ogg | |
| ambience_mining1_4.ogg | |
| ambience_mining1_5.ogg | |
| ambience_mining2_1.ogg | |
| ambience_mining2_2.ogg | |
| ambience_mining2_3.ogg | |
| ambience_mining2_4.ogg | |
| ambience_mining2_5.ogg | |
| ambience_mining2_6.ogg |
Video
History
| Bedrock Edition | |||||||
|---|---|---|---|---|---|---|---|
| March 25, 2025 | The event server is now live. | ||||||
| March 27, 2025 | Quest 2 is now live and the Outer Walls have been updated. | ||||||
| March 29, 2025 | Quest 3 is now live. | ||||||
| March 31, 2025 | Quest 4 is now live and chat has been enabled. | ||||||
| April 2, 2025 | Quest 5 and Quest 6 are now live. | ||||||
| Quest 6 is no longer live.[note 7] | |||||||
| April 4, 2025 | Quest 6 is now live. | ||||||
| April 7, 2025 | The event server was scheduled to close. | ||||||
| The event was unable to be joined for 5 minutes. Once the 5 minutes ended, an extension was announced - 7 extra days to protect the payload, mine some ores, and defend the village! Let's go save the overworld!.[7] | |||||||
| April 14, 2025 | The event server has now ended. | ||||||
Trivia
- After the first countdown ended (to 21:00 UTC), the event was delayed by 30 minutes as a new countdown appeared counting down to 21:30 UTC. After this second countdown ended, it disappeared for about 5 minutes or less with no option to enter the event, after which then the event was opened.
- Players who equip any of the five skins from A Minecraft Movie Hero Pack or custom skin before entering the event will have their skin reverted to one of the game's default skins when they join the event.
- Throughout the map, several copies of the Spark Universe symbol can be found.
- One can be found at the second-to-last floor of the bell tower, right beside the ladder.
- One can be found on the anvil in Steve's Secret Stash.
- One can be found on a shelf in the Diamond Boot-Tique, above the Lava Chicken Hat.
- One can be found in a barn to the right of the Outer Walls.
- One can be found engraved in stone at the bottom of a pit in Henry's area.
- One can be found in a cave, accessed by entering a well near Garrett.
- Two can be found in a cave behind the garden, one leaning beside a drawer behind the waterfall near the elder guardian statue. The other is engraved in the wall.
- One can be found behind a tomb in the church area.
- One can be found inside a tent in the Outer Walls, lying beside a farmer.
- One can be found on a high shelf in a building beside the ocean at the edge of the village.
- The promotional screenshot of Defending The Walls With Garrett quickly became outdated from various tweaks to the minigame:
- The additional portals are not present.
- The health bars are all the same size instead of being relative to the enemy's total health.
- The health bars for the chained ghasts are missing entirely.
- There used to be the following bug: All collectible item entities could be deleted server-wide by using any base attack related actions or explosion (e.g. a Creeper exploding near a Cactus Ball). This has since been fixed.
- Unlike previous live events, all resource files related to the Movie Event are encrypted, just like packs of Marketplace.
- Numerous assets used in this event are reused from RealismCraft 1.6.1, a mash-up pack also made by Spark Universe.
- In the game "Outer Wall Defense," fire damage is turned off.
- The server resource pack has many textures of mobs, blocks, and items which do not appear in the event, such as a cave spider texture and model.
- Unlike vanilla Minecraft, some walls and fence blocks can be jumped over, since some are actually custom blocks.
- Before the badlands area was formally unlocked, it was possible to parkour into it.[8]
- Before the level 2 mine was formally unlocked, it was possible to hack into it via resource pack.
- Although the tops of awnings can be stood on, the bent portions have no collision.
- In a trailer about the event and A Minecraft Movie DLC, it shows a minigame that does not exist on the server, that being defending Midport Village with Steve.[9]
- Unlike vanilla Minecraft, the jockeys featured in the event (namely chicken jockey, chained ghast, hoglin jockey and armored hoglin jockey) are one mob instead of consisting of one entity riding another.
- This means it is impossible to kill the jockey and leave the other mob unharmed, or vice versa.
- Since seven inventory slots are taken up, the maximum amount of EXP that can be earned in a single mining attempt is 111,360 (from 29 stacks of clocks), and the maximum amount of emeralds that can be earned is 37,120 (from either clocks or compasses).
- Collecting any of the optional collectible items can decrease the amount of inventory space for items gained in the mines.
- Although spyglasses offer more EXP and emeralds compared to any other item individually, they cannot be stacked.
- A more reasonable item to gather is diamonds (especially in Level 2 of the mines), which still give up to 37,120 EXP and 25,984 emeralds per successful mining trip.
Gallery
Official artwork
-
 Key art for the event
 -
 Key art for the event extension
 -

-

-

-
 Animation of Steve being chased by a piglin as seen in the main menu
 -

-
 A meme about the "average event player."
 -
 A meme about players who missed it.
Promotional screenshots
-
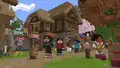
 Midport Village seen from a distance
 -
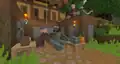
 Midport Village's main square
 -
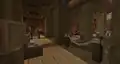
 The heroes hanging out in Midport Village
 -
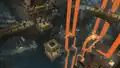 The mining game
 -
 The wall defense mini-game
 -
 The payload game
 -

-
 An in-game pop-up notification to promote the event and cape.
Screenshots
-
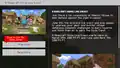 The menu screen where players can join the event
 -
 A parrot
 -
 A cat
A cat -

-

-

-

-

-

-
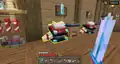
 A popup for a quest completion
 -
-

-

-

-
-

-
 Dawn and Natalie in Midport Village
 -
 Garrett in Midport Village
 -
 Henry in Midport Village
 -
 Steve in Midport Village
 -
 Steve's Secret Stash in Midport Village
 -
 Diamond Boot-ique in Midport Village
 -
 Dripstone Caves in the Mines
 -
 Lush Caves in the Mines
 -
 A player fighting the Great Hog.
 -
 The Great Hog in the Mines
 -
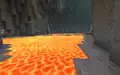 Lava Pool in the Mines
 -
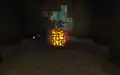 Monster Spawner in the Mines
 -
 Entrance to Level 1 of the Mines
 -
 Redstone Ore in the Mines
 -
 Tunnels in the Mines
 -
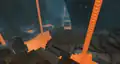
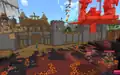 Players guarding the gate of the Outer Walls
 -
 Point A in the Wilderness
 -
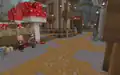 Point B in the Wilderness
 -
 Players guarding the payload in the Wilderness
 -
 A Portal Building in Wilderness
 -

-

-

-
-
-

-

-

-

-

-

-

-
-

-

-

-

-

-

-

-

-

-

-
-

-
-

-

-

-

-

-
-

-
-

-

-
-

-
-

-

-

-

-
-

-

-

-

-

-

-
-

-

-

-

-

-

-

-
-

-

-

-

-

-
-

-

-
-

-

-

-
-

-

-

-

-

-

-

-
-

-

-
-

-
-

-
-

-

-
-

-

-

-

-
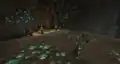
 A cave full of diamonds in Level 2 of the Mines
 -

-

-

-

-

-

-

-

-
-

-

-

-
-
-

-

-

-

-
-

-
-

-
-
-

-
-

-

-

-

-

-
-

-

-

-

-

-

-

-

-

-

-
-
-

-

Renders
Characters
-
 Steve
Steve -
 Garrett
 -
 Natalie
 -
 Dawn
Dawn -
 Henry
Henry -
 Dennis
Invaders
-
 Great Hog
 -
 Piglin General
 -
 Piglin
 -
 Wilbur
 -
 Spear Piglin
 -
 Drum Piglin
 -
 Snowball
 -
 Snortilla
 -
 Baby Torch Piglin
 -
 Adult Torch Piglin
 -
 Trotsky
 -
 Hoglin
 -
 Hoglin Jockey
 -
 Netherite Hoglin
 -
 Netherite Hoglin Jockey
 -
 Seeker (unused)
 -
 Chained Ghast
 -
 Chained Ghast (shooting face)
Enemies
-
 Zombie
 -
 Chicken Jockey
 -
 Skeleton
 -
 Spider
 -
 Cave Spider
 -
 Creeper
 -
 Pillager
 -
 Vindicator
 -
 Evoker
 -
 Vex
Vex -
 Enderman
 -
 Ghast
Ghast
Animals
-
 Salmon
 -
 Cod
Cod -
 Parrot
 -
 Llama
Llama -
 Cow
Cow -
 Chicken
 -
 Pig
Pig -
 Mooshroom
 -
 Sheep
Sheep -
 Wolf
Wolf -
 Bee
Bee -
 White Cat
 -
 Red Cat
 -
 Tuxedo Cat
Animations
Characters
-
A render of Steve.
-
 Steve's idle pose.
 -
 Steve walking.
 -
 Steve's special idle pose
 -
A render of Garrett.
-
 Garrett's idle pose.
 -
 Garrett walking.
 -
 Garrett's special idle pose
 -
A render of Natalie.
-
 Natalie's idle pose.
 -
 Natalie walking.
 -
 Natalie's special idle pose
 -
A render of Dawn.
-
 Dawn's idle pose.
 -
 Dawn walking.
 -
 Dawn's special idle pose
 -
A render of Henry.
-
 Henry's idle pose.
 -
 Henry walking.
 -
 Henry's special idle pose
 -
A render of Dennis.
-
 Dennis' idle pose.
 -
 Dennis walking.
 -
 Dennis barking.
 -
 Dennis barking.
 -
 Dennis barking.
 -
 Dennis doing a trick.
 -
 Dennis doing a trick.
 -
 Dennis doing a trick.
Piglins
-
 A piglin's idle pose
 -
 A piglin walking
 -
 A piglin's aggro animation
 -
 A piglin attacking while idling
 -
 A piglin attacking while moving
 -
 A piglin spawning.
 -
 A spear piglin's idle pose
 -
 A spear piglin walking
 -
 A spear piglin's special idle pose
 -
 A spear piglin attacking
 -
 Ditto
Ditto -
 A spear piglin raising their spear
 -
 Ditto
Ditto -
 A spear piglin about to throw their spear
 -
 Ditto
Ditto -
 A spear piglin throwing their spear
 -
 Ditto
Ditto -
 An adult torch piglin's idle pose
 -
 An adult torch piglin walking
 -
 An adult torch piglin running
 -
 An adult torch piglin attacking
 -
 Ditto
Ditto -
 An adult torch piglin's special idle pose
 -
 An adult torch piglin jumping out of a portal
 -
 A baby torch piglin's idle pose
 -
 A baby torch piglin walking
 -
 A baby torch piglin running
 -
 A baby torch piglin's especial idle pose
 -
 A baby torch piglin attacking
 -
 Ditto
Ditto -
 A baby torch piglin jumping out of a portal
 -
 Trotsky's idle pose
 -
 Trotsky walking
 -
 Trotsky running
 -
 Trotsky's special idle pose
 -
 Trotsky attacking
 -
 Ditto
Ditto -
 Trotsky jumping out of a portal
 -
 A drum piglin's idle pose
 -
 A drum piglin walking
 -
 A drum piglin running
 -
 A drum piglin's special idle pose
 -
 A drum piglin attacking
 -
 Ditto
Ditto -
 A drum piglin jumping out of a portal
 -
 Snortilla's idle pose
 -
 Snortilla walking
 -
 Snortilla running
 -
 Snortilla's special idle pose
 -
 Snortilla attacking
 -
 Ditto
Ditto -
 Snortilla spawning
 -
 Snowball's idle pose
 -
 Snowball walking
 -
 Snowball running
 -
 Snowball's special idle pose
 -
 Snowball attacking
 -
 Ditto
Ditto -
 Wilbur's idle pose
 -
 Wilbur walking
 -
 Wilbur running
 -
 Wilbur's special idle pose
 -
 Wilbur attacking
 -
 Ditto
Ditto -
 Wilbur spawning
 -
 General Chungus's idle pose
 -
 General Chungus walking
 -
 General Chungus running
 -
 General Chungus's special idle pose
 -
 General Chungus attacking
 -
 Ditto
Ditto -
 General Chungus jumping out of a portal
 -
 The Great Hog's idle pose
 -
 The Great Hog walking
 -
 The Great Hog running
 -
 The Great Hog's special idle pose
 -
 The Great Hog punching
 -
 Ditto
Ditto -
 The Great Hog shooting a fireball
 -
 Ditto
Ditto -
 The Great Hog spawning
 -
 A hoglin's idle pose
 -
 A hoglin walking
 -
 A hoglin's aggro animation
 -
 A hoglin attacking
 -
 A hoglin jumping out of a portal
 -
 A hoglin jockey's idle pose
 -
 A hoglin jockey's additive idle pose
 -
 A hoglin jockey walking
 -
 A hoglin jockey's additive walking animation
 -
 A hoglin jockey running
 -
 A hoglin jockey's special idle pose
 -
 A hoglin jockey spawning
 -
 A hoglin jockey's idle pose
 -
 A hoglin jockey's additive idle pose
 -
 A hoglin jockey walking
 -
 A hoglin jockey's additive walking animation
 -
 A hoglin jockey running
 -
 A hoglin jockey's special idle pose
 -
 A hoglin jockey spawning
 -
 A chained ghast's idle pose
 -
 A chained ghast flying
 -
 A chained ghast's special idle pose
 -
 A chained ghast shooting a fireball
 -
 A chained ghast dying
Enemies
-
 A creeper's idle pose
 -
 A creeper's special idle pose
 -
 A creeper walking
 -
 A creeper's running animation
 -
 A creeper inflating
 -
 A creeper deflating
 -
 A creeper spawning
 -
 A zombie's idle pose
 -
 A zombie's special idle pose
 -
 A zombie walking
 -
 A zombie's running animation
 -
 A zombie attacking while idle
 -
 A zombie attacking while moving
 -
 A zombie spawning
 -
 A skeleton's idle pose
 -
 A skeleton's special idle pose
 -
 A skeleton walking
 -
 A skeleton's running animation
 -
 A skeleton preparing to attack
 -
 A skeleton in an attack loop
 -
 A skeleton shooting an arrow
 -
 A skeleton spawning
 -
 A spider's idle pose
 -
 A spider walking
 -
 A spider climbing a wall
 -
 A spider attacking
 -
 A spider shooting a web
 -
 A spider spawning
 -
 A chicken jockey's idle pose
 -
 A chicken jockey's special idle pose
 -
 A chicken jockey walking
 -
 A chicken jockey running
 -
 A chicken jockey attacking while idle
 -
 A chicken jockey attacking while walking
 -
 A chicken jockey spawning
 -
 An enderman's idle pose
 -
 An enderman idling with noise
 -
 An enderman's special idle pose
 -
 An enderman walking
 -
 An enderman walking with noise
 -
 An enderman walking with a block
 -
 An enderman walking with a block and noise
 -
 An enderman's aggro animation
 -
 An enderman's aggro animation with noise
 -
 An enderman's aggro animation while screaming
 -
 An enderman's aggro animation while screaming with noise
 -
 An enderman attacking
 -
 An enderman spawning
 -
 A pillager's idle pose
 -
 A pillager's special idle pose
 -
 A pillager walking
 -
 An pillager's running animation
 -
 A pillager attacking
 -
 A pillager charging a crossbow
 -
 A pillager holding a charged crossbow
 -
 A pillager spawning
 -
 An evoker's idle pose
 -
 An evoker's special idle pose
 -
 An evoker walking
 -
 An evoker walking with tucked arms
 -
 An evoker's running animation
 -
 An evoker casting a spell
 -
 An evoker celebrating
 -
 An evoker spawning
 -
 A vindicator's idle pose
 -
 A vindicator's special idle pose
 -
 A vindicator walking
 -
 A vindicator's running animation
 -
 A vindicator attacking while idle
 -
 A vindicator attacking while moving
 -
 A vindicator spawning
Notes
- ↑ The event was originally scheduled to end on April 7 at 21:00 UTC, but in a last-minute change, it was extended by another 7 days, lasting until April 14 at 21:00 UTC.
- ↑ It was previously possible to access level 2 earlier by using a resource pack. This allowed yearn cape to be unlocked earlier.
- ↑ Blue Dye can be crafted from the lapis lazuli, but the dye does not give any EXP or emeralds. More specifically, anything not on this list is treated as nothing (does not trigger the rewards sequence). However, it will still be deleted when other items from the list are redeemed for rewards.
- ↑ The compass points towards the elevator.
- ↑ Since this is proximity based, it is possible to receive these diamonds even if no damage is done. It is also possible to receive the EXP without receiving these diamonds if the player is far enough away.
- ↑ The route between Points B and C unlocked with the route expansion when Quest 4 dropped on March 31. It was possible to parkour out of bounds to reach the area, prior to the area being unlocked.
- ↑ The icon for Quest 6 reverted to being locked, but progress could still be made, and the Yearn Cape could still be received before April 4.
References
- ↑ "Minecraft LIVE 2025: The Recap" – Minecraft.net, March 22, 2025.
- ↑ "Midport Village needs your help! Join Steve and his companions in this evolving multiplayer live event from March 25 to April 7, where you defend the village in three mini games. Complete all the challenges to earn the Yearn cape!" – @Minecraft (Minecraft) on X (formerly Twitter), March 22, 2025
- ↑ "A Minecraft Movie Live Event" (Archive) by Cristina Anderca – minecraft.net, March 25, 2025.
- ↑ "Minecraft Movie Event - How to Glitch Through the Outer Wall" – Kanerade on YouTube, March 30, 2025
- ↑ "How to UNLOCK Yearn Cape EARLY in Minecraft Bedrock & Java" – ECKOSOLDIER on YouTube, April 3, 2025
- ↑ "How to get the Buck-Chuckets in the Minecraft Movie Event" – FORSAKEN_- on YouTube, March 26, 2025
- ↑ "Hey Minecraft community - we’re happy to announce that we’re extending the A Minecraft Movie Live Event by an extra 7 days. Get yourself a cape and enjoy!" – @ryancooper on X (formerly Twitter), April 7, 2025
- ↑ https://www.youtube.com/watch?v=xq3M8XnBnfE
- ↑ Celebrate A MINECRAFT MOVIE with free DLC, on YouTube
| Cast | |||||||||
|---|---|---|---|---|---|---|---|---|---|
| Crew |
| ||||||||
| Narrative devices | |||||||||
soundtrack soundtrack |
|||||||||
| Events | |||||||||
| Promotions |
| ||||||||
| Miscellaneous | |||||||||
| |||||||||||||
| |||||||||||||
| |||||||||||||
| |||||||||||||
| |||||||||||||