I'd like to output a list of all installed packages into a text file so that I can review it and bulk-install on another system. How would I do this?
Asked
Active
Viewed 5.8M times
25 Answers
3131
Ubuntu 14.04 and above
The apt tool on Ubuntu 14.04 and above makes this very easy.
apt list --installed
Older Versions
To get a list of packages installed locally do this in your terminal:
dpkg --get-selections | grep -v deinstall
(The -v tag "inverts" grep to return non-matching lines)
To get a list of a specific package installed:
dpkg --get-selections | grep postgres
To save that list to a text file called packages on your desktop do this in your terminal:
dpkg --get-selections | grep -v deinstall > ~/Desktop/packages
Alternatively, simply use
dpkg -l
(you don't need to run any of these commands as the superuser, so no sudo or any other variants necessary here)
518
To get just the packages which were expressly installed (not just installed as dependencies), you can run
aptitude search '~i!~M'
This will also include a brief description, which you may want. If not, also add the option -F '%p', as mentioned by karthick87.
Yet another option seems to be to copy the file /var/lib/apt/extended_states, which is a text file database in this format:
Package: grub-common
Architecture: amd64
Auto-Installed: 0

Package: linux-headers-2.6.35-22-generic
Architecture: amd64
Auto-Installed: 1
Auto-Installed: 0 indicates that the package was expressly installed and is not just a dependency.
266
To list all packages intentionally installed (not as dependencies) by apt commands, run the following :
(zcat $(ls -tr /var/log/apt/history.log*.gz); cat /var/log/apt/history.log) 2>/dev/null |
  egrep '^(Start-Date:|Commandline:)' |
  grep -v aptdaemon |
  egrep '^Commandline:'
This provides a reverse time based view, with older commands listed first:
Commandline: apt-get install k3b
Commandline: apt-get install jhead
...
Installation data also showing synaptic usage, but without details (the same with installation date) :
(zcat $(ls -tr /var/log/apt/history.log*.gz); cat /var/log/apt/history.log) 2>/dev/null |
  egrep '^(Start-Date:|Commandline:)' |
  grep -v aptdaemon |
  egrep -B1 '^Commandline:'
providing the following:
Start-Date: 2012-09-23  14:02:14
Commandline: apt-get install gparted
Start-Date: 2012-09-23  15:02:51
Commandline: apt-get install sysstat
...
213
Create a backup of what packages are currently installed:
dpkg --get-selections > list.txt
Then (on another system) restore installations from that list:
dpkg --clear-selections
sudo dpkg --set-selections < list.txt
To get rid of stale packages:
sudo apt-get autoremove
To get installed like at backup time (i.e. to install packages set by dpkg --set-selections):
sudo apt-get dselect-upgrade
116
apt-mark showmanual
man pages state:
will print a list of manually installed packages
So, it should just give a list of explicitly installed packages (though this includes packages that were part of the default initial install) without all of the dependencies included due to these packages being installed.
To output the result into a text file:
apt-mark showmanual > list-manually-installed.txt
Pablo Bianchi
- 17,371
Tim Tisdall
- 1,591
46
dpkg-query (instead of dpkg --get-selections, which lists some packages that are not installed) as follows:
dpkg-query -W -f='${PackageSpec} ${Status}\n' | grep installed | sort -u | cut -f1 -d \ > installed-pkgs
Or:
dpkg -l | grep ^ii | sed 's_ _\t_g' | cut -f 2 > installed-pkgs
46
APT-Clone
This package can be used to clone/restore the packages on a apt based system.
- It will save/restore the packages, sources.list, keyring and automatic-installed states.
- It can also save/restore no longer downloadable packages using dpkg-repack.
source:
man apt-clone
APT-Clone is used by ubiquity (Ubuntu installer) for upgrade process. It is much better than the dpkg --get-selections solution because:
- It preserves all repositories information.
- It keeps track of what packages were automatically installed.
- It allows to repack locally installed DEB files.
How to Use
Install
sudo apt-get install apt-cloneMake backup
sudo apt-clone clone path-to/apt-clone-state-ubuntu-$(lsb_release -sr)-$(date +%F).tar.gzRestore backup
sudo apt-clone restore path-to/apt-clone-state-ubuntu.tar.gzRestore to newer release:
sudo apt-clone restore-new-distro path-to/apt-clone-state-ubuntu.tar.gz $(lsb_release -sc)
Result structure
It makes a simple gzipped tar file which can be easily edited and reviewed before restoring on the other machines. Here an example of its structure:
/
├── etc
│   └── apt
│       ├── preferences.d
│       ├── sources.list
│       ├── sources.list.d
│       │   ├── anton_-ubuntu-dnscrypt-vivid.list
│       │   ├── maarten-baert-ubuntu-simplescreenrecorder-vivid.list
│       │   └── megasync.list
│       ├── trusted.gpg
│       └── trusted.gpg.d
│           ├── anton__ubuntu_dnscrypt.gpg
│           ├── anton__ubuntu_dnscrypt.gpg~
│           ├── maarten-baert_ubuntu_simplescreenrecorder.gpg
│           └── maarten-baert_ubuntu_simplescreenrecorder.gpg~
└── var
    └── lib
        └── apt-clone
            ├── extended_states
            ├── installed.pkgs
            └── uname
45
To list all installed packages,
dpkg -l |awk '/^[hi]i/{print $2}' > 1.txt
or
aptitude search -F '%p' '~i' > 1.txt
or
dpkg --get-selections > 1.txt
Note:
You will get the result 1.txt file in your home folder or you can specify your own path.
d a i s y
- 5,551
karthick87
- 84,513
39
You can use Synaptic to save the current state of your installed packaged. In Synaptic, select "file/save markings", Enter the name of the file to save the state to, and make sure to check the "Save full state, not only changes" box.
The file saved from this can be loaded into a new machine using "file/read markings" in Synaptic.
Nerdfest
- 4,658
37
There's also a tool called Aptik (currently proprietary, both command line and GUI) which can help you view a list of all installed packages, with an option to select/unselect some of them, make a backup list, and then restore the same set of packages in another system.
To install:
sudo add-apt-repository -y ppa:teejee2008/ppa
sudo apt-get update
sudo apt-get install aptik
Further info: https://teejeetech.in/aptik/
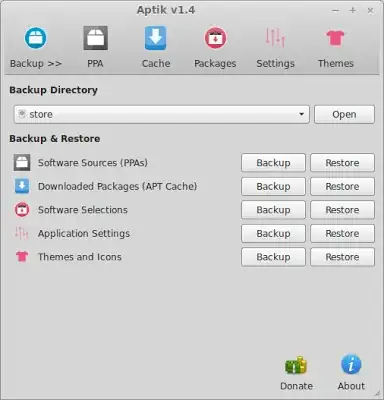
As can be seen in the screenshot, Aptik lets you also backup and restore PPAs, which will certainly be necessary to install some of the packages installed.
Pablo Bianchi
- 17,371
Sadi
- 11,074
36
You want to reinstall the packages now there on 12.04, right?
If so, it's very easy. You'll need an "Ubuntu Single Sign On account." (Create it before reinstalling so that your system is synced.)
Go to the Software Center and look for the "Sync Between Computers..." option under the File menu.
When you click on it you will see your computer registered and a list of all apps on your computer.
When you will install fresh, that computer will be considered a new computer.
You just have to sign in to your Ubuntu account and your previous computer will be shown.
Click on it; you'll get a list of all apps. Select "install" on the app you want to install.
31
There's a great explanation on Unix StackExchange that describes how to use aptitude to list packages not installed as dependencies, and how to compare that list with the list of default packages for your Ubuntu release.
To obtain the manifest file for desktop versions of 12.04 and newer, visit this site, choose your release, and scroll down below the CD images to the files section. You'll find something like "ubuntu-12.04.4-desktop-amd64+mac.manifest" that matches your architecture.
For server versions you'll need to obtain the manifest file from the ISO that was used to install the original system. For a VPS or cloud server, your provider may make the images available or you might need to contact them.
Here's an example using the code from the referenced post, along with modifications to install on the new server.
Old server (code from other post, output saved to file):
aptitude search '~i !~M' -F '%p' --disable-columns | sort -u > currently-installed.list
wget -qO - http://mirror.pnl.gov/releases/precise/ubuntu-12.04.3-desktop-amd64.manifest \
  | cut -f1 | sort -u > default-installed.list
comm -23 currently-installed.list default-installed.list > user-installed.list
On the new server, copy the file using scp, then use sed to append 'install' to every line (-i performs an inline-replace). Then you can use the list as input to 'dpkg --set-selections' and install the packages with apt-get:
scp user@oldserver:user-installed.list .
sed -i 's/$/\tinstall/' user-installed.list
sudo dpkg --set-selections < user-installed.list
sudo apt-get dselect-upgrade
Before starting this task, I recommend reading and understanding all parts of the post mentioned in the beginning, and then consult the aptitude reference guide for details on search patterns and the Customizing how packages are displayed to use the -F option as you like.
SebMa
- 2,927
- 5
- 35
- 47
thinkmassive
- 803
29
I'm surprised the apt-cache command designed exactly for this purpose hasn't been mentioned above...
apt-cache pkgnames
For more info, run apt-cache --help:
**apt-cache is a low-level tool used to query information
from APT's binary cache files

Commands:
   gencaches - Build both the package and source cache
   showpkg - Show some general information for a single package
   showsrc - Show source records
   stats - Show some basic statistics
   dump - Show the entire file in a terse form
   dumpavail - Print an available file to stdout
   unmet - Show unmet dependencies
   search - Search the package list for a regex pattern
   show - Show a readable record for the package
   depends - Show raw dependency information for a package
   rdepends - Show reverse dependency information for a package
   pkgnames - List the names of all packages in the system
   dotty - Generate package graphs for GraphViz
   xvcg - Generate package graphs for xvcg
   policy - Show policy settings

Options:
  -h   This help text.
  -p=? The package cache.
  -s=? The source cache.
  -q   Disable progress indicator.
  -i   Show only important deps for the unmet command.
  -c=? Read this configuration file
  -o=? Set an arbitrary configuration option, eg -o dir::cache=/tmp
See the apt-cache(8) and apt.conf(5) manual pages for more information.
**
ostrokach
- 864
23
Help out this community wiki - Add up-to-date solutions.
dpkg, xargs, & apt-get
This command should accomplish the creation of a text file containing installed packages:
dpkg -l | awk '{print $2}' > package_list.txt
To accomplish the bulk installation of the listed packages you'll need to edit 'package_list.txt'. Remove the weird lines at the top of the file using a text editor. You can then use this command to install packages from the created file using:
xargs < package_list.txt apt-get install -y
apt-cache, xargs, & apt-get
Only use this method if you want all current packages to be installed using the list (which includes automatically installed, etc).
Output the response of 'apt-cache pkgnames' to a file we'll simply name "package_list.txt". You can accomplish this with:
apt-cache pkgnames > package_list.txt
Then when you want to install packages from "package_list.txt" you would use this command:
xargs < package_list.txt apt-get install -y
apt-mark, xargs, & apt-get
We can use the command apt-mark showmanual to give a list of packages that were manually or initially installed with Ubuntu. We'll want to output that to a file we'll just call "package-list.txt". Use this command to accomplish that:
apt-mark showmanual > package-list.txt
The command we would use to install packages from the file "package_list.txt" is below.
xargs < package_list.txt apt-get install -y
Aptik Migration Utility
Utility to simplify re-installation of software packages after upgrading/re-installing Ubuntu-based distributions.
[Launchpad | Aptik]
For information on Aptik, try visiting its official page, and for a screenshot click here or view the end of this section.
Installing Aptik is simple. Follow these steps:
Add the PPA with:
sudo add-apt-repository -y ppa:teejee2008/ppaUpdate apt with the below command.
sudo apt-get updateInstall Aptik using:
sudo apt-get install aptik

parsley72
- 382
19
The below command will also lists all the installed packages,
grep ' installed ' /var/log/dpkg.log /var/log/dpkg.log.1 | awk '{print $5}' | sort -u
Avinash Raj
- 80,446
16
To save a list of installed packages to a file named installed_packages.txt, just run:
dpkg-query --list >> installed_packages.txt
wb9688
- 1,477
- 2
- 17
- 30
5
https://www.rosehosting.com/blog/list-all-installed-packages-with-apt-on-ubuntu/:
1. List the installed software packages on Ubuntu
To list the installed software packages on your machine you can use the following command:
sudo apt list --installedThe output of the command will be very similar to the following one, depending on which packages are currently installed:
Listing...
acl/xenial,now 2.2.52-3 amd64 [installed]
adduser/xenial,xenial,now 3.113+nmu3ubuntu4 all [installed]
apache2/xenial-updates,xenial-security,now 2.4.18-2ubuntu3.1 amd64 [installed]
apache2-bin/xenial-updates,xenial-security,now 2.4.18-2ubuntu3.1 amd64 [installed,automatic]
apache2-data/xenial-updates,xenial-updates,xenial-security,xenial-security,now 2.4.18-2ubuntu3.1 all [installed,automatic]
apache2-doc/xenial-updates,xenial-updates,xenial-security,xenial-security,now 2.4.18-2ubuntu3.1 all [installed]
apache2-utils/xenial-updates,xenial-security,now 2.4.18-2ubuntu3.1 amd64 [installed]
apparmor/xenial-updates,now 2.10.95-0ubuntu2.5 amd64 [installed,automatic]
apt/xenial-updates,now 1.2.19 amd64 [installed]
apt-utils/xenial-updates,now 1.2.19 amd64 [installed]
...
2. Use the LESS program
To easily read the entire output you can use the
lessprogram.sudo apt list --installed | less3. Use the GREP Command
You can look for a specific package through the output using the
grepprogram.sudo apt list --installed | grep -i apache4. List all packages that include Apache
The output from the above command will list all packages that include
apachein their names.apache2/xenial-updates,xenial-security,now 2.4.18-2ubuntu3.1 amd64 [installed] apache2-bin/xenial-updates,xenial-security,now 2.4.18-2ubuntu3.1 amd64 [installed,automatic] apache2-data/xenial-updates,xenial-updates,xenial-security,xenial-security,now 2.4.18-2ubuntu3.1 all [installed,automatic] apache2-doc/xenial-updates,xenial-updates,xenial-security,xenial-security,now 2.4.18-2ubuntu3.1 all [installed] apache2-utils/xenial-updates,xenial-security,now 2.4.18-2ubuntu3.1 amd64 [installed] libapache2-mod-php/xenial,xenial,now 1:7.0+35ubuntu6 all [installed,automatic] libapache2-mod-php7.0/xenial-updates,now 7.0.13-0ubuntu0.16.04.1 amd64 [installed,automatic] libapache2-mod-security2/xenial,now 2.9.0-1 amd64 [installed] libapache2-modsecurity/xenial,xenial,now 2.9.0-1 all [installed]Apt supports patterns to match package names and options to list installed
(--installed)packages, upgradeable(--upgradeable)packages or all available(--all-versions)package versions.5. Use the DPKG program
Another alternative that you can use to list the installed software packages on your Ubuntu VPS is the
dpkgcommand.sudo dpkg -lThe output of the command will provide you with information such as the name of the package, version, architecture and short description about the package. Of course, you can use the
grepprogram again to search for a specific package.sudo dpkg -l | grep -i apacheThe output should look like the one below:
ii  apache2                       2.4.18-2ubuntu3.1                     amd64        Apache HTTP Server
ii  apache2-bin                   2.4.18-2ubuntu3.1                     amd64        Apache HTTP Server (modules and other binary files)
ii  apache2-data                  2.4.18-2ubuntu3.1                     all          Apache HTTP Server (common files)
ii  apache2-doc                   2.4.18-2ubuntu3.1                     all          Apache HTTP Server (on-site documentation)
ii  apache2-utils                 2.4.18-2ubuntu3.1                     amd64        Apache HTTP Server (utility programs for web servers)
rc  apache2.2-common              2.2.22-6ubuntu5.1                     amd64        Apache HTTP Server common files
ii  libapache2-mod-php            1:7.0+35ubuntu6                       all          server-side, HTML-embedded scripting language (Apache 2 module) (default)
rc  libapache2-mod-php5           5.5.9+dfsg-1ubuntu4.16                amd64        server-side, HTML-embedded scripting language (Apache 2 module)
ii  libapache2-mod-php7.0         7.0.13-0ubuntu0.16.04.1               amd64        server-side, HTML-embedded scripting language (Apache 2 module)
ii  libapache2-mod-security2      2.9.0-1                               amd64        Tighten web applications security for Apache
ii  libapache2-modsecurity        2.9.0-1                               all          Dummy transitional package
ii  libapr1:amd64                 1.5.2-3                               amd64        Apache Portable Runtime Library
ii  libaprutil1:amd64             1.5.4-1build1                         amd64        Apache Portable Runtime Utility Library
ii  libaprutil1-dbd-sqlite3:amd64 1.5.4-1build1                         amd64        Apache Portable Runtime Utility Library - SQLite3 Driver
ii  libaprutil1-ldap:amd64        1.5.4-1build1                         amd64        Apache Portable Runtime Utility Library - LDAP Driver
.
With the competition of this tutorial, you have successfully learned how to list installed packages in Ubuntu.
terdon
- 104,119
M.A.K. Ripon
- 3,409
- 3
- 28
- 36
5
In addition to APT packages, many GUI packages are nowadays distributed as snaps.
If your package can't be found in apt list --installed, then try snap list:
$ snap list

Name                  Version                     Rev   Tracking  Publisher       Notes
gimp                  2.10.10                     165   stable    snapcrafters    -
gnome-calculator      3.32.1                      406   stable/…  canonical✓      -
keepassxc             2.4.1                       267   stable    keepassxreboot  -
...
It's also a good idea to add /snap/bin to the PATH so you can start those from the terminal (done automatically for non-root users).
rustyx
- 1,066
- 15
- 17
5
Another, easy and graphically beautiful approach is to use apt show command with '~i' -a flag to list only installed packages:
apt show '~i' -a
No need to use sudo.
By default, it also give useful information about all the packages, for example:
Package: linux-headers-generic-hwe-20.04
Version: 5.13.0.30.33~20.04.17
Status: install ok installed
Priority: optional
Section: kernel
Source: linux-meta-hwe-5.13
Maintainer: Ubuntu Kernel Team
Installed-Size: 19.5 kB
Depends: linux-headers-5.13.0-30-generic
Download-Size: unknown
APT-Manual-Installed: no
APT-Sources: /var/lib/dpkg/status
Description: Generic Linux kernel headers
 This package will always depend on the latest generic kernel headers
 available.
If you want to exclude this information, use grep to print only the package name:
apt show '~i' | grep 'Package:'
For example:
Package: linux-firmware
Package: linux-generic-hwe-20.04
Package: linux-image-generic-hwe-20.04
Package: linux-headers-generic-hwe-20.04
Package: linux-headers-5.13.0-28-generic
Package: linux-hwe-5.13-headers-5.13.0-28
Package: linux-headers-5.13.0-30-generic
Package: linux-hwe-5.13-headers-5.13.0-30
Package: linux-modules-5.13.0-28-generic
Package: linux-modules-extra-5.13.0-28-generic
Package: linux-modules-5.13.0-30-generic
Package: linux-modules-extra-5.13.0-30-generic
Error404
- 8,278
- 3
- 35
- 60
3
I think it is interesting to note apt list --installed or dpkg-query --list actually use the file called /var/lib/dpkg/status in behind where all the info about the packages is beard.
So if you would like to deal with the super extended list of packages just cat /var/lib/dpkg/status.
Note: Do not alter /var/lib/dpkg/status file.
prosti
- 1,085
2
The package dctrl-tools provide the grep-status tool to get the list of the packages marked as installed on your system:
sudo apt install dctrl-tools
Usage:
grep-status -FStatus -sPackage -n "install ok installed"
See: man dctrl-tools
Pablo Bianchi
- 17,371
GAD3R
- 3,748
1
I had an Ubuntu Server installation on a corrupted SD card from which I could no longer boot, and I needed to recover which packages I had installed on it.
Luckily, dpkg provides the --root option to specify the path towards an alternative root filesystem (i.e. that broken system's /).
So in a fresh Ubuntu Server installation on another SD card, after having mounted the corrupted SD card's root filesystem to /media/external-sd-card-root-fs using a second SD card reader, that broken system's installed packages can be listed with (and hoping there are no bad sectors within the investigated files):
dpkg --root=/media/external-sd-card-root-fs --get-selections
Abdull
- 734