655

How can I record my screen on Ubuntu?

The app I'm looking for has ideally all of these features:

  1. Can record in a format that can be played back easily on any platform and/or accepted by YouTube or another popular video site
  2. Can record just a window (instead of the whole screen), possibly selecting it with a mouse click
  3. Can start recording after a configurable delay (e.g., I launch the app and have time to do arrangements to my desktop/window before actual recording starts)
Zanna
  • 72,312

28 Answers28

308

gtk-recordmydesktop install gtk-recordmydesktop

Adds an easy to use graphical icon on the GNOME toolbar to make a pleasure use and configure the audio and video capture and screencast application recordMyDesktop.

enter image description here

As mentioned at 20.04: Can't install gtk-recordmydesktop and on the package search, the package is not available on the main repository anymore, and sudo apt install gtk-recordmydesktop fails. I'm not sure why the http://apt.ubuntu.com/p/gtk-recordmydesktop link seems to work, maybe it installs an older version. But this indicates that the software is not being actively supported.

recordmydesktop

This is the non-GUI backend of recordmydesktop, and it is still available in 20.04:

sudo apt install recordmydesktop
recordmydesktop --on-the-fly-encoding

This will record until you stop the program on the terminal e.g. with Ctrl + C.

--on-the-fly-encoding encodes the output immediately; without it you need to wait for a possibly long time at the end for the encoding to be done. I haven't seen any significant downsides to that option yet, likely it will just take a bit more of CPU resources, but it is generally worth it.

It should be able to do everything that gtk-recordmydesktop does, but it is a bit harder to learn as you have to deal with the command lines.

You can set a stop recording shortcut e.g. with:

recordmydesktop --stop-shortcut=Control+s

You can select to record a single window as shown at: How can I get the value of Window ID?

recordmydesktop --windowid `xwininfo | grep 'id: 0x' | grep -Eo '0x[a-z0-9]+'`

This will allow you to first select the window with a mouse click, and it starts recording after you click.

How to record sound output with it: https://unix.stackexchange.com/questions/3490/how-can-i-record-the-sound-output-with-gtk-recordmydesktop

xvidcap (no longer maintained, package is no longer available)

A screen capture enabling you to capture videos off your X-Window desktop for illustration or documentation purposes. It is intended to be a standards-based alternative to tools like Lotus ScreenCam.

Video can be saved in MPEG or AVI files format.

sagarchalise
  • 24,306
200

Kazam

It's a good application for this purpose: Home, install, or simply sudo apt install kazam

It gives you a delay before recording. Recording is done in HD and the output is in .mkv format which is accepted for YouTube so there is no need to convert and re-render.

There are some useful keyboard shortcuts too:

To start the recording: Super + Ctrl + R
To pause the recording: Super + Ctrl + P
To stop the recording: Super + Ctrl + F
To show/hide main window: Super + Ctrl + W

On Ubuntu 20.04 I met this bug with it where the video is not captured/or is all black: https://github.com/hzbd/kazam/issues/9 even though recordmydesktop video capture worked on the same machine.

suli8
  • 2,975
191

I like Byzanz; it records your activity as a GIF file.

enter image description here

It's pretty light and works well, especially for putting a shorter screencast on a webpage or in an email.

You can either get it from the PPA (might have a more up-to-date package but is 'unsupported'):

sudo add-apt-repository ppa:fossfreedom/byzanz
sudo apt-get update && sudo apt-get install byzanz

Or you can get it from the official Ubuntu repositories by clicking the button below:

Install Byzanz

For further information:

How to create animated GIF images of a screencast?

150

Simple Screen Recorder

SimpleScreenRecorder is a Linux program that I've created to record programs and games. There are programs that can do this, " but I wasn't 100% happy with any of them, so I created my own "

My original goal was to create a program that was just really simple to use, but as I was writing it I started adding more and more features, and the result is actually a fairly complex program. It's 'simple' in the sense that it's easier to use than ffmpeg/avconv or VLC :).

For Ubuntu versions 12.04 - 16.10 it is not in the standard repositories and can be installed with the following:

sudo add-apt-repository ppa:maarten-baert/simplescreenrecorder
sudo apt-get update
sudo apt-get install simplescreenrecorder
# if you want to record 32-bit OpenGL applications on a 64-bit system:
sudo apt-get install simplescreenrecorder-lib:i386

For Ubuntu versions 17.04 - onwards it is included in the universe repository and can be installed by:

sudo apt-get update
sudo apt-get install simplescreenrecorder

Here is a UI preview:

enter image description here

Qasim
  • 22,162
79

Recently I tried to record a screencast with audio. I tried many of the options listed here and other websites. My goal was not to write a comprehensive summary of all tools available, but to find a single one which works.

In my case (after several hours of struggling) it was VOKOSCREEN which worked, so I did not look further. My system is Linux Mint 15 Olivia, 64-bit, which is based on Ubuntu Raring.

This is my summary/log which I wrote while experimenting. Hope it will save you several hours:

  • avconv: audio and video get out of sync, audio is lagging behind. Tried all the options I could. This is the command line I used:

    avconv -f alsa -i pulse -f x11grab -r 15 -s 1024x768 -i :0.0 -vcodec wmv1 -acodec pcm_s16le -q 7 b4.avi
    
  • Byzanz: creates animated gif (not tried, since I need sound as well and longer screencast)

  • Eidete: unable to install (with 20 years of Linux experience, didn't try forever though)

  • gtk-recordmydesktop: creates ogg which is fine, but unable to convert to anything. Best converter was mencoder but is speeds up video (but not audio) so they get out of sync.

  • istanbul: freezes immediately

  • Kazam: if record area larger than ~640x480 memory starts leaking, leaving at most a few minutes before system becomes unresponsive. Many have reported similar issue, this is a known bug.

  • pyvnc2swf: Is a tool to record a VNC session. Not convenient if you want to record your own screen (not tried)

  • screenkey: advertised as a "screencast tool", but is not about recording your screen

  • tibesti: seems to be no longer maintained (since 2011), does not even install

  • vokoscreen: FINALLY!!!!
    Quality is good: both audio and video. After recording, I could compress the file to about 1:7 with mencoder without any loss of quality. I discovered that it uses the following command line:

    ffmpeg -f alsa -i pulse -f x11grab -r 15 -s 1024x768 -i :0.0+0,0 -vcodec mpeg4 -acodec libmp3lame -ar 48000 -sameq -r 15 my.avi
    
  • xvidcap: As stated above: "We've removed xvidcap from the repository now because it's no longer maintained." (not tried)

  • wink: distributed as downloadable executable not as package, (not tried)

Pablo Bianchi
  • 17,371
Tohotom
  • 21
48

This is what I use to make screencasts, the cli command that comes with recordmydesktop

recordmydesktop \
  --width 1920 \
  --height 1200 \
  --full-shots \
  --fps 15 \
  --channels 1 \
  --device hw:1,0 \
  --delay 10

The delay 10 gives me 10 seconds to "prepare" my desktop before it starts recording. When I'm done I hit ctrl+c, then it starts encoding the file.

I have a dual display, and the width/height argument lets me focus recording on one of my monitors. By adjusting this value I can also record onto my second monitor.

Other pointers:

jmizv
  • 107
Jorge Castro
  • 73,717
34

You can also use ffmpeg to create a screencast. Example:

ffmpeg -f x11grab -framerate 25 -r 25 -s 1024x768 -i :0.0 /tmp/output.mpg

Notes:

  • 0.0 is your display.screen number of your X11 Server. You can get the number with echo $DISPLAY
  • -r = frames per second
  • -s = resolution

To get audio:

ffmpeg -f oss -i /dev/audio -f x11grab -s 1280x1024 -r 3 -ab 11 -i :0.0 /tmp/out.mp4
Dayjay
  • 526
34

GNOME built-in desktop recorder

Gnome 3 already seems to have a very simple thing to do record Screencasts - you can assign what shortcut it uses in Keyboard settings. It records the entire screen, and records directly into a webm file (a fairly widely used format) into XDG_VIDEOS_DIR - by default "$HOME/Videos".

  1. By default, to start recording, press Ctrl + Alt + Shift + R. You'll see a circle displayed on top right corner to indicate recording is in process.
  2. To Stop recording, press Ctrl + Alt + Shift + R again.

Source: Screenshots and screencasts on Gnome Help page

example screencast
The above image should be animated - if you have animations disabled it won't work. Click to view the file

If you want to convert the image to a animation, this answer on Superuser is very helpful - the best method is to basically:

Another command-line method would be to export the movie to frames using ffmpeg:

mkdir frames
ffmpeg -i input -vf scale=320:-1 -r 10 frames/ffout%03d.png

Then use convert from ImageMagick (or GraphicsMagick) to make your animated GIF:

convert -delay 5 -loop 0 frames/ffout*.png output.gif

This is how I did the above animation, with the exception that I added -dither None -colors 80 -fuzz "40%" -layers OptimizeFrame to the convert command*, and cropped the result in GIMP.

*Be careful with these options, some like using ALL of the CPU

Wilf
  • 30,732
32

Vokoscreen

A new screencasting tool for Linux

vokoscreen screenshot

Installation

Since Ubuntu 20.04 there's a package:

sudo apt install vokoscreen-ng

Previously you needed a PPA:

sudo add-apt-repository ppa:vokoscreen-dev/vokoscreen # For latest version
sudo apt update
sudo apt install vokoscreen

Alternatively, using snap:

snap install vokoscreen-ng
Qasim
  • 22,162
20

Open Broadcaster Software (OBS)

screenshot

But this works really well. The main reason why I use it is because I can record both my microphone AND monitor output with ease.

Plus you can stream to Twitch if you'd like.

sudo apt-add-repository ppa:jon-severinsson/ffmpeg
sudo apt-add-repository ppa:obsproject/obs-studio
sudo apt-get update
sudo apt-get install ffmpeg obs-studio

If you don't want to add the PPA you can also download the deb file and installed with sudo dpkg -i <debfile>.


The benefit of OBS is that you can preset many recording options like screen recording and webcam. Whenever you need to start recording just select the preset recording option and start recording. Along with that while screen recording you need not to select windows/ grab screen every time. It have option to select whole screen or just a specific area of page on google-chrome or Firefox or libre-doc. In this case it just keep on recording that specific selected area of that application irrespective of what you are viewing on your screen and even if you resrat. You can see real time preview. This saves a lot of time and effort.

Ajay
  • 688
14

Tibesti

Tibesti Screencaster is a program for Ubuntu that allows you to record your screen and your microphone and/or audio out sounds.

Screenshot from OMG!Ubuntu!

To install add the PPA ppa:ackondro/tibesti (How to add a PPA) and then install tibesti from the software center.

Alternatively, open a terminal and paste:

sudo add-apt-repository ppa:ackondro/tibesti
sudo apt-get update
sudo apt-get install tibesti
Lincity
  • 25,749
14

Have a look at Wink.

There are two tutorial projects created in Wink which you can view. Use the Help, View tutorial menu options to render and view them before you start using Wink.

Features as told on their website:

  • Freeware: Distributed as freeware for business or personal use. However if you want to redistribute Wink, you need to get permission from the author.
  • Cross-Platform: Available for all flavours of Windows and various versions of Linux (x86 only).
  • Audio: Record voice as you create the tutorial for explaining better.
  • Input formats: Capture screenshots from your PC, or use images in BMP/JPG/PNG/TIFF/GIF formats.
  • Output formats: Macromedia Flash, Standalone EXE, PDF, PostScript, HTML or any of the above image formats. Use Flash/html for the web, EXE for distributing to PC users and PDF for printable manuals.
  • Multilingual support: Works in English, French, German, Italian, Danish, Spanish, Serbian, Japanese, Brazilian Portuguese and Simplified/Traditional Chinese.
  • Smart Capture Tools: Capture screenshots automatically as you use your PC, based on mouse and keyboard input (great time saver and generates professional captures).
  • Performance/Quality: Creates highly compressed Flash presentations (few kbs to few hundreds of kbs, much smaller than competing commercial products) ideal for using on the web.

Tutorials:

enter image description here

Rinzwind
  • 309,379
13

Check out Peek. You can record screencast of a selected region and save it as GIF.

Recording screen using peek

You can install the latest version of Peek on Ubuntu from its PPA.

sudo add-apt-repository ppa:peek-developers/stable
sudo apt update
sudo apt install peek
muru
  • 207,228
13

How to create an animated (GIF) screenshot

Added bonus with this approach is that you can post the screencast without embed tags on any forum that includes animated GIFs as embedded like this

The answers prior to mine have clearly answered how to create a video screencast. Now if you just want to show an animated screenshot, essentially an extremely short screencast in an image format (GIF, and not more than ~10 sec), it's also easy.

First create a screencast of what you want to show in the animated GIF. Then follow the instructions below...

You'll need Gimp, mplayer (WARNING! NOT mplayer2) and mencoder. Issue the following commands to install them.

sudo apt-get install gimp
sudo apt-get install mplayer
sudo apt-get install mencoder
sudo apt-get -f install

Alternatively, you can install them from the Synaptic package manager that comes with Ubuntu.

The following command breaks your screencast into a number of jpeg or png (based on which command you choose) images:

mplayer -ao null -ss 0:0:33 -endpos 2 eagles.avi -vo jpeg:outdir=Desktop/animated
mplayer -ao null -ss 0:0:33 -endpos 2 eagles.avi -vo png:z=9:outdir=Desktop/animated

Where, -ss 0:0:33 tells mplayer where you begin (0 hours, 0 minutes, 33 seconds), -endpos 2 tells mplayer where to stop (2 minutes), z=9 sets compression level for the output png images to 9, Desktop/animated is the directory (~/Desktop/animated/) where you want the images to be output to.

You can also tell mplayer where to stop, as a specific time, like so:

mplayer -ao null -ss 0:0:33 -endpos 0:1:12 eagles.avi -vo jpeg:outdir=Desktop/animated
mplayer -ao null -ss 0:0:33 -endpos 0:1:12 eagles.avi -vo png:z=9:outdir=Desktop/animated

Now you have the images, but you need to combine them into a single, animated GIF. This is really simple:

  • Start Gimp > File > Open as Layers > browse to the directory (~/Desktop/animated/), Ctrl+A to select all images, and click 'Open'.

  • Simple hit Shift+Ctrl+S or go to File > Save As... and name the image as 'animated.gif' > hit 'Save' > check 'Save as Animation' radio button > hit 'Export' > in the next window, simply hit 'Save' unless you know what you are doing.

That's it. You have your animated GIF ready!
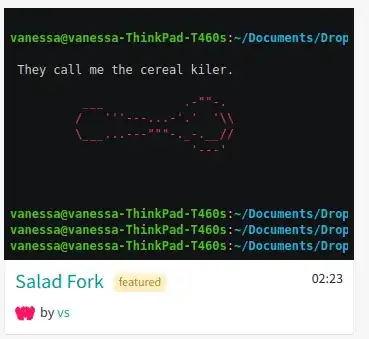
Here's an example:

Animated GIF screenshot

PS: I am not very comfortable with the terminology when it comes to this kind of stuff, but I hope I am clear nevertheless. :)

SOURCE: http://www.youtube.com/watch?v=OhJtyblE_D0

its_me
  • 1,948
12

After trying everything, this is the solution I came up with:

Note: The "fake" ffmpeg from Libav has been depreciated (within Libav) and has been replaced by avconv from Libav. The "deprecated" message does not apply to the real ffmpeg from FFmpeg which is unaffected and is still under heavy development.

First install the required codecs:

sudo apt-get install libavcodec-extra-5*

Use the following command to record the screencast:

avconv -f alsa -i pulse -f x11grab -r 30 -s 1280x800 -i :0.0 -vcodec libx264 -acodec libmp3lame myscreencast.mkv

Change -s 1280x800 to whatever resolution you like.

more examples

all screen with given resolution and sound

avconv -f alsa -i pulse -f x11grab -r 30 -s 1024x768 -i :0.0 -acodec pcm_s16le -vcodec libx264  -threads 0 output.mkv

all screen with mouse following and sound

avconv -f alsa -i pulse -f x11grab -show_region 1 -follow_mouse 100 -r 10 -s 960x540 -i :0.0+10,200 -acodec pcm_s16le -qscale 0 -threads 0 output.mkv

Detailed options I know are following

  • -f: input file format
  • -i: input file name
  • -r: fps (Frame Per Second)
  • -s: frame size (width x height)
  • -i :0.0+10,200: size of squared area to follow
12

You can use VLC as follows:

  1. Launch VLC media player and select Media > Open Capture Device:

    enter image description here

  2. Set Desktop at Capture mode:

    enter image description here

  3. Enter desired frame per rate for the capture and select Convert at bottom:

    enter image description here

  4. Provide path to the file to which you want to save your screen capturing by Browse button and click on Start to start recording:

    enter image description here

  5. Click on Stop button when you finish.

You'll get the screen recorded/captured in the file.

Pandya
  • 37,289
9

This bash script is based on ffmpeg. It calculates the required resolution and record your desktop in high-definition.

Xaxis=$(xrandr -q | grep '*' | uniq | awk '{print $1}' | cut -d 'x' -f1)
Yaxis=$(xrandr -q | grep '*' | uniq | awk '{print $1}' | cut -d 'x' -f2)
ffmpeg -f x11grab -s $(($Xaxis))x$(($Yaxis)) -r 25 -i :0.0 -sameq ~/Video/output.mkv

Change the filename to your taste. This script can be found on github here.

Aditya
  • 13,616
Dilawar
  • 1,811
8

Check out this article about Screenkey

It turns your key strokes into highly readable subtitles overlaid on the recording. It seems like it would be incredible for tutorial and training type videos about CLI-based topics.

Not positive it fits all the original criteria, I will try to update later.

It's on Launchpad here

RolandiXor
  • 51,797
Mark Russell
  • 7,396
7

Ubuntu 18.04/GNOME 3 have a built-in feature of recording screen for 30 seconds. Ctrl + Alt + Shift + R to start or stop recording.

Videos will be saved in WebM format in videos folder

You can increase it by installing dconf Editor from Ubuntu Software. Follow these steps:

  1. Open dconf-editor and type screencast, this will let you jump to schema org.gnome.settings-daemon.plugins.media-keys.
  2. Edit the 30 of max-screencast-length key to required value (set it to 0 to make it stop when you hit Ctrl + Alt + Shift + R to stop recording)

You can also edit the shortcut if you need to change.

Pablo Bianchi
  • 17,371
5

Kdenlive is a free open-source video editor for GNU/Linux and FreeBSD, which supports DV, AVCHD and HDV editing. Kdenlive relies on several other open source projects, such as FFmpeg, the MLT video framework and Frei0r effects.

http://www.kdenlive.org/features

2

CTL + ALT + SHIFT + R to start CTL + ALT + SHIFT + R to stop Saved in /home/$USER/Videos as .webm files

CRTLBREAK
  • 131
2

OBS Studio worked for me.

It has the most advanced features I've seen - can record your entire screen or just a window, and can also be used for streaming your screen and other stuff I didn't even use.

Warning: It's only for advanced users.

Nimo
  • 111
1

asciinema

A fast/lightweight way to record the terminal:

Forget screen recording apps and blurry video. Enjoy a lightweight, purely text-based approach to terminal recording.

  • Install: sudo apt install asciinema
  • Record: asciinema rec
  • Stop: Type exit or hit Ctrl+D

Then will give you the option to upload (public or private) or just generate the file on disk.

screenshot

Pablo Bianchi
  • 17,371
1

Scshoot is open-source cross-platform (Java) screen capture and recording tool: http://github.com/edartuz/scshoot

Besides of single-image capture, can record part of screen to animated PNG (APNG) or video.

user2053898
  • 101
  • 1
1

ScreenStudio

ScreenStudio is a top notch screen recording software. There are no dependencies beside the need for the JRE 8.0 (OpenJDK).

Features:

  • Record video from the webcam during screencast
  • Record audio from both the microphone and the speakers
  • Allows you to select which screen you want to record if there are multiple screens.
  • Customizable FS(Frames per second)
  • You can chose the desired resolution for recording video from the webcam.
  • Stream directly to YouTube live, Twitch.tv, HitBox and Upstream.
  • Screencast live over UDP
  • Supports FLV, MOV and MP4 formats.

Installing ScreenStudio in Ubuntu 16.04

First make sure that you have either OpenJDK 8 or OracleJDK 8 before installing

Open a terminal and type

java -version

If it shows something like this then you have Java 8 installed.

java version "1.8.0_111"
Java(TM) SE Runtime Environment (build 1.8.0_111-b14)
Java HotSpot(TM) 64-Bit Server VM (build 25.111-b14, mixed mode)

Otherwise you need to install it.

Steps to install OpenJDK can be found here:

How can I install OpenJDK on Ubuntu 16.04?

Steps to install OracleJDK can be found here:

http://tipsonubuntu.com/2016/07/31/install-oracle-java-8-9-ubuntu-16-04-linux-mint-18/

Install ScreenStudio -

Method 1:

ScreenStudio isn’t included in Ubuntu repository. The Ubuntu PPA contains version 2.3

Steps to install:

Open terminal and type the following commands:

sudo add-apt-repository ppa:soylent-tv/screenstudio
sudo apt-get update
sudo apt-get install screenstudio

Method 2:

Go to

http://screenstudio.crombz.com/archives/ubuntu/

At the time of writing this article the latest version is: 3.09

Download it. Use Nautilus file explorer to go to the download directory and extract the archive using default archive manager.

Go to ScreenStudiosrc --> apps --> Ubuntu

Using Nautilus open a terminal at the target folder. Smply right click on any empty space of the folder and select open in terminal

In terminal type the command: ./ScreenStudio.sh

and the application will launch

If you want to create a desktop shortcut for the software type in terminal: ./createDesktopIcon.sh

How to use ScreenStudio features?

ScreenStudio is so much rich in features that it can be explained only through video tutorial.

Refer the following link:

https://www.youtube.com/watch?v=52V6UJ4y-ME

CREDITS: Patrick Balleux

rancho
  • 4,136
1

I have used Soapbox, which is a great extension developed for Chrome. It records your camera, mic, and screen all together.

After you're done recording, you can use their online editor to select during what sequences of the recording you want to show your screen, your camera, or both.

0

just use kooha it runs fine with wayland

flatpak remote-add --if-not-exists flathub https://flathub.org/repo/flathub.flatpakrepo  #  https://flathub.org/home

flatpak install flathub io.github.seadve.Kooha

then launch by hitting the Windows key and search for kooha

for details see https://flathub.org/apps/details/io.github.seadve.Kooha

0

Thanks for all of the great suggestions here. My recommendation for tools that will work great for recording audio, video and editing the screencast is Camtasia and Screenflow. If you're looking for more ideas on recording your screen and creating an engaging screencast then check out this post: http://www.mediacore.com/blog/how-to-record-your-screen-and-create-engaging-screencasts It includes tons of tools and tips on audio, video and editing your screencast

Maddy
  • 1