Timeless Trails
| Map maker(s) | |
|---|---|
| Price |
Free |
| Release date |
June 19, 2023 |
| Tags |
Mobs
Adventures |
| Genre(s) |
|
| Players |
Single player, Multiplayer (1-4) |
| Website page | |
| Article |
{
    "title": "Timeless Trails",
    "rows": [
        {
            "field": "[https://playhive.com/ The Hive]",
            "label": "Map maker(s)"
        },
        {
            "field": "Free",
            "label": "Price"
        },
        {
            "field": "June 19, 2023",
            "label": "Release date"
        },
        {
            "field": "<div style=\"\" class=\"collapsible collapsed collapsetoggle-inline\">\n\n<div class=\"collapsible-content\" style=\"\">Mobs<br>\nAdventures<br>\nExploration<br>\nDream<br>\nGames<br>\nStory\n</div>\n</div>",
            "label": "Tags"
        },
        {
            "field": "\n* Minigame\n* Action-Puzzle",
            "label": "Genre(s)"
        },
        {
            "field": "Single player, Multiplayer (1-4)",
            "label": "Players"
        },
        {
            "field": "[https://www.minecraft.net/en-us/marketplace/pdp?id=d2db89ca-5ee1-4df7-9974-23eeb111f7db Timeless Trails in Minecraft Marketplace]",
            "label": "Website page"
        },
        {
            "field": "[https://www.minecraft.net/en-us/article/the-summer-celebration-sale-has-begun \"The Summer Celebration Sale has begun\"]     – (link to Minecraft.net article, displayed as Minecraft.net).",
            "label": "Article"
        }
    ],
    "invimages": [],
    "images": []
}

Timeless Trails is a free Marketplace map developed by The Hive that promotes the Trails & Tales update. The map tells the story of an archeologist, who is sent back in time to uncover ancient mysteries and help recover those stories in the present.
Summary
Info Room

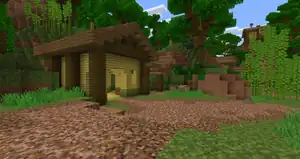
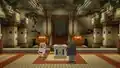
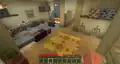
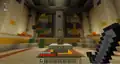
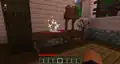
The player is immediately dropped into the center of a large room, resembling an office or classroom. In front of the player is a bulletin board, with a persuasive help wanted poster. Clicking on that starts the map proper, but the surrounding area can be explored in full. To the left is an empty display case, labeled My Discoveries, and next to that is a large bookshelf with a dark oak log frame and replica of a potted plant, with azalea leaves and a spruce fence trunk. Between those is a non-interactive door, made up of stripped dark oak logs and a polished blackstone button. Next to all of those is a replica of a desert pyramid, labeled as the Desert Temple, in a jungle wood display case with two wooden buttons.
To the right is another display case, labeled the same as on the left, but in front of that is a table made of quartz stairs, holding two microscopes (made to resemble spyglasses and a sample of sand with a magnifying glass. A similar table is right behind the player's initial spawn, containing several more of the jar and microscopes, as well as small test tube with pencil and paper. Sandwiched between both is a third table, holding two green rolled blankets and 3D leaning shovels. On the right wall, the player can find a desk containing a cartography table and lamp consisting of an end rod and quartz pillar, behind that a collection of beehives symbolizing filing cabinets, and the Bust and Albanian paintings. On the left side of the right wall is a chalkboard, made up of gray concrete powder, smooth stone slabs, a white candle, and polished blackstone button. In the corner is another lamp, made up of an end rod and skull, next to a lectern.
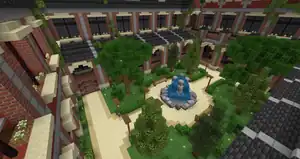
The back walls are a collection of windows, the right side partly opened, represented by iron trapdoors. Past a garden of azure bluets, the player can see a vast university, with several trees, a fountain, azalea leaf vines, lantern fixtures, and identical windows to the ones being used.
Dig Site/Digsite Echo
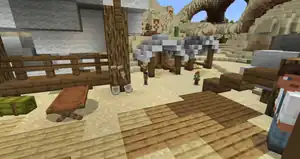
Once the player enters the map itself, the screen will fade to black, as sounds of horses galloping play. From there they will be warped to a desert, inside of a tent with four beds, a crafting table, a lectern with a book, and a sherd on display. The player's first task will be to meet with Professor Stone, who is down below a flight of stairs. Talking to her will inform the player she wants them to craft a brush, giving them the necessary items and triggering a marker at crafting tables, those being behind her or in the tent. After crafting the brush, Stone will congratulate the player, then instruct them to brush suspicious sand "over there." Brushing the sand will excavate an emerald.
Taking the discovery back to Stone, she will call the player a natural, then ask if they would be willing to start their first assignment. Answering "yes boss!" she explains that water sources are prime for archeology, due to their importance to ancient civilizations, and that there is a desert well on a nearby hill they need to investigate. Heading up another flight of stairs, the player will find the well by a large granite boulder, with a single suspicious sand inside holding a single arms up pottery sherd. Collecting this will trigger a time skip to sunset, and upon showing it to Stone she will be amazed at the discovery, calling it "one of the best sherds we've ever uncovered." However, she will promptly notice the time and recommend getting some shuteye, remarking "if only we could go back in time... Anyway, sweet dreams!"
Desert Bazaar
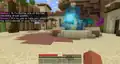
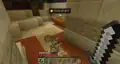
Upon falling asleep, the player will mysteriously awaken inside of a house made out of red sandstone, with four beds paralleling the ones in the tent. Approaching the stairs, the player themselves will be described as saying "where am I? Where's the digsite? Is this a dream?" An unseen figure named Aisling will claim it is in fact a dream, and promises to explain outside. Walking downstairs, the player will discover the building is some sort of forge, with a large deposit of blocks of raw iron, coal ore, an anvil, two smithing tables, and a fireplace. Outside, Aisling will be revealed as a curious, floating blue orb who is described as "one of the few remaining dream guides" and "[wanting] to help you unlock the full potential of your imagination!" They explain the only way forward is to follow a trail, and that "trail" starts by giving the forge a name, the necessary resources being inside the shop.
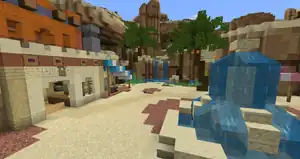
Heading back inside, the player can craft a hanging sign, before Aisling says they have a customer. This is revealed to be Isabella Stone, an ancestor of Professor Stone, who proclaims "you" have a reputation for being the best blacksmith in town. She asks for help, mentioning that she wants a rare armor trim from a "nearby temple" of unknown history. Accepting the quest, the player will be encouraged to prepare for the journey, with several chests containing iron swords, chainmail and iron armor, inside the shop. Outside, the player will find a hot spring, similar to one in Digsite Echo, a large sandstone fountain, several stands selling cake, melons, and pumpkins, and an inaccessible second building. Exiting this area will lead them into a bazaar, Aisling telling them to head for a camel stable.
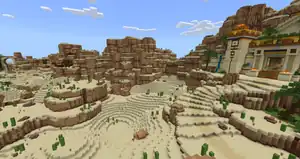
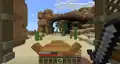
The camel stable can be found by following several signs pointing towards it, as well as various stands selling odd items. These include Books for Sale, Fresh Water, Plant Shop, Candles, Potion Shop, Food (inexplicably facing away from the customers), Fresh Fungi, Fresh Fish, and finally Melons, parked directly next to the stable. After mounting a cable, the player will have to enter out of a ginormous gateway to the left of the stables, which will open automatically. Beyond the Bazaar is an open desert, filled with cacti and palm trees, before hitting a roadblock in the form of a ravine. This serves as a tutorial for the camel's dash ability. From there, the player will reach a river, which requires stepping off the camel. To help, Aisling hands the player a lead. On the opposite side is a small settlement, which will turn out to be an ambush of husks, which will trap the player inside. Using the camel, the husks can be swiftly defeated.
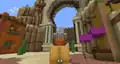
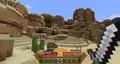
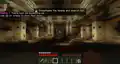
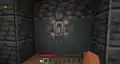
From there the player will have to climb a large dune, before finally arriving at the temple. In order to enter, the player will need to climb a series of vines, with the camel being expected to be left behind. Upon entering, Aisling will call the temple breathtaking, and suggest the player look for something to open a large, locked door. In order to do this, the player will have to search out several buttons, the closest to the entrance being behind a pole, with fireflies marking the spot. Upon clicking any button, a counter will pop up, teaching the player there are seven in total. The second closest is underneath the entrance and accessed through a flight of birch stairs, which activates a trap, summoning uniquely designed husks and silverfish colored like sandstone. Returning back to the first button, the player can go another path into a dark hallway and follow torches until they find the third, releasing several silverfish from the ceiling. The fourth button is out in the open, built into a pillar right outside the silverfish trap, the fifth being on the opposite side of the chamber high on another pillar, and the sixth being the same but closer to the door. The final button is again close by, hidden underneath a staircase by a brazier with a hole full of sand.
Opening the door will lead into another chamber, this one above a large water system. Heading up more stairs, the player will find an empty pad on the floor, Aisling proposing a square object goes inside. Platforming across several pillars made of birch planks to the left of the room, passing a statue of a humanoid figure, the player will find this object, which can be moved by punching and will cause a staircase to lead out of the temple to appear. From there the player will need to repeat this process, now looking for three objects to activate another door. The first, recognizable as orange, will be to the right of the entrance, leading into a small room where the object will need to be carried over several bridges made of jungle planks until the player falls down a pit, right beside the pad outside. The second, yellow object will be right out in the open, to the left of the entrance, but not immediately reachable. Heading down into a hallway will lead to a ravine, leading into a platforming section accessed from swimming up a water stream to the right. Two other will be present, but will lead to nowhere. Once the player clears the short platforming, they will obtain the key, and can be escorted to the middle of the area. The final, purple object is above the door, and can be found by returning to the right path and leaping onto the top of the door. Once the player reaches it, it can be quickly dropped onto the pad, opening the door.
Once the door is open, another horde of husks and silverifhs will emerge from inside, protecting several large braziers. Once the husks are defeated, the player will finally find the treasure, a chest at the very end of a tomb, illuminated by a hole in the ceiling. Inside, the dune armor trim can be claimed. Upon clicking on the trim, however, the player will immediately be treated with sounds of bells ringing and wake up.
Cherry Village
Returning to the digsite, the player will be immediately told to report to Stone again; Professor Stone, not Isabelle. She can be found inside the tent with the crafting table, hoping the player slept well and asking for help excavating the desert temple. Once the player is ready, she will ask for them to extract more items from suspicious sand, giving them a new brush and pointing them to the archeological room in the desert pyramid. Descending into it, they will recover the prize sherd and take it to Stone, who takes a moment to question the origins of the artifacts, fascinated. She will then ask if the days are getting shorter, wishing the player another good night.

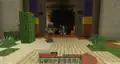
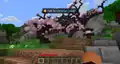
Upon finishing the conversation, the time will change to night, and the player will once again wake up inside of a stranger's house. This time, they will be inside a house made of cherry planks, with a letter visible outside the bedroom emitting particles. Clicking on the note will tell the player to visit a library at the top of a hill, signed by "Librarian Isabel." Walking outside, the player will find an excited Aisling, asking what adventure they're going on now. Exiting the building will reveal the biome to be an expansive cherry grove, with rooted dirt paths leading up to the library.
At the top of the hill is the library, as promised, and Isabel is another ancestor of Professor Stone, as expected. They will explain that people in the village have neglected to return their books, and asks the player to return all six and place them inside chiseled bookshelves. The first book, Fabled Firebreathers will be found right across from the player's presumed house, recognizable by its carrot farm. The second, Flight of the Dragon, will be very close by, not in a house but under a light blue wool tent at what appears to be a picnic, while the third is even closer and inside the house behind the player's, the book labeled as Enchanted Wings. Entering out the back, the player can head into another nearby house, identifiable by a shed with a spruce door and moss block floor, where they will find the fourth book, Eyes of Darkness. while inside, the player may also notice a stairway, which leads to both the fifth book, a second copy of Enchanted Wings, and a golden pot on top of it. Near another carrot farm, the player will find two different books, if one is clicked the other will disappear, Aisling saying these are enough.

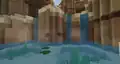
Returning up the hill, the player will be able to return the books. However, instead of reporting back to Isabel, they will discover a secret passageway opening up behind a shrine of cherry saplings. Inside, the player will find a lush cave filled with cave vines and granite, Aisling asking why the village would need such a "secret entrance." Exiting the cave, the player will find an abandoned shack made out of bamboo, with an iron axe on two tree trunks outside and a jungle table inside. Advancing forward, the player will find a building labeled the River Outpost, where they will be instructed to build a bamboo raft. Conveniently, the bamboo can be chopped down by the axes in the hut, as Aisling will be quick to point out.
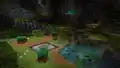
Now on the raft, the player can advance down a vast river. There players will have to dodge stone pillars, bounce off slime blocks, dodge lily pads, and tumble down waterfalls. While rowing, Aisling will overhear an ominous sound. The player will progressively approach a collection of houses, as Aisling picks up more and more growls, before entering into another cave that becomes increasingly dark. At the end of the tunnel, the player will be attacked by an unseen dragon, only visible by its eyes, waking up before it can do anything.
Ancient Caves
Once again waking up at the digsite, the player will once again be instructed to talk to Professor Stone. This time, she will be standing in front of a large fossil, and explain the player "looked like [they] were getting some much needed rest, so we didn't to wake [them]!" She will then establish they'd dug up more potential relics, trusting the player to excavate them due to their previous streak of success. The player will then be led by a marker into the temple, returning to the archeology room, which is now considerably more cleared out. Brushing the sand will reveal the skull sherd, which Stone is amazed by upon being shown. Once again, the player will be allowed to sleep, and proceed to wake up in the past. This time, however, things will be quite different.
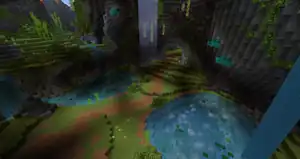
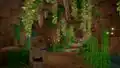
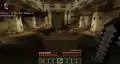
The player will awaken not in a house, but inside of what appears to be a cave, with no immediate signs of civilization. Following a path made out brown concrete powder and coarse dirt, the player will discover a patch of pitcher plants, leading them to find Aisling and many sniffers living in the cave. Walking up to the end of the room, the player will find a locked door marked with a torchflower, Aisling concluding it must be the key to unlocking it. Upon receiving torchflower seeds from any of the three sniffers, the player will then need to find a way to grow the seeds, which is resolved by looking for piles of bones and converting them into bonemeal.

As the ancient door unlocks, the player will be brought into another cave, this time centered around platforming and following several soul torches. Players will need to cross several platforms with moss on top, before traversing a collection of cobbled deepslate stairs and jumping over a pit; if they miss this jump, they can climb back up using two separate pairs of vines, one leading to a platform between the main path and a golden pot. At the top of this route, Aisling will instruct the player to climb many more vines to reach a higher level, initially consisting of several tunnels of moss floors before coming to another, more forgiving pit. From there the player will leap across more, smaller platforms, before reaching two branching paths. To the right, will be another ancient door, again marked by a torchflower, and to the left another deepslate staircase that leads to another golden pot and two spruce support beams the player can jump over. Finally, the player will discover a lever made out of tuff, which will unlock the door. Upon opening it, Aisling will praise the player's dreams as "some of the most exciting I've joined."
Pressing forward, the player will find yet another cave, with another door at the end. However, this time players might notice a cave painting of a skeleton by a spring, marked with the number four. At the end of the area will be a pedestal housing a button, surrounded by note blocks adorned with piglin and ender dragon mob heads, behind those more cave paintings. One is of the ender dragon, and another a creeper, marked 5 and 3 respectively. Players may deduce that they need to find the remaining mob heads and place them on the note blocks, the closest, the creeper head, being in a chest on top of a large rock made of smooth basalt and gray terracotta. After that, the player can climb a slightly larger hill to find the zombie head, identifiable by a grove of torchflowers, a small waterfall. and mural of a wither skeleton written with 6. A painting of a piglin, second, will lead the player to the skeleton skull, and right behind the note blocks will be the wither skeleton skull.

With all six mob heads placed on the note blocks, the player can then press the deepslate button, causing all the mobs' respective noises and opening the door. The final reward of the dream is a treasure vault, filled with gold, amethyst, and diamonds. This time, simply approaching the treasure will return the player to the present, without the pretense of being awoken. They are simply told to return to Stone.
Professor Stone will now be beside the player's tent, informing them that today is the final day of their contract. As such, she's hoping the player will help find the final sherd needed to reconstruct a pot. Heading into the temple one last time, the player will claim the archer sherd. Bringing the sherd to Stone, she will excitedly begin restoring a lost decorated pot, giving the player the opportunity to piece them together. Using the crafting tables from the beginning of the map, the player will be allowed to make any combination of the four sherds they desire. Bringing it to her will lead to one final speech.
Upon finishing the conversation with her, the map will be concluded, with the text "the next adventure... will be yours to tell." As the player is warped back to the info room, they will gain the ability to revisit any of the previous "dream worlds," as well as return to the info room once more using an ender pearl. Furthermore, the My Discoveries display will be filled with various trinkets of the adventure, including a figure of a sniffer, a golden pot, the dune armor trim, a 3D brush, a figure of a bamboo raft, and a cherry sapling in a smaller flower pot.
Golden Pots
Hidden throughout the map are various golden pots. They are never acknowledged by characters in the narrative, and can often be found in incredibly obscure locations.
- Found in a tent in front of the player's, recognizable by a large assortment of barrels. It uses the blade sherd.
- Found behind the well the player finds the arms up sherd in. It uses the shelter sherd.
- Found inside the desert temple, through the top room, best noticeable at night. It uses the mourner sherd.
- Found hiding behind several cacti, best noticeable at night. It uses the friend sherd.
- Found inside a cave, identifiable by its use of hanging roots. It uses the howl sherd.
- Found at the top of a red sandstone building in the Desert Bazaar, immediately outside the blacksmith's shop. It uses an angler sherd.
- Found at the top of a three-story sandstone building in the Desert Bazaar, identifiable by a large collection of barrels at the roof with a shelter made of unlit campfires below. It uses the burn sherd.
- Found inside a green tent, while trekking to the desert temple. It uses the heart sherd.
- Found underneath the bridge into the first puzzle chamber in the desert temple, accessed by swimming. It uses the explorer sherd.
- Found on top of the door in the desert temple, on the path to the purple key. It uses the arms up sherd.
- Found in a beetroot farm near the path to the library. It uses the plenty sherd.
- Found on the second floor of a building close to the player's in the cherry grove, on top of a book. It uses the heartbreak sherd.
- Found near a bench in a rose bush garden across the lake in the cherry grove, identifiable by a gate. It uses the sheaf sherd.
- Found in the river section of the cherry grove, floating above the water and only reachable using the slime blocks. It uses the danger sherd.
- Found in a hidden cave area of the river, identifiable by cave vines and packed ice at the end. It uses the archer sherd.
- Found across from the path in the third ancient cave, clear as day. It uses the brewer sherd.
- Found upon reaching the vine section of the third ancient cave, below and reachable from a platform with two torchflowers. It uses the snort sherd.
- Found branching from the forgiving pit, identifiable from a narrow cliff. It uses the miner sherd.
- Found above the snort sherd, near two ancient trees. It uses the prize sherd.
- Found on the path to the lever in the ancient cave. It uses the skull sherd.
Sounds
Quotes
External
| “ |
|
„ |
| — Minecraft Marketplace description |
Internal
| “ |
|
„ |
| — Professor Stone |
| “ |
|
„ |
| — Isabella Stone |
| “ |
|
„ |
| — Librarian Isabel |
| “ |
|
„ |
| — Aisling |
| “ |
|
„ |
| — Professor Stone |
Videos
History
| Bedrock Edition | |||||||
|---|---|---|---|---|---|---|---|
| June 19, 2023 | Timeless Trails is released on the Marketplace. | ||||||
Gallery
Official artwork
-
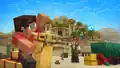 Key art without text.
Promotional images

Screenshots
-

-
 Meeting Professor Stone.
 -

-
 Crafting a brush.
 -
 Digging up suspicious sand.
 -

-
 Waking up in the Desert Bazaar.
 -
 Meeting Aisling.
 -
 Crafting a hanging sign.
 -
 Hot spring featured in the map.
 -
 An ancient NPC appearing in a curious location.
 -
 Approaching a large gate.
 -
-
-
 Somehow bringing a camel into the temple.
 -
-
 Silverfish as they appear in the map.
 -
 An out of bounds area.
 -
 Two husks as they appear in the map.
 -
-
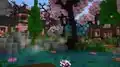
 Waking up in the Cherry Grove.
 -
-
 Approaching the library in the Cherry Grove.
 -

-

-
 Meeting Librarian Isabel.
 -

-
 A mysterious creature in the cherry grove.
 -
 A better look at the creature.
 -
 The era sniffers hail from.
 -
 A lever made out of tuff.
 -
 A cave painting of a skeleton.
 -

-

-
 Trophies at the end, once the player has returned to the info room.
 -
 Ditto.
See also
- Sonic the Hedgehog Skin Pack, another Marketplace project of The Hive
- Trails & Tales Event, an event server developed by The Hive and released around the same time
- The Traveling Trader, a map with a similar premise used to promote Village & Pillage
External links
| |||||||||||||||
| |||||||||||||||
| |||||||||||||||
| |||||||||||||||
| |||||||||||||||
| |||||||||||||||
| |||||||||||||||