Legends:Journal


The Journal is a tool that can be accessed within Minecraft Legends. It contains information about things from the game. The Songbook is part of the journal that contains songs to command allays to gather and build.
List of entries
Journal
Resources
| Icon | Name | Unlocked by | Entry |
|---|---|---|---|

|
Wood | Collecting wood | "Allays use wood to build structures like walls, stairs and towers. It's also necessary to spawn plank golems. It would be silly to explain where it comes from, right?" |

|
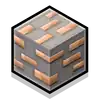
Stone | Collecting stone | "Stone is required to build moderate and advanced structures like stronger village fortifications. You can find stone pillars and deposits in most biomes." |
|
Iron | Collecting iron | "Iron is a bit rarer than stone but shouldn't be too difficult to find. It is used by the allays to build structures like the protector tower and the masonry as well as some allies." |

|
Coal | Collecting coal | "Coal is used to spawn creepers and build certain advanced structures like the kaboomery. It's fairly rare, but you can find coal deposits in most biomes." |

|
Gold | Collecting gold | "Gold is obtained from destroying piglin bases and some of their structures. It is required to build wellhouses. Taking the piglins' gold after defeating them in battle is definitely adding insult to injury." |

|
Diamond | Collecting diamond | "Diamond can rarely be found in small deposits around the Overworld as well as collected in village chests. It is used by the allays to build freeze traps and the spyglass overlook." |

|
Redstone | Collecting redstone | "Redstone is a rare resource found in small deposits around the Overworld and collected in village chests. It's required to build the redstone launcher and the battle drums. Don't worry. the allays will do all the redstone engineering for you." |

|
Piglin Key | Collecting a piglin key | "These keys open piglin chests which have been locked to prevent their valuable contents from being stolen. Though any piglin may be found carrying them, bosses and tougher units, especially those found roaming the world, are the best place to look. Their crude craftsmanship causes them to break after use, so you'll need to find a new one for each chest you open." |

|
Lapis | Collecting lapis | "Lapis is what feeds the Flames of Creation, allowing you to spawn golems and mobs. It is obtained from roaming piglins and may also be stocked in village chests. Lapis is the main reason why you should give every piglin you see a good thwacking. Not that you needed more reasons." |

|
Prismarine | Collecting primsarine | "Prismarine can only be obtained from destroying piglin structures and can be used to build upgrade structures at the Well of Fate." |

|
Blast Tower Core | Collecting a blast tower core | "Created by the hosts, this core contains the essence of the Blast Tower, enabling its unique properties. Upon collecting a tower found in the world or deconstructing one you've placed, you will receive its core. The more you collected, the more you can build. If a tower is destroyed, the core will be lost." |

|
Frost Tower Core | Collecting a frost tower core | "Created by the hosts, this core contains the essence of the Frost Tower, enabling its unique properties. Upon collecting a tower found in the world or deconstructing one you've placed, you will receive its core. The more you collected, the more you can build. If a tower is destroyed, the core will be lost." |

|
Stun Tower Core | Collecting a stun tower core | "Created by the hosts, this core contains the essence of the Stun Tower, enabling its unique properties. Upon collecting a tower found in the world or deconstructing one you've placed, you will receive its core. The more you collected, the more you can build. If a tower is destroyed, the core will be lost." |
Tools
| Icon | Name | Unlocked by | Entry |
|---|---|---|---|

|
Map | Automatically unlocked | "Not only does the map show the Overworld and its settlements, but it will also reveal the locations of piglin bases and piglin movements. And you didn't even have to make it yourself!" |

|
Legendary Lute | Automatically unlocked | "Allays love music. The Lute allows you to play different melodies to ask them to do various tasks, like gathering or building." |

|
Banner of Courage | Automatically unlocked | "The Banner of Courage draws its power from whoever wields it. In the right hands, it is a symbol of unity and hope." |

|
Flames of Creation | Automatically unlocked | "The Flames of Creation signify the unity between you and your allies and are used to call upon them to fight by your side." |

|
Allay Storage | Automatically unlocked | "Not much is known about where the allays keep what they gather for you, but they can definitely storage a great amount of resources." |
Piglins
| Icon | Name | Unlocked by | Entry |
|---|---|---|---|

|
Horde of the Hunt | Encountering a Horde of the Hunt outpost | "The Horde of the Hunt has aggressive, fast moving armies that favor direct attacks. You will need to push back hard to stop their advance." |
|
Horde of the Spore | Encountering a Horde of the Spore outpost | "The Horde of the Spore's chaotic fighters will keep you on your toes. It won't be easy getting to their portals – and there will be many surprises until the battle is won." |

|
Horde of the Bastion | Encountering a Horde of the Bastion outpost | "The Horde of the Bastion are elite defenders renowned for their strength and barbarity. Getting past their defenses is a battle in itself." |

|
The Great Hog | Defeating The Great Hog | "Legends say that the Great Hog was born from lava, spat out by the Nether itself to feast on the bones of those who dare to show any resistance." |
|
The Beast | Defeating The Beast | "The Beast's ferocious speed is only matched by their petulance and pride. But more than anything, this piglin lives for the hunt." |

|
The Devourer | Defeating The Devourer | "The Devourer rules over the Horde of the Spore from their wretched royal soup-bath. They are feared for their ferocity and their insatiable hunger to consume anything in sight - runt, mob, and villager alike." |
|
The Unbreakable | Defeating The Unbreakable | "Like any other Piglin, the Unbreakable is a power hungry and arrogant opportunist who wouldn't hesitate to take the throne from the Great Hog. However, no other Piglin is as cutthroat and relentless in their pursuit of the highest rank." |

|
Piglin Invasion Horn | "The piglin invasion horn signals troop movement, so they can give away the piglins' plans, especially at night." | |

|
Piglin Chest | Opening a piglin chest | "Piglin chests are filled with resources they have taken from the overworld. You'll need to find a key to open them..." |

|
Blaze Runt | Defeating a blaze runt | "Blaze Runts are better trained than mace Runts. They wield blaze rods that give them a greater range of attack. They would never win an archery contest against the skeletons, though." |

|
Mace Runt | Defeating a mace runt | "Mace Runts are the weakest piglins, but they make up for this with their numbers and their ferocious determination to rise up the ranks. Their maces are only dangerous in close combat, and they are susceptible to ranged attacks. They're pretty cute when they're not pillaging or setting things on fire. Unfortunately, most of the time they're pillaging and setting things on fire." |

|
Brute | Defeating a brute | "Brute's are the Horde of the Bastion's elite units. They pack a devastatingly fast whirlwind attack in close quarters that will smash your units to bits in an instant." |

|
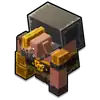
Piglin Builder | Defeating a piglin builder | "These piglins are crude but effective builders responsible for every piglin structure that pollutes the Overworld." |
|
Sporeback | Defeating a sporeback | "Sporebacks are the Horde of the Spore's elite units. The mushroom grenades they throw are designed to root enemies to the ground and render them defenseless against other piglins" |

|
Spore Medic | Defeating a spore medic | "Spore Medics spread netherspores that make the Overworld air breathable for the piglins and heal wounded piglin units." |

|
Seeker | Defeating a seeker | "The seekers' explosive mushrooms cause devastating damage to anyone within their range - including themselves. There's not much you can do once a seeker is ready to explode. But you can destroy the barracks to prevent more from spawning." |

|
Pigmadillo | Defeating a pigmadillo | "Pigmadillos are the Horde of the Hunt's elite units. They are rolling armored wrecking balls that bowl through their enemies with devastating effectiveness. They also tend to smash through wooden walls like a shovel through sand." |

|
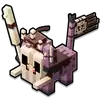
Warboar | Defeating a warboar | "Warboars are tough and quick on their hooves, knocking down enemies as they speed through the battle field. What came first, the warboar or the piglin? Best not to dwell on that." |
|
Lava Launcher | Defeating a lava launcher | "The lava launcher is a slow and lumbering beast that delivers a devastating ranged attack. But that doesn't mean you should get too close to it." |

|
Portal Guard | Defeating a portal guard | "Portal guards are incredibly tough and protective of their namesake. From a distance they're not much of a threat, but their punishing chain-mace arm is always ready to strike at close range." |

|
Clanger | Defeating a clanger | "These piglins stand out from the horde with their tall stature and their enthusiasm for playing their crude instruments. The powerful sounds they emit at close range are strong enough to sun nearby units for a long duration. Disruptors don't deal any damage on their own, so they're dependent on the rest of their piglin buddies to do the clean up work. Disruptors can be countered by direct player attacks or by attacking them being their range." |

|
Nether Spreader | Destroying a nether spreader | "Nether spreaders poison the ground with corrupting red netherrack that prevents you from building structures. Once a Nether spreader is destroyed, the ground that it has sourced can be de-nethered and reclaimed." |

|
Piglin Launcher | Destroying a piglin launcher | "The piglin launcher flings barrels with piglins onto the battlefield. The size of the base that the piglin launchers are in determines which piglins go for a brief ride." |

|
Spike Tower | Destroying a spike tower | "This menacing tower fires huge spiked projectiles from very long distances. Shortly after impacting its target, it splits into several smaller bombs, making it effective against both units and structures. It can be countered by protector towers or by destroying it before it can detonate." |

|
Armored Tower | Destroying an armored tower | "This powerful tower fires a spread of molten-hot blaze rods that damage and ignite anything they hit. The only way to take down an armored tower is to send in allies when it fires and the tower shield drops." |

|
Spore Tower | Destroying a spore tower | "Reaching and destroying the spore tower is nearly impossible for golems as they don't have the strength to fight off the knock-back effects. These towers must be dealt with by more resolute allies." |

|
Blaze Tower | Destroying a blaze rod tower | "The blaze rod tower is a medium-range heavy offense structure that must be dealt with from a safe distance unless you don't mind being a little tiny fire" |

|
Piglin Pit | Destroying a piglin pit | "Pits deploy piglin units. Destroy them quickly to avoid being overwhelmed. You don't have to look too closely to tell that these pits are cobbled together by piglin builders on the battlefield." |

|
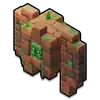
Terror Horn | Destroying a terror horn | "Like the Nether spreaders, terror horns claim territory for the piglins by poisoning the ground with netherrack, but faster." |

|
Siegeworks | Destroying a siegeworks | "Siegeworks increase the range of piglin towers. It's a fascinating technology - too bad it must be destroyed." |
|
Patcher | Destroying a patcher | "The patcher repairs piglin base structures. Any structure that is being repaired will be harder to destroy, so it might be a good idea to get rid of the patcher first." |
Overworld
| Icon | Name | Unlocked by | Entry |
|---|---|---|---|

|
Well of Fate | Automatically unlocked | "The Well of Fate is the Hero's first respawn and fast travel point and the building site for improvement structures. This ancient spring feeds every village fountain, sustaining life across the overworld." |

|
Knowledge | Automatically unlocked | "Resident tinkerer Knowledge is the creator of the three powerful tools gifted to the Hero." |

|
Action | Automatically unlocked | "Action is the youngest at heart of the three Hosts, so they're often more quick to emotion." |

|
Foresight | Automatically unlocked | "The Host of Foresight can see many possible turns of events - but can't say what's to come with certainty." |

|
Allay | Automatically unlocked | "Blue allays collect resources; yellow allays build structures. You can build an improvement to have more allays by your side. Remember - the allays are friends, not devices." |

|
Horse | Automatically unlocked | "Horses are sturdy sidekicks that can sprint indefinitely. It's no wonder horses are many adventurer's first choice - they're fast, they're loyal and they snort when they're happy." |
|
Plank Golem | Encountering a source of Wood | "Plank golems launch powerful ranged attack against piglin units but are quite vulnerable to direct hits. Some say plank golem cuddles are totally worth the splinters." |

|
Cobblestone Golem | Encountering a source of Stone | "Cobblestone golems are hardy units that can take down structures easily in large numbers. It turns out that the humble cobblestone has a mighty history." |

|
Allay Chest | Opening an allay chest | "Allay chests contain rare resources like wood, iron, coal, redstone and diamond. When the piglins arrived, the allays harvested the Overworld's resources to safely store them in these chests that only they can open. Not that the piglins haven't tried." |

|
Grindstone Golem | Building Iron Improvement | "Grindstone golems can break through large groups of low-rank piglins." |

|
Mossy Golem | Building Iron Improvement | "Mossy golems use the healing waters of the Well of Fate to heal the Hero and their allies. There's nothing like splashing around with a mossy golem on a warm day." |

|
Creeper | Freeing them from their Homestead | "Native to the badlands, the creepers deal devastating explosive damage to piglin structures. When was the last time to hear sSssSssssSssssss? It's a welcome yet peculiar feeling." |

|
Zombie | Freeing them from their Homestead | "Despite their horticultural leanings, zombies will bravely fight in the frontlines to save their allies from heavier blows. It's a good thing that the piglins haven't caught onto why zombies wear hats." |

|
Skeleton | Freeing them from their Homestead | "The tundra-native skeletons are excellent archers that are best suited to the far edges of the battlefield. Why do skeletons wear armor? Some say they have felt a war coming for a long time. Others say it's the result of a particularly rattling blow to the head. One is more likely than the other." |

|
Regal Tiger | Mounting Regal Tiger | "Stylish without even trying, regal tigers are the fastest mount in the Overworld. The only felines you can ride safely." |

|
Brilliant Beetle | Mounting Brilliant Beetle | "Brilliant beetles can climb up walls and cliffs. If you can get over the extra legs, brilliant beetles are an excellent companion if you want to reach the higher points of the Overworld." |

|
Big Beak | Mounting Big Beak | "Big beaks can glide over long distances. The higher you start, the further you'll glide. They are flightless birds, maybe because of their undersized wings or oversized beaks. Probably both." |

|
Village | Encountering a village(s) | "Villages are important ally settlements and fast travel points that the piglins target at night. As long as you keep them safe, villagers will collect resources for you in the fountain chest. Fortify them with structures like walls and towers to make them easier to defend. Empty village chest? The residents might be too busy dodging piglin maces and blaze arrows." |

|
Warrior | Defeating all the piglin hordes and their bosses. | "The Warriors are your most powerful ally against the piglins. For them, defending the Overworld came at a heavy cost." |

|
Witch | Freeing a witch hut village from a piglin attack. | "These powerful alchemists have had enough of the piglins and they're ready to throw their potions into the fight. Earn their trust (and their spawners) by defending their village homes from a nighttime invasion. How do the witches throw potions with their arms crossed? Only they know what tricks they have up their sleeves." |

|
First of Stone | Rebuilding First of Stone | "The First of Stone uses their great strength to fling boulders at piglins. To assemble the Firsts, you must build a special improvement at the Well of Fate and collect the required resources. When a First is defeated, they will meet you at the nearest village fountain or beacon." |

|
First of Diorite | Rebuilding First of Diorite | "The First of Diorite spawns other golems to fight by your side. To assemble the Firsts, you must build a special improvement at the Well of Fate and collect the required resources. When a First is defeated, they will meet you at the nearest village fountain or beacon." |
|
First of Brick | Rebuilding First of Brick | "The First of Brick's shields will protect your allies in battle. To assemble the Firsts, you must build a special improvement at the Well of Fate and collect the required resources. When a First is defeated, they will meet you at the nearest village fountain or beacon." |
|
First of Oak | Rebuilding First of Oak | "The First of Oak's powerful cannon can launch booming ranged attacks against the piglins. To assemble the Firsts, you must build a special improvement at the Well of Fate and collect the required resources. When a First is defeated, they will meet you at the nearest village fountain or beacon." |

|
Blast Tower | Collect the Blast Tower | "The blast tower zaps piglins within its range, stopping them in their tracks and dealing significant damage. To collect these mysterious towers, you must build a special improvement. Knowledge built the Blast Tower a long time ago to combat forest fires but never found a use for all that energy... until now." |

|
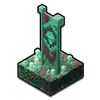
Stun Tower | Collect the Stun Tower | "When rung, the stun tower's bell emits a sound that stops the piglins in their tracks. To collect these mysterious towers, you must build a special improvement. Those chimes sure sound lovely... Makes you wonder what their original purpose was." |

|
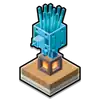
Frost Tower | Collect the Frost Tower | "The frost tower freezes piglins in their tracks - at least for some time. To collect these mysterious towers, you must build a special improvement. Knowledge can't remember why they created this tower but they definitely did not have freezing piglins in mind. A very welcome surprise indeed." |

|
Speed Wheat | Interacting with speed wheat | "Speed wheat makes you go fast. Don't overthink it." |

|
Bouncecaps | Interacting with bouncecaps | "Bouncecaps let you jump higher, allowing you to reach the treetops and scale mountains easier. Just make sure their effect doesn't wear down by the time you land." |

|
Regeneration Stone | Interacting with a regeneration stone | "Regeneration stones have a restorative effect on beings that come near them. It's unclear how all the regeneration stones ended up in the Overworld but it might have something to do with the waters of the Well of Fate." |

|
Redthorn | Interacting with redthorn | "Wonder what happens if you touch redthorn? Ouch." |

|
Mud Puddle | Interacting with a mud puddle | "Running through mud puddles will slow you down. But the pigs look so cute rolling around in them." |

|
Poison Vines | Interacting with poison vines | "As their name suggests, these plants will poison you if you touch them, making you take damage for a short period of time. Looking for any redeeming qualities or uses? They have none." |

|
Geyser | Interacting with a geyser | "When exploring the tundra, watch out for geysers - they will send you flying high enough to make the landing... unpleasant. Might be fun with the right mount by your side, though." |

|
Tar Pit | Interacting with a tar pit | "The bubbling tar pits in the badlands will slow you down if you run into them." |
Songbook
Resourcing Melodies
| Icon | Name | Unlocked by | Entry |
|---|---|---|---|
|
|
Gather Wood | Unlocked in the Well of Fate tutorial | "Gather wood from the chosen area. Wood is essential for many structures. Make sure you keep your allay storage filled with wood. To hold more wood, build one or more Improvement: Allay Storage at the Well of Fate." |
|
|
Gather Stone | Unlocked in the Well of Fate tutorial | "Gather Stone from the chosen area. Stone is essential for many structures. Make sure you keep your allay storage filled with stone. To hold more stone, build one or more Improvement: Allay Storage at the Well of Fate." |
|
|
Gather Iron | Build an Improvement: Gather Iron | "Gather iron from the chosen area. Iron unlocks advanced structures and can be used to spawn Grindstone Golems and Mossy Golems. Iron deposits can be found in the fatelands, forest, and dry savannah. |
|
|
Gather Coal | Build an Improvement: Gather Coal | "Gather coal from the chosen area. Coal unlocks advanced structures and can be ussed to spawn Creepers. Coal deposits can be found in the meadow and badlands." |
|
|
Gather Redstone | Build an Improvement: Gather Redstone | "Gather redstone from the chosen area. Redstone unlocks advanced structures and can be used to spawn zombies. Redstone deposits can be found in the swamp and jungle." |
|
|
Gather Diamond | Build an Improvement: Gather Diamond | "Gather diamond from the chosen area. Diamond unlocks advanced structures and can be used to spawn skeletons. Diamond deposits can be found in the tundra and jagged peaks." |

|
Cure Netherrack | Build an Improvement: Cure Netherrack | "Converts netherrack in a chosen area to a safe block that you can build structures on. Curing netherrack is key towards fighting back the piglin threat. Use it to push into their bases and build structures at their gates." |

|
Gather All | Unlock all gather commands (except cure netherrack) | "Gathers all rescources from a small chosen area. Excellent for gathering resource rich areas but not as efficient when trying to gather a specific resource." |
Combat Melodies
| Icon | Name | Entry |
|---|---|---|

|
Cobblestone Golem Spawner | "Spawns cobblestone golems
Strong vs structures |

|
Creeper Spawner | "Spawns creepers
Strong vs structures, mace runts and lava launchers |

|
First of Brick Spawner | "Spawns the First of Brick, powerful golems that produce a shield for your other mobs, protecting them from ranged attacks. First of Brick Spawner can only by [sic] built in your base zone. To unlock the First of Brick, ensure you have Improvement: Build the Firsts built. Each First of Brick that is spawned requires Flames of Creation, iron and lapis." |

|
First of Diorite Spawner | "Spawns the First of Diorite, powerful golems that spawn other small golems in battle. First of Diorite Spawner can only by [sic] built in your base zone. To unlock the First of Diorite, ensure you have Improvement: Build the Firsts built. Each First of Diorite that is spawned requires Flames of Creation, coal and lapis." |

|
First of Oak Spawner | "Spawns the First of Oak, powerful golems that fire powerful arrow attacks from a long range. First of Oak Spawner can only by [sic] built in your base zone. To unlock the First of Oak, ensure you have Improvement: Build the Firsts built. Each First of Oak that is spawned requires Flames of Creation, diamond and lapis." |

|
First of Stone Spawner | "Spawns the First of Stone, powerful golems that attack with a powerful ranged boulder, which can heavily damage structures. First of Stone Spawner can only by [sic] built in your base zone. To unlock the First of Stone, ensure you have Improvement: Build the Firsts built. Each First of Stone that is spawned requires Flames of Creation, redstone and lapis." |

|
Grindstone Golem Spawner | "Spawns grindstone golems
Stuns piglins |

|
Mossy Golem Spawner | "Spawns mossy golems
Heals friendly mobs |
|
Plank Golem Spawner | "Spawns Plank Golems, ranged mobs that shoot rapidly at close range. Interact with the structure to spawn them, each mob requires the following resource costs: - 1 wood |

|
Skeleton Spawner | "Spawns skeletons Strong vs melee units, seekers and portal guards |

|
Zombie Spawner | "Spawns zombies Strong vs mace runts, spore medics and warboars |
Player Building Melodies
| Icon | Name | Entry |
|---|---|---|

|
Ramp | "Creates stairs or bridges. Use them to overcome obstacles. Can be built on netherrack. You need to enter Placement Preview and pick a starting point and an ending point to build ramps as stairs or a bridge. The larger the ramp, the larger the cost." |

|
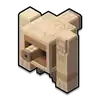
Gate | "Gates will open for you but not for enemies. Use them with walls to build effective defence. Pair a gate with walls in your base zone, it will help defend your base against enemies by allowing you to leave but stops enemies from pushing in." |
|
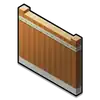
Extendable Wall | "Creates a defensible perimeter that protects structures from enemies. You need to enter Placement Preview and pick a starting point and an ending point to build a wall. The larger the wall, the larger the cost. Walls are destroyed in segments, make sure to patch them." |
|
Ice Trap | "Freezes enemies who approach but deals no damage. Any enemy who approaches this structure will be frozen in place for a short period of time. The ice trap will continue to freeze enemies until something else eliminates them." |

|
Scatter Tower | "Short-range tower that shoots a volley of arrows at enemies that come within range. The tower can be upgraded by other structures. Scatter towers can be upgraded by placing the following village structures nearby: kaboomery, spyglass overlook and battle drum." |

|
Wellhouse | "Resilient structure that serves as both as a respawn point and a location that can be fast travelled to. A base of operations in the fight against the piglins. Its connection to the Well of Fate enables its unique capabilities. Unfortunately, this also makes it a target for piglin attacks at night." |

|
Redstone Launcher | "Launches explosives at targeted area. Requires manual targeting and firing. Interact with the launcher and use your camera controls to move your target. Confirm your target to begin firing. The redstone launcher needs to be interacted with again after reloading." |
|
Protector Tower | "Destroys large enemy projectiles in a wide area surrounding the protector tower. Requires iron in order to build. Protector towers can only be upgraded by the masonry." |

|
Carpenter Hut | "Repairs nearby structures within its zone. Healing effects cannot stack with additional carpenter huts but can allow you to heal structures in a wider area. The carpenter hut affects most structures within the zone it creates. These structures will slowly repair any damage taken over time. If a building is destroyed, the carpenter hut cannot repair it." |

|
Arrow Tower | "Shoots arrows at enemies that come within range. This tower can be upgraded by other structures. Arrow towers can be upgraded by: Kaboomery, Spyglass Overlook and Battle Drum." |

|
Lapis Flag | "Build in your base zone to gain more lapis over time. Building more lapis flags will increase the amount of lapis from your base. Lapis flags allow you to improve your constant drip of lapis to your team. The lapis flag can be destroyed, so make sure to protect it." |

|
Spyglass Overlook | "Increases the firing range of nearby arrow towers, scatter towers and redstone launchers. For a structure to be affected, it must be inside of the zone the spyglass overlook creates. If the spyglass overlook is destroyed, affected towers lose their range increase." |
|
Battle Drum | "Increases the firing speed of nearby arrow towers, scatter towers, redstone launchers and traps. Requires redstone in order to build. For a structure to be affected, it must be inside of the zone the battle drum creates. If the battle drum is destroyed, affected structures lose their rate of fire increase." |

|
Kaboomery | "Adds an explosive damage from projectiles shot from the arrow tower, scatter tower and redstone launcher. Requires coal in order to build. For a structure to be affected, it must be inside of the zone the Kaboomery creates. If the Kaboomery is destroyed, affected structures lose their explosive shot." |
|
Masonry | "Turns basic wood structures into stone blocks, which significantly increases their durability. Requires iron in order to build. These structures will change visually over time to indicate the masonry is strengthening them. Strengthens walls, towers and gates." |
|
|
Blast Tower | "Fires projectiles that will knock back enemies on impact. Cannot be buffed by other structures. Ancient host tower. Attacks nearby enemies and sends them flying. Lost permanently if destroyed." |
|
|
Stun Tower | "Emits a sonic attack that will stun any enemy within range. Cannot damage enemies. Cannot be buffed by other structures. Ancient host tower. Rings loudly when enemies approach and stuns them in place. Does not damage enemies, so it needs support." |
|
|
Frost Tower | "Fires frost cubes that slows enemies over time. Cannot be buffed by other structures. Requires the Improvement: Build Power Towers structure. Ancient host tower. Attacks nearby enemies with a slowing ice cube that that damages enemies over time with intense cold. Make sure to protect the Frost Tower with supporting structures." |
Improvements And Host Melodies
| Icon | Name | Entry |
|---|---|---|

|
Improvement Hub | "Building an Improvement Hub enables the building of improvements with prismarine which can be obtained by destroying piglin structures. Must be built in your Base's zone. Improvement Hubs create a zone that allows improvements to be built. Building improvements allows you to strengthen your mobs and resourcing capabilities." |

|
Improvement Build the Firsts | "Allows your team to build the First spawners which are powerful Mobs with unique abilities. Requires an Improvement Hub structure. You cannot build First spawners without this upgrade. Firsts will require lapis, plus either iron, redstone, diamond or coal when you spawn them." |

|
Improvement Abundant Allays | "Improves your lute to direct more allays at one time. Gives +1 build allay & +1 gather allay to each player. Requires an Improvement Hub structure. Allays are required to build structures and gather resources. This upgrade increases both of your gather allays & build allays which allows you to construct and resource more quickly." |

|
Improvement Banner | "Increases your lure to let you rally more mobs with you at a time. Increases the amount of mobs you can lure by +10. Requires an Improvement Hub structure. Improving your rally allows you to command more mobs to follow you. It is essential to pair with the Improvement: Flames of Creation." |

|
Improvement Allay Storage | "Increases the amount of basic resources you can carry at one time. Increases wood, stone, lapis and prismarine. Requires an Improvement Hub structure. The Allay Storage is an essential upgrade that increases your capacity to build structures. Each upgrade allows you to carry: +1000 wood, +1000 stone, +250 lapis and +250 prismarine." |

|
Improvement Flames of Creation | "Increases the amount of Flames of Creation for your team by +20. Teams can only have 3 of these structures built at any given time with a total mob cap of 100. Improves your Lantern of Creation to let you have more Flames. Each mob costs a Flame of Creation to spawn. When a mob dies, its Flame is returned." |

|
Improvement Build Power Towers | "Improves your team to unlock and build powerful host towers. Requires an Improvement Hub structure. You cannot build power towers without this upgrade. Power towers will either require diamond, redstone or coal when you build them." |

|
Improvement Gather Coal | "Unlocks the ability to gather coal and increases the cap by +125 coal with each structure built. Requires an Improvement Hub structure. Improvement: Gather Coal unlocks the following: creepers, scatter tower, kaboomery, stun tower & First of Diorite." |

|
Improvement Gather Diamond | "Unlocks the ability to gather diamond and increases the cap by +125 diamond with each structure built. Requires an Improvement Hub structure. Improvement: Gather Diamond unlocks the following: skeletons, frost tower, First of Oak, & spyglass overlook." |

|
Improvement Gather Redstone | "Unlocks the ability to gather redstone and increases the cap by +125 redstone with each structure built. Requires an Improvement Hub structure. Improvement: Gather Redstone unlocks the following: Redstone launcher, zombie, warrior spawner, blast tower, First of Stone and battle drums." |
History
| Minecraft Legends | |||||||
|---|---|---|---|---|---|---|---|
| 1.17.24827 | Added the journal. | ||||||
| 1.17.35227 | Added a journal entry for the furnace tower. | ||||||
| Updated the spike tower's journal entry. | |||||||
| 1.17.49848 | Updated the armored tower's journal entry to reflect its name change. | ||||||
| 1.18.14350 | Added journal entries for lava coils, witches, witch huts, clangers, air choppers, and fearless frogs. | ||||||
Gallery
-
Icon
-
 The quill icon used for the journal tab
Development Images
-
 Journal UI iteration.
 -
 Ditto.
Issues
Issues for Minecraft Legends relating to "Journal" are no longer maintained on the bug tracker since January 10, 2024.
| Development | |||
|---|---|---|---|
| Gameplay | |||
| Menus | |||
| Books |
| ||
| Soundtracks | |||
| Miscellaneous |
| ||