Considering I have a bunch of files in a directory, I would like to bundle them into an ISO image file. How should I proceed to do that?
Asked
Active
Viewed 5e+01k times
7 Answers
117
Few quick steps:
Boot up Linux.
Go to a terminal screen. You can usually right click on the desktop and choose this option from the drop-down menu.
Either
A. type
dd if=/dev/cdrom of=~/cdrom_image.iso.or
B. type
mkisofs -o /tmp/cd.iso /tmp/directory/to make an ISO from files on your hard drive.
You must have permission to access the drive directly using dd. mount permissions are not necessarily the same as dd permissions!
Also... when creating an ISO file, the device must not be mounted. To unmount the cdrom device, use the umount command as follows:
umount /dev/cdrom
You may also use sudo to ensure you have proper permissions, but this also means you must have sudo access on the system. Check the /etc/sudoers file for information.
Arch Stanton
- 180
florent
- 1,195
74
It's easy to create ISO in terminal as described in other answers but there are some GUI options too, Like Brasero. If you don't already have it, you can install it using:
sudo apt install brasero
How can I create ISO images with Brasero?
Hit the Super key (Windows key) and search for "brasero" and open it.
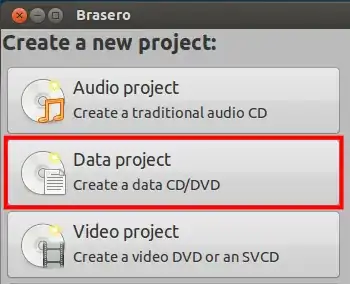
Click on the Data project button.
Click on the green plus button in the upper left corner in the toolbar to start adding files and directories to your image:
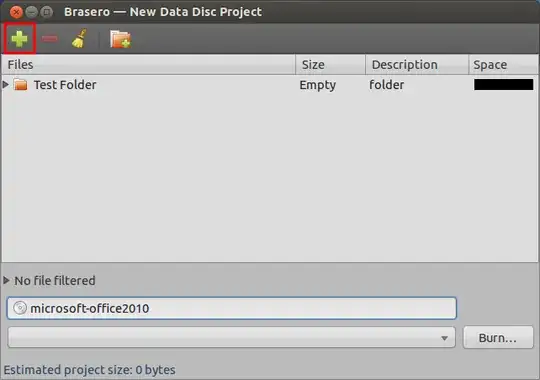
- Enter the name of disc at the bottom to whatever you like.
- Make sure no empty CD/DVD is in your optical drives and click on Burn.
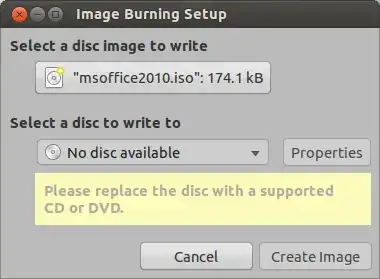
- Brasero will ask you for the location where you want to create ISO image, Give your desired location and click on Create Image. That's it!
If you want to burn that image to disc, Just right click on ISO image you just created and select "Open With Brasero Disc Burner". Select your optical drive and click Create Image.
Basharat Sialvi
- 24,156
37
Try This:
Go to the Terminal
Install genisoimage:
sudo apt install genisoimage
Type:
genisoimage -o ~/backup.iso -V BACKUP -R -J ~/Documents
or, for more useful permissions, change -R to -r:
genisoimage -o ~/backup.iso -V BACKUP -r -J ~/Documents
In this case Ubuntu will generate a file called "backup.iso" with all the contents in the Documents Folder.
Ciro Santilli OurBigBook.com
- 31,312
Emerson Hsieh
- 6,940
19
I actually had to do this just today. A really easy way to do it is in the terminal, so type:
cat [device file of external disk] > ~/newfile.iso
To find the device file of the external disk open up the Unity launcher and search for "System Monitor," then go to "File Systems."
So an example would look like:
cat /dev/scd0 > ~/newfile.iso
Daniel Werner
- 105
mshindal
- 307
16
Actually, there is a very simple answer to this question. I have just created Windows 7 ISO file with no problems. Didn't really liked the Brasero method because it keep throwing pop-up windows. It had some compatibility issues with file names and ISO standard. I believe this method is compatible with Mac OS ISO's as well.
This answer is provided by using Archive Manager, the default archive manager in Ubuntu 14.10.
Open your folder with files you want to include in ISO. Then select view/show hidden files, select all files , right click and choose compress...
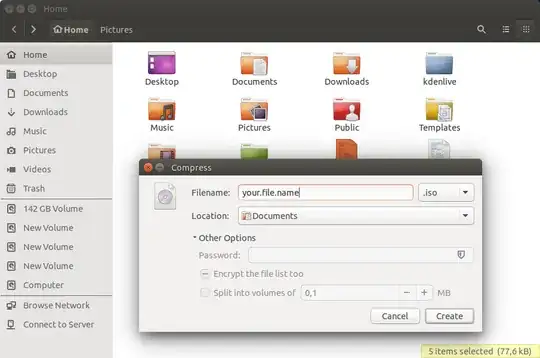
On new window select ISO option, file name and location. That's it!
VRR
- 1,290
4
Making ISO file feature is already there in Ubuntu as VRR said in his answer. To elaborate more read this.
Open Archive Manager.

Open the folder to which you wanted to convert an ISO file.

Copy all the content from the folder to Archive Manager including hidden files.

Click on Create Archive and select .iso as an extension.

karel
- 122,292
- 133
- 301
- 332
Ishan Jawade
- 41
0
Here I would like to add a procedure which combines the use of the command dd and the command gzip to save space in the disk where it is stored the ISO file.
Umount of the device
I suppose to copy the image of an SD card to a file ISO. I suppose the SD card is inserted into a SD card to USB adapter so it is mapped from the kernel into /dev/sda.
First of all execute the unmount of the SD card:
umount /dev/sda
Use of dd combined with gzip
Use the following command:
sudo dd if=/dev/sda status=progress bs=64K | gzip -c > ./sdcard_image.iso.gz
In the previous command is not present the parameter of= for the command dd: the output of the command is sent to the gzip application. In this way the size of the file sdcard_image.iso.gz is smaller than the uncompressed one.
The parameter status=progress gives a feedback of the progress of the copy during the command execution.
Experience of cloning of a large SD card
I have recently used the previous command for the creation of an ISO file of a lubuntu image installed on a SD card of 128 GB. The real size of the distribution is much less than 128 GB so the ISO file compressed has a size much less than 128 GB (in my case the lubuntuSDcard.iso.gz file has a size of 26.5 GB instead 128 GB).
How to write the .gz file to a new device
To write the file sdcard_image.iso.gz to a new SD card by the dd command we have to use it combined with gunzip as showed in the following command:
> gunzip -c sdcard_image.iso.gz | sudo dd status=progress of=/dev/sda
where /dev/sda is a new SD card where we would like to write the ISO file built by the original SD card.
By the following command the output of the command gunzip is sent to dd which write the uncompressed image to the new SD card.
User051209
- 539
- 1
- 7
- 24