1

Part number: INA228 from Texas Instruments
MCU: msp430fr2433

I initially brought a current sensor from Adafruit that used an INA228 chip. After some challenges, I managed to get the I2C communication going and was able to read data from the registers. I cleaned up my code and made a custom board that has 16 of these sensors.

I only soldered one of the INA 228 sensors on my custom board and am trying to see if I can read the registers using the same code.

For some reason, my code works on the Adafruit sensor but not on my custom board. Not sure why. I scoped the I2C lines using a logic analyzer. I have attached the captures to this message and also listed the data being transmitted below. Can anybody please explain what I missed on my custom board here?

Working data stream: Start -> 0x40 Write (slave address) -> ACK -> 0x06 (temp register) -> Stop || Start -> 0x40 Read -> ACK -> 0x0B -> ACK -> 0xC8 -> NAK -> Stop

Here clearly the data from the register is 0x0b, 0xC8. This translates roughly to 23.56°C. This works. No issues (I think).

Not-working data stream: Start -> 0x40 Write -> ACK -> Stop || Start -> 0x40 Read -> ACK -> 0x00 -> ACK -> 0x00 -> NACK -> Stop

|| represents a small pause.

Why is the master not writing 0x06 (register to read) in the custom board case when I am using the same code? Why is the SDA line always low? Is this a hardware or firmware issue?

Not-working logic analyzer capture: enter image description here

Working logic analyzer capture: enter image description here

Circuit: enter image description here

Adafruit sensor: Adafruit sensor

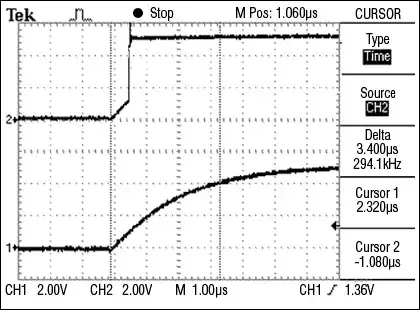
Working scope captures: enter image description here enter image description here

Not working scope captures: enter image description here enter image description here enter image description here

Note: The working board had 4.7 kΩ pull-up resistors. I tried 4.7 kΩ, 24 kΩ, and 2.4 kΩ pull-up resistors, but none of them worked so far. I'm not sure if it's even a pull-up resistor thing.

varun
  • 165
  • 8
  • There is nothing to work on. No code, no hardware schematics, no even mention of the used MCU. Can you provide all details, such as schematics, PCB layout, code, etc, maybe cabling if the chips are not on same PCB, and so on. It might be an issue you can't see with a logic analyzer, but an oscilloscope would reveal it immediately. – Justme Mar 14 '24 at 19:41
  • The code works on the adafruit sensor so I figured its not the code. I am looking for an explanation based on the scope captures. Adafruit and custom board have the same circuit and the MCU had the same code. Works for one bit doesn't for other .. Added circuit and MCU details – varun Mar 14 '24 at 19:43
  • Like I explained, logic analyzer captures are only good when you know the bus has an issue you can see with a logic analyzer, and your bus has an issue that can't be seen with a logic analyzer. Maybe you are simply missing a supply (or ground) wire to the sensor, bad soldering etc. Please provide schematics and PCB layout if you are sure it's not the code. – Justme Mar 14 '24 at 19:49
  • 3
    @varun - Hi, Those images are labeled "scope capture", but they're not - they're logic analyser captures, so they are hiding all the analog detail in the signals. :( From experience, that is the level which needs investigating, in situations like this. Can you capture & provide real scope traces of the working & not working I2C buses, or do you only have a logic analyser and not a scope? – SamGibson Mar 14 '24 at 19:49
  • I checked the board under a scope and they seemed to be connected. I'll scope the I2C lines and get back to you guys. Thanks. – varun Mar 14 '24 at 19:53
  • 1
    @varun : the "scope" mentioned is an oscilloscope, not a microscope. An oscilloscope will show you (analog) voltage as function of time, while the logic analyser will show you only "high or low" as function of time. So the oscilloscope gives far more information (while the logic analyser is simpler to interpret once you are sure the signal is correct at analog level) – Sandro Mar 14 '24 at 19:57
  • I get that .. I meant I already looked under a microscope for solder issues. I'll try to scope I2C lines using an oscilloscope and get back to you all. – varun Mar 14 '24 at 20:05
  • Please post your code, including headers/libraries used, because it looks like your MSP430 isn't even attempting to send the address. – evildemonic Mar 14 '24 at 20:19
  • 1
    @evildemonic But same code works with Adafruit sensor. My guess is, there is a hardware error, maybe in design, and the provided very small piece of schematic does not show that, or it's a PCB design or manufacturing issue, or a soldering issue, or a broken/missing component somewhere else. – Justme Mar 14 '24 at 20:36
  • I added the scope captures, The signal doesn't look the same. It seems a little distorted. I visually can see Master sending 0x06 in the scope capture but the logic analyzer and the slave are not picking it up. When it's not working, the bus is longer relatively speaking as it has 16 slaves instead of just 1. Is it why the signal is distorted? What can be done to avoid this? – varun Mar 14 '24 at 22:13
  • The working example uses 400 kHz clock frequency, but the not working one seams to use around 250 kHz only. I wonder why. – Jens Mar 14 '24 at 23:21
  • @Jens - I suspect this could be "percieved" clock stretching due to slow rising edges – Attie Mar 14 '24 at 23:22
  • @Attie Yes, sounds plausible. The bus master reduces the speed. This needs stronger pullups. – Jens Mar 14 '24 at 23:27
  • @varun Clearly there is some difference in your schematic vs reference product schematic. I can't see either of them so no way to compare differences. However, for some reason the I2C bus voltages go near 4V which makes no sense, as I bet your MCU is not running at 4V. Also the frequency is different and there are weird steps in one of the non-working diagram. Are you perhaps using a long cable, long being anything over few 10 cm? Why is bus going to 4V as it makes no sense? Show your schematics how your sensor connects to MCU and power and how MCU is powered. The current diagram is useless. – Justme Mar 15 '24 at 06:10

1 Answers1

6

It's particularly visible in the last osciloscope trace - you can see that the rising edges are very rounded, and don't actually reach their full height. This is generally because either the bus capacitance is too high, or more likely the pull-up resistor values are too weak. Bus capacitance will increase with each device you add.

You mentioned a few pull-up values, and the schematic shows 10kΩ... Try a lower value, the lower the better... 1.8kΩ should still be safe.

The open-drain nature of I2C means that the falling edges are good and sharp / fast, but the rising edges are entirely under the control of the pull-up resistor.

The following annotated version of your photo shows the "high" level (looks like ~3.3v, drawn in red)... none of the clock or data signals reach this level, and likely only briefly reach above the input threshold value for a "high" signal.

Additionally, you can see the significant delay in the signal (drawn in green).

annotated version of OP's photo

The MSP430FR2433 datasheet outlines the characteristics of the part - see Section 5.11.4. This lists the positive going threshold for VCC=3v at somewhere in the range VCC×0.45 to VCC×0.75 (you're probably using 3.3v, but this should extrapolate apprixmately enough).

The SDA signal probably is crossing this threshold, but it's doing so far too late. Note how the working trace is much more "square".

excerpt of the datasheet, showing the positive input threshold voltage at between VCC0.45 to VCC0.75

To further emphasise the point - as pointed out by @Jens in the comments, the "working" trace has a clock speed of ~350 kHz, but the "not working" has a clock speed of only ~225 kHz... if the code is indeed identical as you claim, then this is quite likely due to the controller percieving "clock stretching" due to these slow rising edges.


Edit: You've mentioned that you have 16x devices on this bus, which may be accounting for the extra capacitance... It could be worth looking into a "rise time accelerator", which will help to bring the lines back up more quickly, without making the pull-up resistors too stiff.

screenshot showing an accelerated rise time, vs an unaccelerated rise

Attie
  • 1,661
  • 10
  • 12
  • The pull-up resistor was the issue. 1.8k was also too high. The clock rise time was 420 nsec for 1.8K pul up. The rise time should not exceed 300 nsec according to the INA228 sensor. So I tried 1K pull up and it worked. The rise time now is 235 nsec which is under the limit. Thank you all for your help. – varun Mar 18 '24 at 21:42
  • I'm glad it's working, but I'm intrigued - that sounds quite low... have you identified anything that could be increasing the capacitance of your bus? (lots of devices, large/long traces, etc...?) – Attie Mar 18 '24 at 21:48
  • Not yet. We currently have 16 slaves connected to this custom board because this sensor supports 16 unique addresses. The increase in the number of slaves likely led to an increase in bus capacitance. When we had just one slave, a 4.7k pull-up resistor worked effectively. In my next revision of the board, I plan to reduce the bus length to mitigate capacitance issues and experiment with higher pull-up resistor values to optimize performance. – varun Mar 18 '24 at 22:01
  • 1
    It might also be worth looking at using a "rise time accelerator", which will help improve the rising edges, without making the pull-up values too stiff. – Attie Mar 19 '24 at 00:04
  • Thank you so much, Attie. I'll look into it. – varun Mar 19 '24 at 19:05
  • somewhat related thread: https://electronics.stackexchange.com/q/102611/7036 . Somebody didn't know he should have the pull-up resistors, and ran on internal pull-ups in the microcontroller. – Nick Alexeev Mar 20 '24 at 16:14