Client Configuration
Set up ~/.ssh/config
Setting up host entries for ssh is really easy and will save you a lot of trouble. Here is an example:
Host digitaloceanbox
Hostname 111.111.111.111
User root
PubKeyAuthentication yes
IdentityFile /home/user/.ssh/digitalocean-rsa
ForwardX11 yes


Host github github.com
Hostname github.com
User git
PubKeyAuthentication yes
IdentityFile /home/user/.ssh/github-rsa
ForwardX11 no
In this example, we setup digitaloceanbox and github and github.com so that we can do the following commands:
ssh githubssh digitaloceanbox
If we want to login as a different user than the one specified in the config file, we just put user@ at the begining:
Generating ssh keys
ssh-keygen -t rsa -b 4096 -C user@homemachine
Generating public/private rsa key pair.
Enter file in which to save the key (/home/user/.ssh/id_rsa):  /home/user/.ssh/digitalocean-rsa
Enter passphrase (empty for no passphrase):
Enter same passphrase again:
Your identification has been saved in /home/user/.ssh/digitalocean-rsa
Your public key has been saved in /home/user/.ssh/digitalocean-rsa.pub.
The key fingerprint is:
SHA256:p9PYE/tveF2n//bLbp3ogYDtMtYEC5ziQiPxeob6fbo user@homemachine
Note that I've specified the full path of the private key I want to generate when prompted by ssh-keygen. I've also defined the comment (-C) which allows me to easily identify keys on remote machines.
This will create two files:
.ssh/digitalocean-rsa
- PRIVATE key. Never share this.
.ssh/digitalocean-rsa.pub
- Public key. This is what you store on the server to authenticate.
When you provide your ssh key, be sure it's the .pub version!! When you add to your ~/.ssh/config, be sure to add the correct private key that matches the public key you added to the system.
Server Configuration
Most installations will come with Public Key Authentication enabled. If you start doing things all willy nilly, you might run into a few problems, however. At where the OP is in their problem, I recommend that the OP deletes the /root/.ssh/ directory to start over.
It is not recommended that you use ssh to access the root user on the remote system. It is recommended that you ssh into another user, and then escalate to root using your password (sudo su -).
Add keys to host using ssh-copy-id
Regardless of whether you decide to create another user and use ssh as that user, or the root user, the following is the recommended way of placing ssh keys on a server:
ssh-copy-id -i /home/user/.ssh/digitalocean-rsa.pub user@digitaloceanbox
This allows sshd to create the directory and files needed with the permissions needed. This means there is zero chance for you to mess up permissions or needing to remember the details. Just use the tool to upload the keys.
Disable Password Authentication
That being said, once you have key'd yourself and verified that you are able to connect using the keys, it is recommended that you disable Password Authentication in sshd and restart the service:
- Edit
/etc/ssh/sshd_config
PasswordAuthentication nosudo systemctl restart sshd
What about new users?
If you disable Password Authentication, how can you key new users? One way is to add template files to the /etc/skel directory. Once you've key'd one user, do the following:
sudo cp -r .ssh/ /etc/skel/ls /etc/skel/.ssh- Edit any files found in
/etc/skel/.ssh/ so that they are blank, unless you want to automatically key yourself for every newly created user.
When you create new users with sudo useradd -m newuser, that user will have the .ssh/authorized_keys, which you can edit and will have the proper permissions.
Debugging
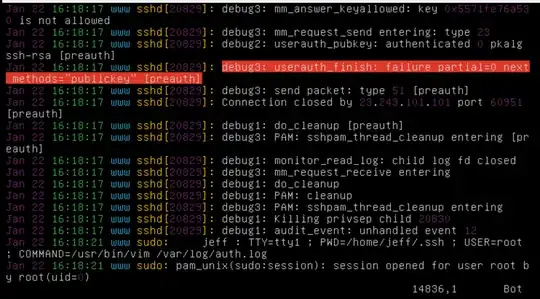
You can watch the sshd log file to see why connections fail or get refused:
sudo tail -f /var/log/auth.log
While you're running this command, use another terminal to attempt a login. Many times the messages provided are good enough to help pinpoint the problem, or find a solution online.
