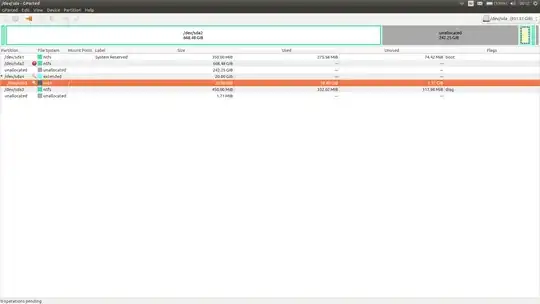
Warning: FIRST backup all important files on /dev/sda5
To perform the required tasks, you'll need to have a Ubuntu Live DVD for the same version of Ubuntu that you have installed now.
Before (unallocated and sda4/sda5)

After (sda4/sda5 and swap)

In gparted:
boot to the Ubuntu Live DVD in Try Ubuntu mode
start gparted from the Unity dashboard
make sure that you're viewing the proper hard disk... if you only have one hard disk, it's probably /dev/sda
make sure it's set to align partitions on MiB boundries
note: the following steps may vary slightly and you should stay in contact if there are any difficulties or questions.
info: partitions are moved or resized in two different ways. The easy way is to use the graphic representation and use the hand cursor to drag/move partitions, and grab handles on the left/right sides of partitions to resize. The other way is to enter specific numeric values into the space before and space after entry fields. We'll use both methods here.
in the lower pane of gparted, right-click on sda4 and select move/resize
in the new window that appears, enter a 1 (one) into the space before and the space after numeric fields, then click OK
observe the graphic representation in the upper pane, and confirm that sda4 covers the previous unallocated space, and its original location, and that sda5 still only takes up a small portion of the left side sda4
if it doesn't appear as instructed, then STOP
if it does appear as instructed, click the Apply icon
right-click on sda5 and select move/resize
in the graphic representation, drag the right side of sda5 to the right, leaving 12-16G free space at the right, then click OK
in the bottom pane, right-click on the 12-16G of unallocated space that appears to the right of sda5, and select new logical partition, with a swap file system, sized to consume the entire 12-16G space, then click OK
compare the upper pane with the "After" image that I posted earlier, and if they don't look similar (the yellow portion represents swap), then STOP, if they do look similar click the Apply icon
note the sda representation of the new swap partition, it'll probably be sda6, you'll need that later when you edit /etc/fstab
In Ubuntu:
In terminal...
- edit: type
sudo mkswap /dev/sda6 changing sda6 to the sdaX number from the previous step, if required
- type
sudo blkid and note the UUID of the new swap partition, and copy it to the clipboard
- type
sudo cp /etc/fstab /etc/fstab.bak # to backup fstab
- type
gksudo gedit /etc/fstab # to edit fstab
- add the following two lines to the end of fstab, changing the UUID to the one noted above, by pasting the clipboard
# swap was on /dev/sda6 during repartition
UUID=071f8b0e-8e16-4f4d-90ff-a4ae9cc56e2b  none  swap  sw  0  0
- check your work, save the file, and quit gedit
- type
sudo swapon -a # to enable swap
- type
swapon and verify that it shows memory and swap
- type
reboot
In Windows:
- boot into Windows
- open the Power control panel
- click on
change what the power buttons do
- click on
change options that are unavailable
- uncheck
fast start
- close the Power control panel
- open an administrative command prompt window
- type
powercfg /h off (turns off hibernation)
- type
chkdsk /f c:
- approve that chkdsk runs at next boot time
- reboot Windows


