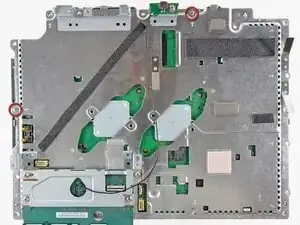
Introduction
Use this guide to replace a blown motherboard. Replacing the motherboard requires removal of nearly every component in your PS3.
-
-
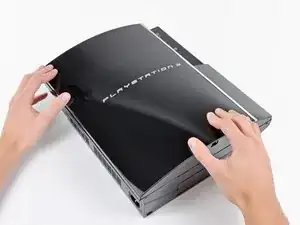
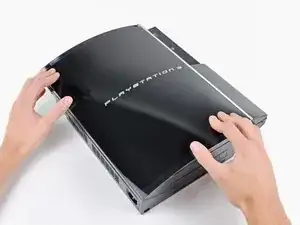
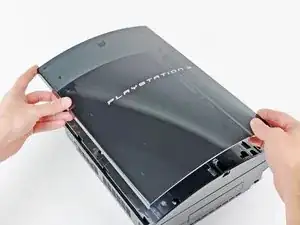
Lift the top cover from its rear edge and rotate it toward the front of the PS3.
-
Remove the top cover.
-
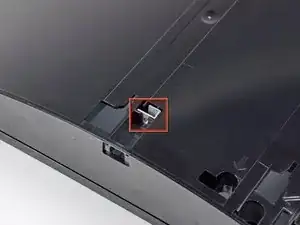
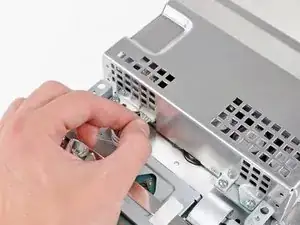
There is a plastic hook located in a hole on the top back right hand side corner. Carefully push the plastic hook a bit from the rear of the machine with a spudger to release the rear right of the casing.
-
-
-
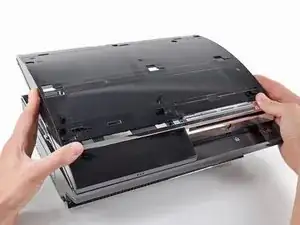
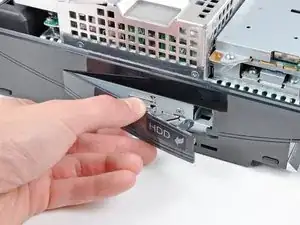
Lift the Blu-ray drive from the edge nearest the power supply and rotate it away from the chassis enough to access its ribbon cable.
-
-
-
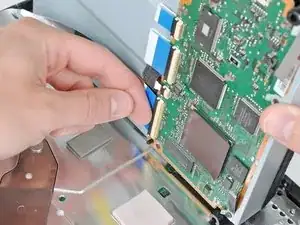
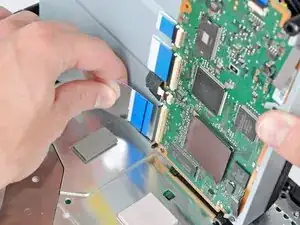
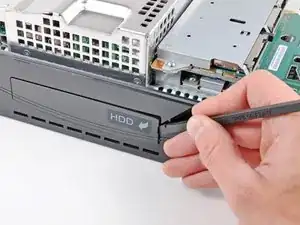
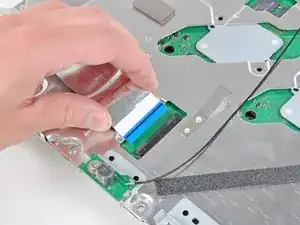
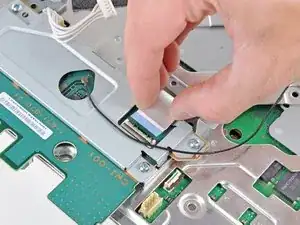
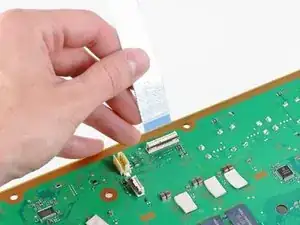
Use your fingernail to flip up the retaining flap on the Blu-ray ribbon cable socket.
-
Pull the ribbon cable out of its socket.
-
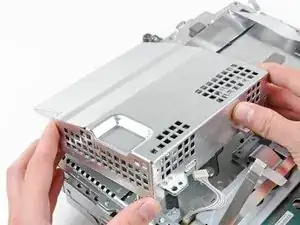
Remove the Blu-ray drive from the PS3.
-
-
-
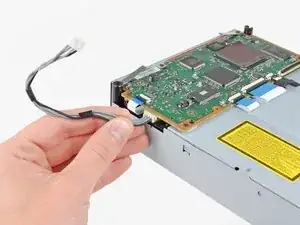
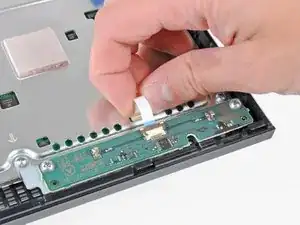
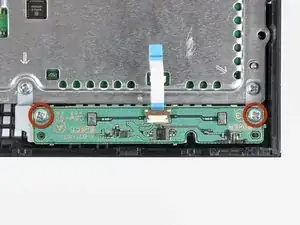
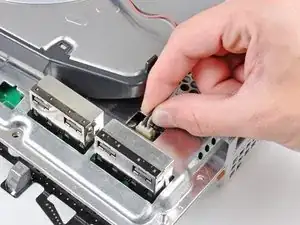
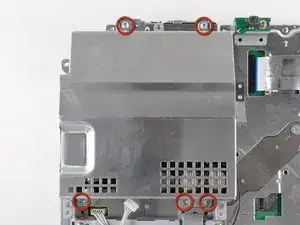
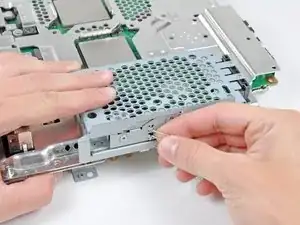
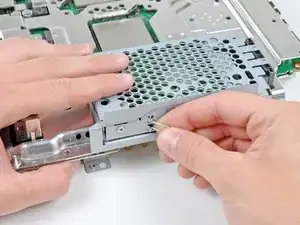
Remove the two 12 mm Phillips screws securing the control board to the lower case.
-
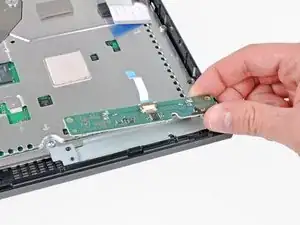
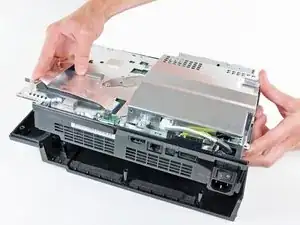
Remove the control board and its attached cable from the PS3.
-
-
-
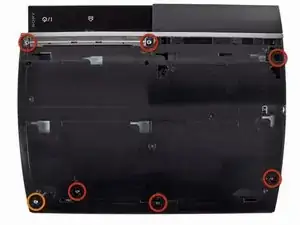
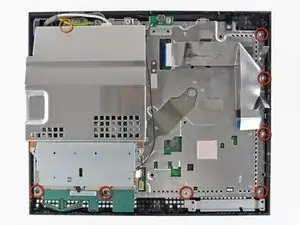
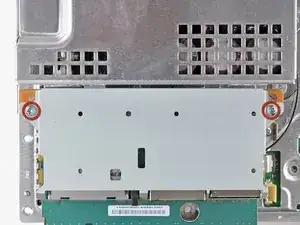
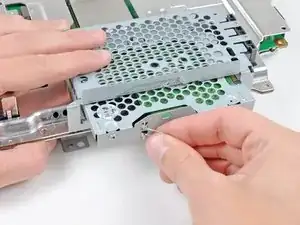
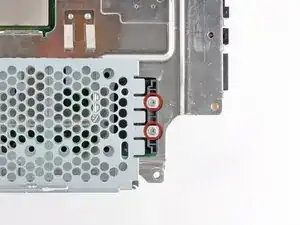
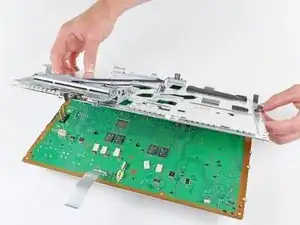
Remove the following eight screws securing the motherboard assembly to the lower case:
-
Seven 12 mm Phillips screws (ph2)
-
One 30 mm Phillips screw
-
-
-
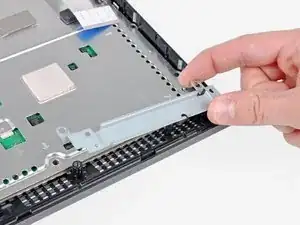
Use the flat end of a spudger to pry the hard drive bay cover away from the lower case.
-
Remove the hard drive bay cover.
-
-
-
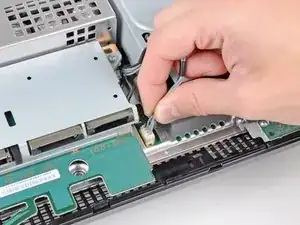
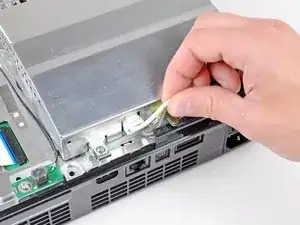
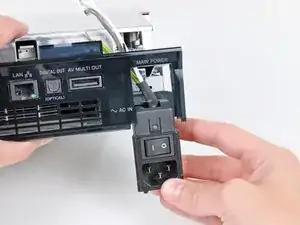
Pull the AC-In cables slightly away from the rear cover for clearance to access the AC-In connector.
-
While depressing its locking mechanism, pull the AC-In connector out of its socket on the power supply.
-
-
-
Pull the AC inlet out from the bottom of the rear cover, minding any of its cables that may get caught.
-
-
-
While lightly pulling the rear cover away from the logic board assembly, use the flat end of a spudger to release the clips along the top and bottom edges of the rear cover.
-
-
-
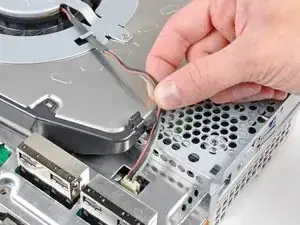
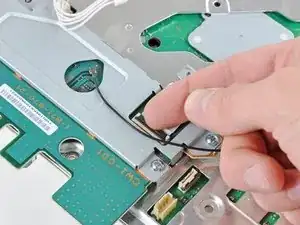
De-route the fan cables from the plastic finger molded into the heat sink.
-
Disconnect the fan from the motherboard.
-
-
-
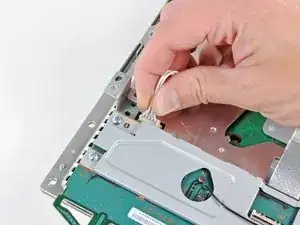
Lift the memory card reader out of the PS3 enough to access its ribbon cable.
-
Flip up the retaining flap on the memory card reader ribbon cable socket.
-
Pull the ribbon cable out of its socket and remove the memory card reader.
-
-
-
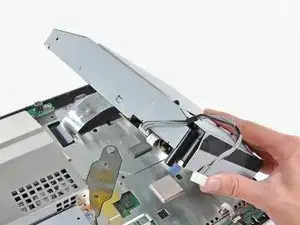
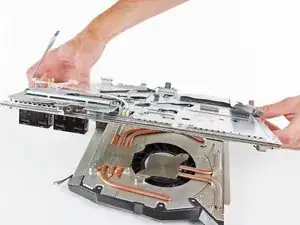
Lift the power supply by its front edge to clear the two posts attached to the motherboard.
-
Remove the power supply.
-
-
-
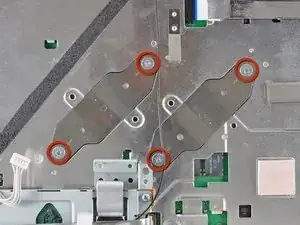
Remove the four 16.5 mm shouldered Phillips screws securing the heat sink to the motherboard.
-
Remove the two brackets held under the screws you just removed.
-
-
-
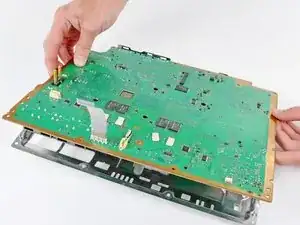
Lift the motherboard assembly off the heat sink.
-
Be sure to apply a new layer of thermal paste when reattaching the heat sink.
-
-
-
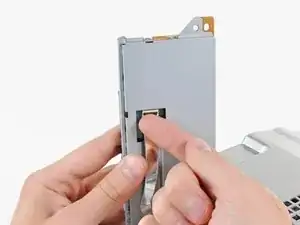
Flip up the retaining flap on the Blu-ray ribbon cable socket.
-
Remove the Blu-ray ribbon cable.
-
-
-
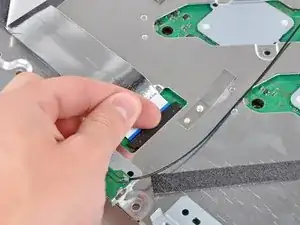
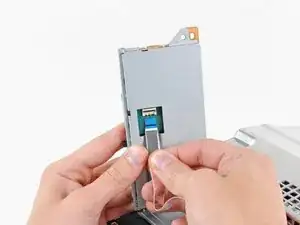
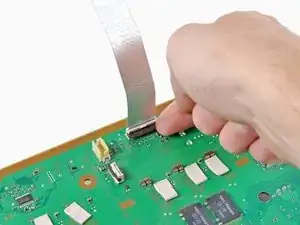
Flip up the retaining flap on the Wi-Fi/Bluetooth ribbon cable socket.
-
Pull the Wi-Fi/Bluetooth ribbon cable out of its socket.
-
-
-
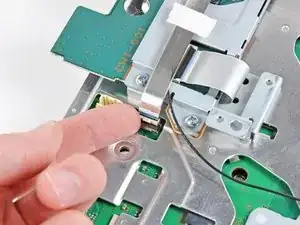
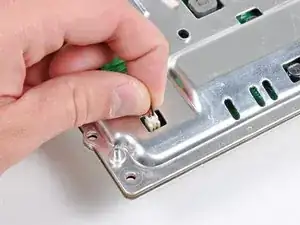
Rotate the PRAM battery slightly counter-clockwise and remove it from the motherboard assembly.
-
-
-
Push the hard drive cage toward the front of the motherboard assembly.
-
Remove the hard drive from the motherboard assembly.
-
-
-
Remove the two 8.3 mm #0 Phillips screws securing the two halves of the motherboard together.
-
-
-
Carefully feed the Wi-Fi/Bluetooth ribbon cable through the hole in the top motherboard cover.
-
Remove the top motherboard cover.
-
-
-
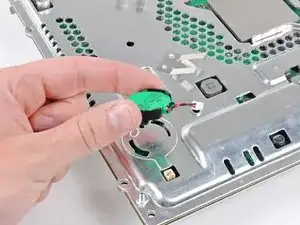
Flip up the retaining flap on the Wi-Fi/Bluetooth ribbon cable socket.
-
Remove the Wi-Fi/Bluetooth ribbon cable from the motherboard.
-
Motherboard remains.
-


To reassemble your device, follow these instructions in reverse order.

4 comments
Just fixed my YLOD last nite and it works like a charm! best guide on the internet, and it was free! i bought the kit here and it has everything you need minus the gunk off. One thing I'd like to see is how to organize all the screws... I had 2 left over after reassembling the unit. it'll also be nice if the guide showed you how to put certain parts back on (back case, top case units).
It took me a total of 3 hours to do. Not bad considering I don't tear things apart for a living.
other than that, the guide and kit are awesome!
Mike Cha -
Just fixed my PS3 Fat. It's the only one that plays PS2 games so it was hard to part with. Instructions were easy to follow. However, I didn't replace the pads on the chips. PS3 is working beautifully again and the fan is much quieter now. I kept forgetting screws and the WIFI cable so I had to take it apart at least a few more times. Now I can take apart and reassemble the PS3 in my sleep.
Charles -
I need schematics board or service manual ps3 fat CECHGxx
sandy -
Fake repair. Real fault: How to Delid and fix the Yellow Light of Death for good (NEC TOKIN Replacement) https://gbatemp.net/threads/how-to-delid...
Player -