Introduction

Replace your audio board to regain functionality of your speakers and microphone.

  1. sLBEp1SWeQaGvAGF
    sLBEp1SWeQaGvAGF
    qiWAxhbPbXwslECg
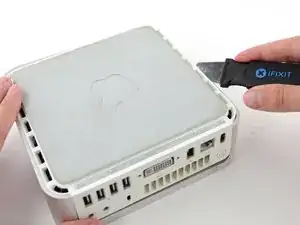
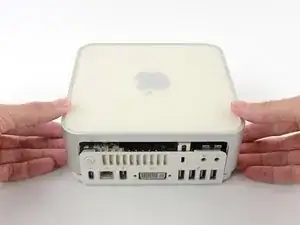
    • Power down your Mac mini, disconnect all of the cables, and flip it over.

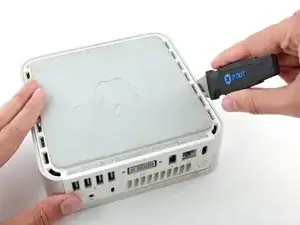
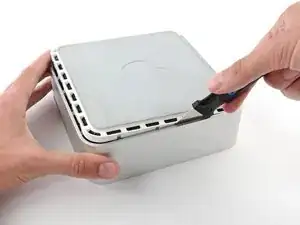
    • Insert the Jimmy into the crack between the aluminum top housing and the plastic lower housing.

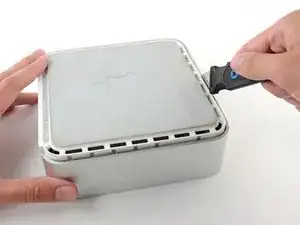
    • The Jimmy should reach a stop about 3/8" down.

    A spackle knife makes these steps go much faster.

    jouniseppanen -

    A double sided letter opener or a thin non-serrated butter knife will suffice.

    To prenent cosmetic blemishes, place a matchbook cover or similar thin cardboard on the outer perimeter under the “jimmy”.

    Mike -

    Despite mentioning recommended tools at the top I think it’s really worthwhile making a point about narrow Philips screwdrivers at this point before people start putting the case apart.

    Matt D -

  2. kah5J3ZqepQRAYLs
    kah5J3ZqepQRAYLs
    TjNLADvgUc3u65EC
    E1GivJlcjLIm1AjR
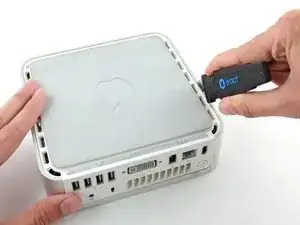
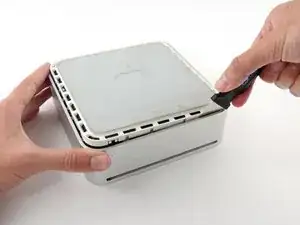
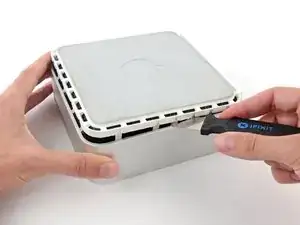
    • Gently bend the Jimmy outwards to pry the crack open a little larger and lift the lower housing up a small amount.

    • There are several plastic clips on the lower housing that fit into a channel in the aluminum top housing. Your goal is to use the Jimmy to push these clips inward enough to free them from the channel, while gently pulling up on the lower housing.

    Patience is your best friend.

    Do not insert “jimmy in too far. Marking a line from tip upwards on the tool will prevent too far insertion, possibly breaking tabs or damaging internal components.

    To prevent the cover closing back up, small strips of matchbook cover (os equivalent) can be inserted about half inch hold prevent closure.

    Mike -

    I think it needs to be made more clear that what you want to be doing is applying upward pressure on the back I/O panel with your HAND while pressing the clips with the jimmy, sort of like tensioning a lock and then setting individual tumblers. (Yeah, I watch LockPickingLawyer.)

    The pictures appear to show trying to lift the lower housing using the jimmy, similar to how I've seen people doing things like prying with a putty knife or screwdriver... and that plastic is only going to get more brittle over time.

    If you apply the upward pressure with your hand via the back panel and then work your way around the outside edge clip-by-clip, then it's much easier to be gentle with the jimmy because your only goal is to press on each clip enough to release it. All the rest of the force comes from, say, a finger hooked into the edge of the Ethernet port and a thumb pressing on the edge of the top cover.

    ssokolow -

  3. IkyV51XbYAOx1scN
    IkyV51XbYAOx1scN
    yEIBOXiZXylOkfa3
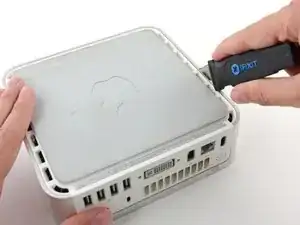
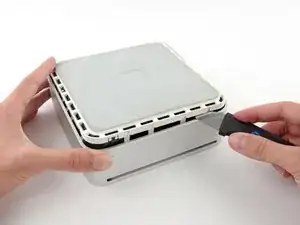
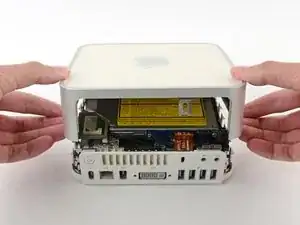
    • Once you have the first side free, rotate the Mac mini and start prying up on the front edge.

    • Use the same prying motion to both bend the clips inward and lift the lower housing up out of the top housing.

  4. ALLVbaEmIiRDx3ye
    ALLVbaEmIiRDx3ye
    tIQp3aqsF2IIZtPb
    • You may need to move the Jimmy along the edge to pry up all of the clips. Be patient and do a little bit at a time.

  5. Tjq4XQhQltwaf41J
    Tjq4XQhQltwaf41J
    cN1LgUGSLjcbAtOp
    • Keep working around the perimeter, freeing the clips along the final edge.

  6. mkOHVknKjJGtqOlZ
    mkOHVknKjJGtqOlZ
    aHVZOjTkBWLtHRns
    • Flip the Mac mini back over and lift the top housing off of the lower housing.

    Before reassembly, make sure no wires are sticking out.

    Line up top cover carefully. Gently press down on top cover until top and bottom fully seated.

    CAUTION! DO NOT PRESS TOO HARD ON THE COVER TO PREVENT CRACKING THE PLASTIC TOP.

    GO EASY.

    Mike -

    Re: reassembly, I found it gentler to use the jimmy to lightly press the plastic clips in a little bit to get them past catching on the frame with minimal force.

    ssokolow -

  7. xEYyr6lXD6UKs2YD
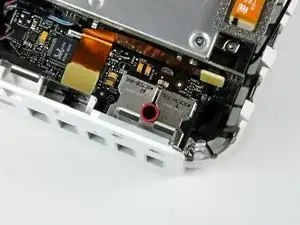
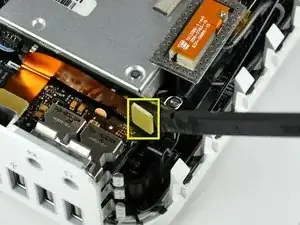
    • Remove the single Phillips screw between the headphone and microphone jacks on the audio board.

  8. MUKPDUbdUuwaevc4
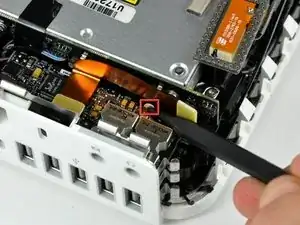
    • Use the flat end of a spudger to pry the audio ribbon cable connector off the interconnect board.

  9. jWcbP2ZMmVJ3snef
    jWcbP2ZMmVJ3snef
    urkVEDitZjkSQDPJ
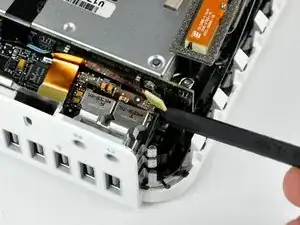
    • Use the tip of a spudger to depress the audio board retaining clip (shown in red) to release the audio board from the bottom housing.

    • Lift the audio board from its free end and remove it from the mini.

    • Don't forget to transfer the audio ribbon cable to your new audio board.

Conclusion

To reassemble your device, follow these instructions in reverse order.

Walter Galan

702854 Reputation

0 comments