Introduction

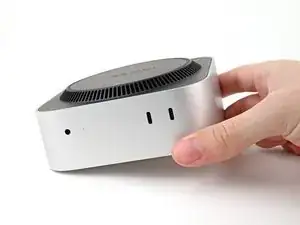
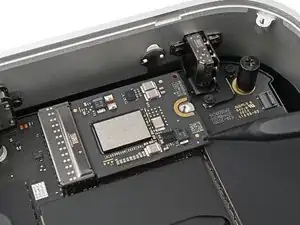
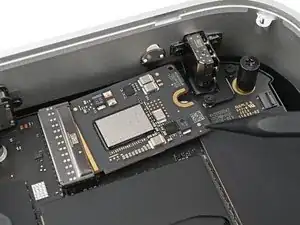
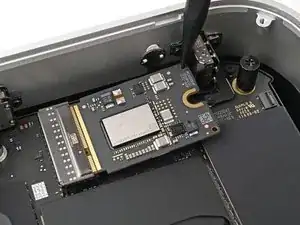
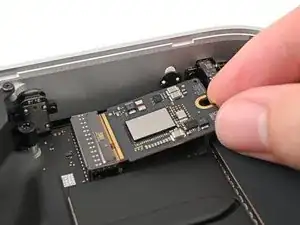
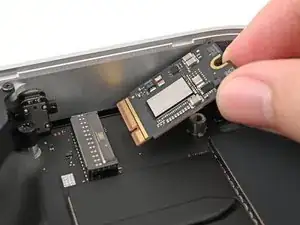
Use this guide to replace the SSD, or flash storage module, in your Mac mini (2024).

This guide was written with a base model M4 Mac mini. Although the SSD for the M4 Pro model is longer and in a different position, the disassembly procedure is the same.

While the Mac mini's SSD looks like a normal M.2 SSD, its lacks a storage controller. Apple integrates the storage controllers into the Apple Silicon SoC, which means that normal M.2 SSDs are incompatible.

This guide is purely instructional for how to replace the SSD with another of the same type.

  1. 2AOCDRumFYCwLHDo
    2AOCDRumFYCwLHDo
    oPNVEBC3oT2PmroR
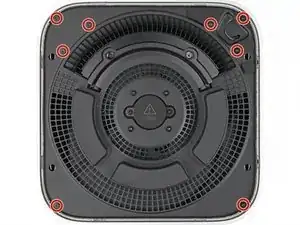
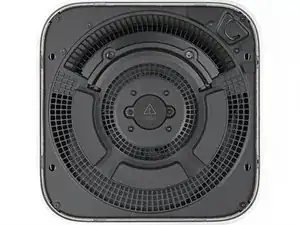
    • Fully shut down your Mac mini and unplug all cables from it.

    • Flip over your Mac mini and place it on a clean, flat surface to avoid scratching the chassis.

    Den Mac vorm ausschalten noch vom Account trennen. Sonst kann es zu Schwierigkeiten bei der Neuanmeldung kommen.

    MacGyverModeOn -

  2. GAqAsFlbHCjSAv5v
    GAqAsFlbHCjSAv5v
    CRy6ImTIPFvNigGN
    XCXS3xLkfcRUsRMF
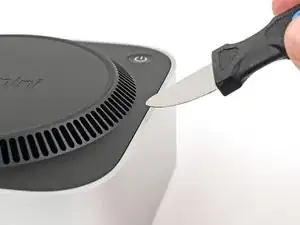
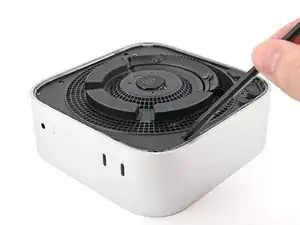
    • Using the Jimmy or other metal tools during this step could scratch the aluminum chassis; however, it's the simplest way to perform this step. Follow the alternate instructions to avoid scratching the aluminum.

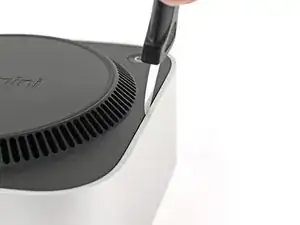
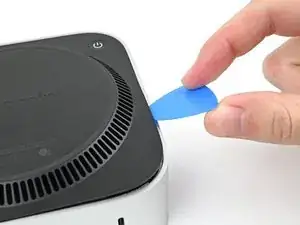
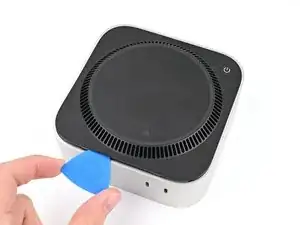
    • Insert a Jimmy into the gap between the bottom cover and the chassis.

    • Pry up the bottom cover to create a gap.

    • Alternatively, you can insert the point of a spudger into one of the plastic vent holes and pry up to create a gap big enough to insert an opening pick into.

    • Keep the Jimmy inserted under the bottom cover.

    It is much easier to get the plastic "pick" under the cover by inserting it UNDER the metal blade (between the blade and the aluminum case) while the blade is more vertical, then bringing the blade down on top of the pick, forcing the fan cover edge up higher. From that position, the pick can easily be pushed in further under the cover and to one side. In other words, instead of putting the pick in OVER the metal blade as shown, put it UNDER. This also protects the aluminum from damage marks of the blade.

    SteveTheMonk -

  3. oIn1d3q2dsgFbK4P
    oIn1d3q2dsgFbK4P
    HqjtQvKCBFw2J4PR
    GqIosShyLUtCj1nG
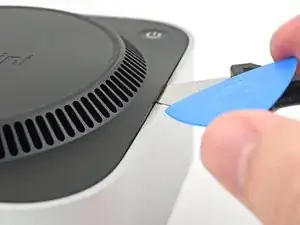
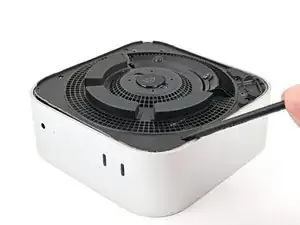
    • Insert an opening pick into the gap created by the Jimmy.

    • Remove the Jimmy.

  4. a1s5oNAhMIPhEdZF
    a1s5oNAhMIPhEdZF
    OjcPUDbawZTxsBPI
    3iNDpG2UcdWeM3Wp
    • Slide the opening pick along the bottom cover until you feel it snag on a pin.

    • There are four pins total—one at each corner of the bottom cover.

    • Twist the pick to lift the pin out of its slot.

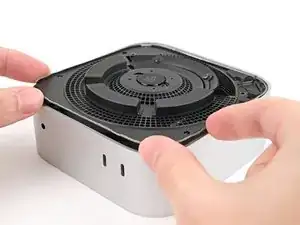
  5. cOUhCJYM1rcSehRM
    cOUhCJYM1rcSehRM
    UdUOJBvlO1sVS62f
    RdtnPQiopAujHrbS
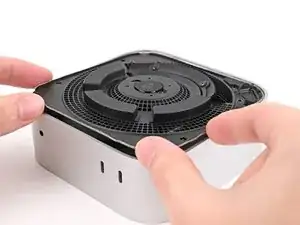
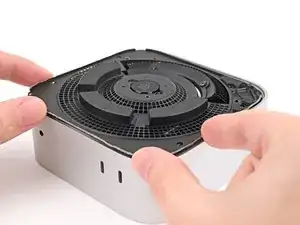
    • Continue sliding and prying with the pick along the perimeter of the bottom cover to release the remaining pins.

    • Don't insert the pick more than an inch when sliding near the power button, as you risk damaging the cable.

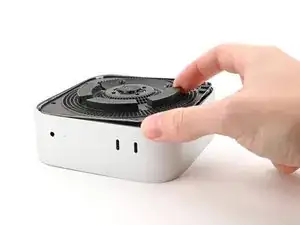
    • During reassembly, press along the perimeter of the bottom until you hear and feel all four pins click back into place.

    "Don't insert the pick more than an inch near the power button" is incorrect wording.

    I think you mean "Don't insert the pick less than an inch from the power button".

    David -

    Hi David!

    For that warning, it's about not inserting the pick too deep under the bottom cover that you risk hitting the cable as you work around the perimeter. The wording is confusing though, so I'll change it!

    Alex Diaz-Kokaisl -

  6. vZyG2Wn2rE61iQM2
    vZyG2Wn2rE61iQM2
    hBV4exmuJXURVt5B
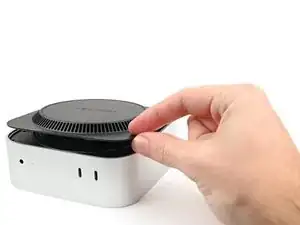
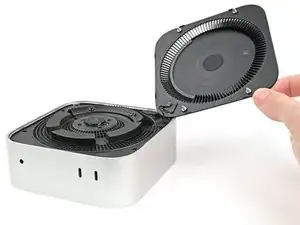
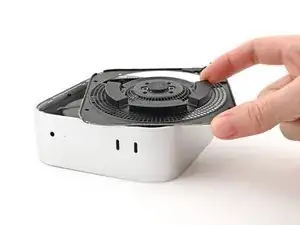
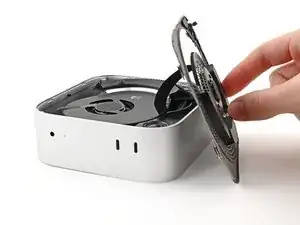
    • Don't remove the bottom cover, as it's still connected to the Mac mini with a cable.

    • Lift the edge of the bottom cover opposite the power button and flip it over to expose the power button cable.

    There are three electrical connectors in this disassembly operation. Having experienced the fragility of these connectors on previous macs, I chose to NOT DISCONNECT any of them, and it actually SAVES TIME fiddling with them.

    IT IS NOT ESSENTIAL to disconnect ANY of these connectors. And it is safer, particularly if you are not experienced. Just take your time and be gentle moving the cover and fan out of the way and resting to the side to get to the SSD screw. It REALLY IS UNNECESSARY TO DISCONNECT ANY CONNECTORS.

    SteveTheMonk -

  7. OMZdwUb1RCYfr43I
    OMZdwUb1RCYfr43I
    P2UWtvWdIv1Y1FXJ
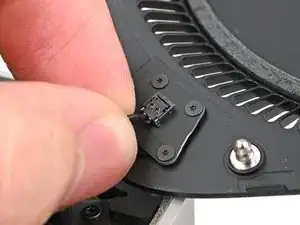
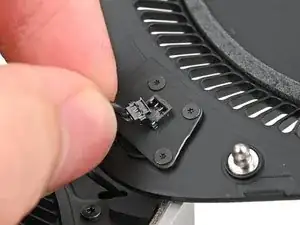
    • The power button cable is very fragile! You don't have to disconnect it to access the internals— but it will require you to keep the bottom cover propped up.

    • To disconnect the cable and remove the bottom cover, follow the next two steps.

    • If you don't disconnect the cable, prop up the bottom cover to prevent straining the cable and skip the next two steps.

    • Grip the power button cable close to the head and pull it away from its socket to disconnect it.

    It's not necessary to remove the power connector and remove the bottom cover (the next step), just flip it over gently to take out the 3 screws underneath (in Step 9).

    James -

    Skip this step, really fragile connector

    Ravire -

    it tore open immediately. DO NOT TRY THIS.

    Chad Prestridge -

    Nicht notwenig man kann den Bodenteil einfach "überlegen"

    Christian Studer -

    Change these instructions, I also damaged my connector.
    This one is different from other connectors, pull up, not along the length of the cable.

    Or even better just move it aside or use the 4 Torx to remove it.

    James -

    How did you fix the connector afterwards? I‘ve the same problem. I broke the connector…

    Christof -

    Please change these instructions I just ripped the cable out before reading the comments

    Sully -

    And one more connector just died!

    Johannss -

    Sorry, what do you do if the connector pulls apart? Utterly evil design. This step needs a rewrite and a serious warning on it!!!!!

    Adam P -

    Achtung, den Connector auf keinen Fall lösen. Bei mir ging dieser kaputt - hoffe, ich kann ihn noch reparieren!

    Christof -

    another wrecked connector come on fix it change this step

    Donald Gillis -

    Broke mine as well. DON'T DO THIS STEP!!!!!!!!!!!!!!!!!!!!!

    djdubcom -

    The 13 comments on this step should've tipped me off, but alas, another one bites the dust. On the bright side, I can see this as a grand opportunity to DIY my own power button and glue it onto a sensible place instead of the underside like a psychopath lol

    Davis Diercks -

    I didn't see the comments at first... was consternated about the direction "...pull it away from it's connector", which isn't clear. As others have said: don't pull it sideways/along the wire, lift it upward, towards your face. Like a Lego block. I was lucky - I didn't break my connector, but was using a small tool to lightly help pry it up.

    JFixIt -

    Another broken connector! Really bad instruction.

    Jon Hutton -

    Hätte ich nur die Kommentare gelesen! One more broken connector...

    raimund.kirchschlager -

  8. kIgBGpKoOr1RhIMk
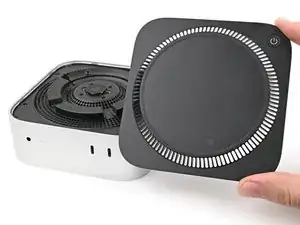
    • Remove the bottom cover.

    The power button is better to be completely unscrewed then to pull at the connector as it shattered in a 8th of a second.

    Chad Prestridge -

  9. pXYTV41FfjgAvBuR
    pXYTV41FfjgAvBuR
    DcQJCakPCYwAQHYv
    • Throughout this repair, keep track of each screw and make sure it goes back exactly where it came from.

    • While the Mac mini uses Torx Plus screws, standard Torx bits work. Make sure to apply constant, downward force to prevent stripping.

    • Use a T5 Torx screwdriver to remove the eight 3.4 mm‑long screws securing the inner plate.

  10. DaRruNxTSRSMoPrJ
    DaRruNxTSRSMoPrJ
    xIvW2Ga1HDNfAqAh
    tkhfWhrlXPqIFKhB
    • Insert the point of a spudger into one of the clips' slots on the inner plate.

    • Pry up the inner plate enough so you can grip the edge along the same side as the headphone jack.

  11. dB3mwJYHa2qhHlEE
    dB3mwJYHa2qhHlEE
    gDjuFpfSeZEIJMDH
    • Pull the inner plate away from the chassis to slide it out from under the lip on the heat sink.

    • During reassembly, slide the inner plate back under the heat sink and press along its edges to secure it in the chassis.

  12. XYYwMHq5K2hCJAry
    XYYwMHq5K2hCJAry
    rAL1IFZlPGjS2Ewn
    kJKtXidJXeqJ3QEI
    • Don't remove the inner plate, as it's still connected to the Mac mini by a cable.

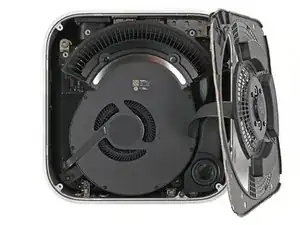
    • Lift the inner plate and flip it over the edge of the chassis. Let it rest against the chassis.

  13. QSSeS4dMBT1b2KDI
    QSSeS4dMBT1b2KDI
    qulvXcfhHAoL4Bk6
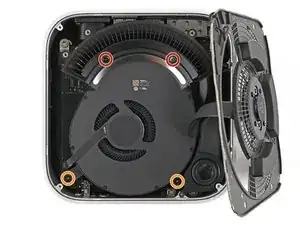
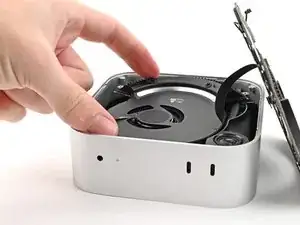
    • Remove the four screws securing the fan:

    • Two 2.4 mm‑long Torx Plus 3IP screws

    • Two 7.9 mm‑long Torx Plus 5IP screws

  14. TkBdTdSO5OKVi6KH
    TkBdTdSO5OKVi6KH
    qSGEhettScmNIOVh
    IArAIGWHrgrQVZDX
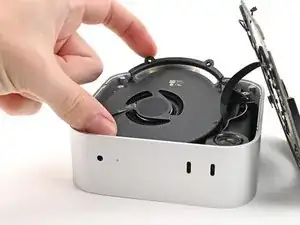
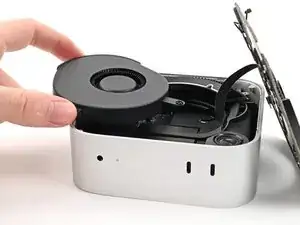
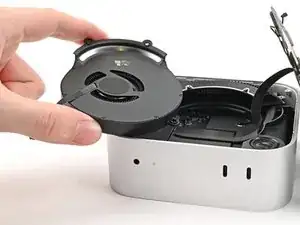
    • Lift the fan out of its recess in the chassis and flip it over to expose its wire and connector.

    • Let the fan rest on the chassis and heat sink.

  15. 6VD4VxVAWWj4wnBF
    6VD4VxVAWWj4wnBF
    mQSqdGWIx3WBoqXt
    6iOpruRCkqnUJEUm
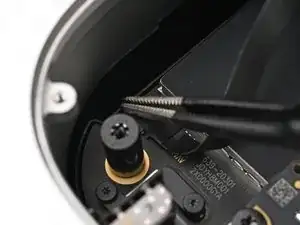
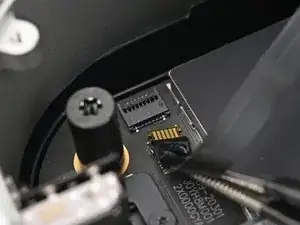
    • Use tweezers to peel back the tape covering the fan ZIF connector.

    Absolutely not needed, you can just put the fan aside!

    James -

    It is NOT required to remove the fan

    Peter van Heerebeek -

  16. CgRfNEYmAO4ahLqw
    CgRfNEYmAO4ahLqw
    ngIKZdCGwySJnW6n
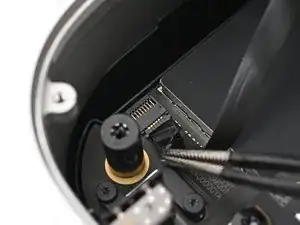
    • Use the point of a spudger, or your fingernail, to flip up the locking tab on the fan ZIF connector.

  17. xNACdsMKXGRkrXtV
    xNACdsMKXGRkrXtV
    EYyUZsqOhJIxcDUb
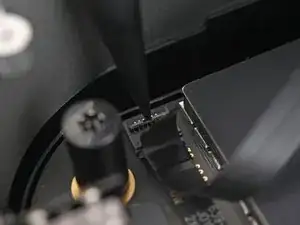
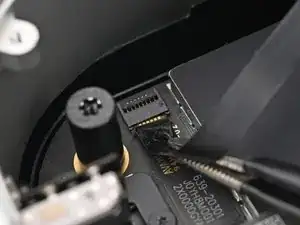
    • Use tweezers, or your fingers, to slide the ZIF connector straight out of its socket.

  18. Sj6lWsKdX6LDLbvr
    • Remove the fan.

  19. Hgthxvt4LFOvG2fe
    Hgthxvt4LFOvG2fe
    dWlFvSAhBhGoIwHW
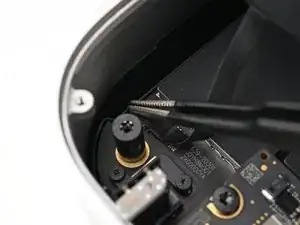
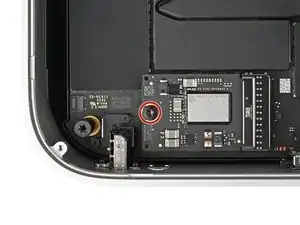
    • Use a Torx Plus 8IP screwdriver to remove the 4.1 mm‑long screw securing the SSD.

  20. BePMMPk4qNGeGJZp
    BePMMPk4qNGeGJZp
    mAL3MNOey5piHIHG
    GA2BI2LPTib4vBiT
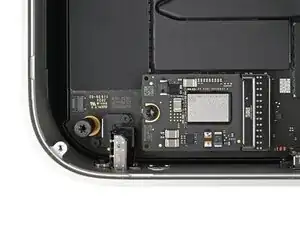
    • Insert the point of a spudger into one of the holes along the bottom edge of the SSD.

    • Use the spudger to pull the SSD away from its socket, alternating sides as necessary, until it's fully disconnected.

  21. kTPXuUsrcpOEIKGQ
    kTPXuUsrcpOEIKGQ
    R5wqDWeRaluYc1NM
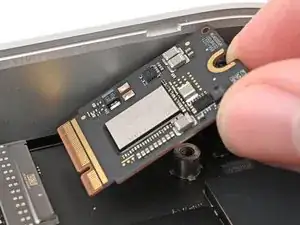
    • Grip the corner of the SSD, tilt it up against the headphone jack, and lift it out of its socket.

    • During reassembly, insert the SSD at an angle and gently wiggle it into place until it sits flat to the logic board.

    I appreciate the guide, it is very thorough and well laid out as one would expect from iFixit. I did notice that it was not necessary to unplug the fan in my case. That jack that is directly behind the SSD is kind of a pain if you do not pull the drive the right way.

    Benjamin McGill -

    Great. But... where to find compatible SSD?

    Aristóteles Benício -

Conclusion

To reassemble your device, follow these instructions in reverse order.

Take your e-waste to an R2 or e-Stewards certified recycler.

Repair didn’t go as planned? Try some basic troubleshooting, or ask our Mac mini (2024) Answers Community for help.

Alex Diaz-Kokaisl

Member since: 16/01/22

168721 Reputation

20 comments

"Apple's unique SSDs aren't sold by Apple and aren't currently available by a third party." is no longer correct. https://expandmacmini.com has tested options to upgrade SSD to 2TB.

Alpha -

Fixed! Thank you!

Alex Diaz-Kokaisl -

Thanks, as always, for such a wonderful job in explanation and photos as to how this disassembly and upgrade of the M4 Mac Mini. I and many others thank you for this work that you do so well. I have just purchased an M4 Mini with only 256 GB internal drive, although, I did opt for an upgrade of the RAM to 32 GB; but, as everyone knows, and extra $500 as a charge from Apple for this much extra RAM makes for quite an expensive addition to the cost. But, now that I have an option to upgrade the internal drive to 2 TB, my Mini will be really powerful, with lots of room to spare!

Bruce -

After the installation, (or prior to?) how does one install the OS? Thank you

Jim Willett -

You need to use the DFU tool to get the system to recognize the new/replaced storage before you can perform an OS install.
dragon788 -

Is it possible to install the OS one the new drive without the need for another Mac mini?
if yes, how can I do this?

DJT -

Hi, I'm looking at tools I need to do this. In the What You Need section, above, it says a Torx Plus 8IP Screwdriver and TR8 Torx security is needed. However, iFixit only has the TR8 Torx Security screwdriver available. I want to know if the TR8 Torx Security screwdriver will remove the single screw holding the SSD in place in the M4 mac mini?

John -

Hello!

Yes, the TR8 Torx security screwdriver will fit the screw holding the SSD! While the screw itself is technically a T8 Torx Plus, a normal screwdriver of the same size will work. Just remember to apply enough downward force to prevent stripping the screw.

Alex Diaz-Kokaisl -

Hi can you tell me what is the right fixit tool kit with all the right bit for this operation. I don’t find any Torx Plus 3ip or 5ip listed in a fixit kit

Daniel Meloche -

The iFixit Minnow or Manta would include the selection of Torx bits required (as mentioned elsewhere, Torx Plus IP are compatible with regular Torx of the same size.

dragon788 -

Two risky steps are not needed:

You don't need to remove the plug from the power button (highly likely you damage it), you can just put the cover aside.

You don't need to remove the sticker and plug from the fan (difficult to put back without damaging), you can just put the fan aside.

James -

Thanks James. Was wondering if those two steps are unnecessary.

Jame Dunkt -

I confirm, I just replaced my 256GB SSD with a 2TB one without removing the power plug nor the fan plug.

eRudy -

Can Ifixit team upgrade the internal SSD of my M4pro? How much will you charge for that?

Attizzoso Dissaldato -

M4 Mini Pro SSD replacements are not yet available. Only M4 Mini SSDs as of now (2 April).

Jame Dunkt -

Thanks for the guide! It was not necessary to remove the fan cable to remove the SSD.

Peter Schneider -

Have you attempted the same operation with the ‘Studio’?

AlaskaJaxx -

Absolut great work. Nice photographed, well described, it was a joy to do the installation... thx a lot.

marcus -

Warning!!! Do not remove the fan cable. I ruined my Mac Mini M4 by removing the fan cable. When I lifted the cable off with a spludger the socket for the cable came off the circuit board. This would be impossible to repair. I'm still using the Mac Mini without an operational fan but I keep a close tab on the CPU and GPU temperatures with a third party app that monitors the temperatures. It's a good thing I don't do any demanding work like editing videos or this computer would be toast.

stulef -