Introduction

Follow this guide to remove and replace the speakers in your Framework Laptop 12.

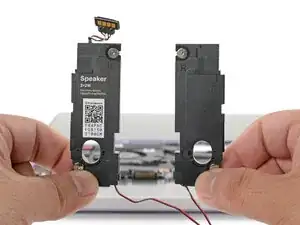
The speakers are replaced in a pair. If you're not getting any sound or your audio sounds distorted, you may need to replace your speakers.

You'll encounter some component terms in this guide:

  • The Input Cover is the part that contains the keyboard and trackpad.
  1. ENj2nRYJffBN2QaN
    ENj2nRYJffBN2QaN
    YjlDgdAsDVIlgqUJ
    GRNSY6XxqDVbUVQJ
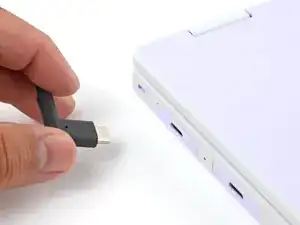
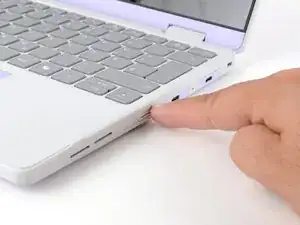
    • Before you begin repairs, unplug your laptop and shut it down from the operating system. This ensures that the laptop isn't in standby/suspend mode.

    • The indicator LEDs along the edges should be unlit. The laptop should be silent.

    • If you accidentally turn on the laptop during repair, hold the power button down for 10 seconds to shut it down.

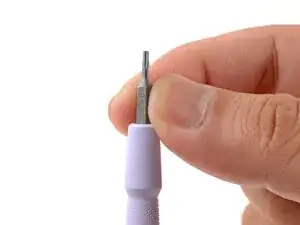
    • Make sure your Framework Screwdriver has the T5 Torx bit (labeled as T-5) facing outwards. If it's not, pull the bit out and flip it.

  2. ubIRwnfForMuSctD
    • Set your Framework Laptop face-down on a clean work surface.

  3. uSiaYQJxHWQEtBTp
    uSiaYQJxHWQEtBTp
    4PYD5BWmLBijnqFr
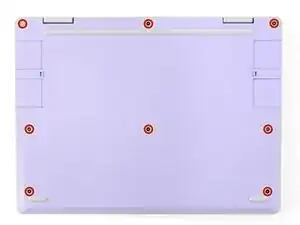
    • Use your Framework Screwdriver to fully loosen the eight captive T5 Torx screws on the bottom of your laptop.

    • Most screws in your Framework Laptop (including these) are captive—they're designed to stay in place after you loosen them.

    • Your laptop comes with a spare set of screws in the frame above the battery. Be careful—the replacement screws aren't captive.

  4. UomOMxHFjJlXOmVI
    • Flip your laptop over so it's face-up on your work surface.

  5. BAlEsafUboQ4NySF
    BAlEsafUboQ4NySF
    IOc5J3IPRwcuJcrW
    • Open the laptop lid so that both the screen and the base lie flat on your work surface.

  6. 1rUg25vLV4eVwDT1
    1rUg25vLV4eVwDT1
    PI4YlkgvqAGikOsI
    P4UYnHUqKXiVjnPu
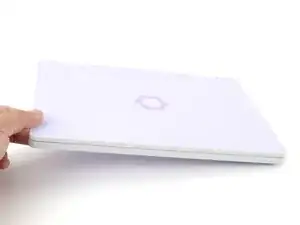
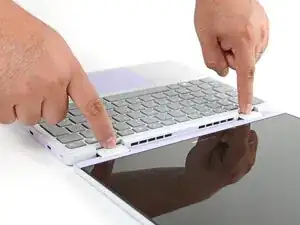
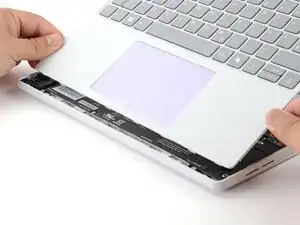
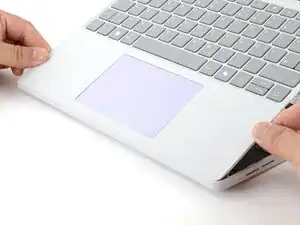
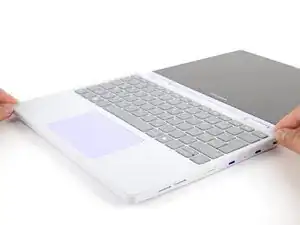
    • Use your fingers to grip the Input Cover in the hinge cutouts.

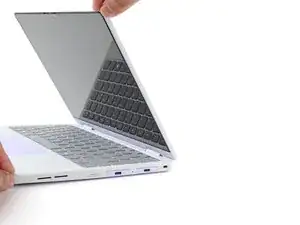
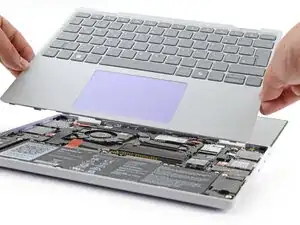
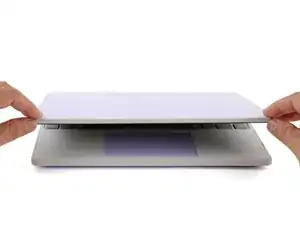
    • Lift upwards to swing the Input Cover up from the base of the laptop.

    • There are magnets holding the Input Cover down, so you'll feel some resistance. If it feels like a lot of force is required, check that you've fully loosened all the screws on the bottom of your laptop.

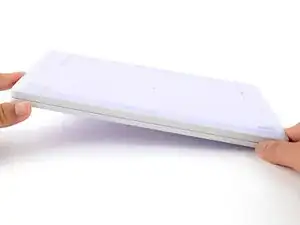
    • Remove the Input Cover.

  7. b5AQM3feYGn4ttQZ
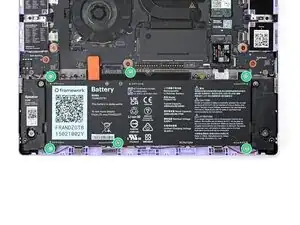
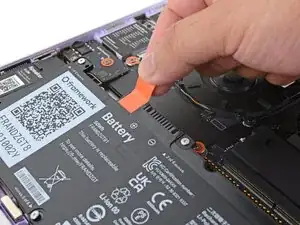
    • Use your Framework Screwdriver to loosen the six captive T5 Torx screws securing the battery.

  8. QMPLTpItI3EVDGEI
    QMPLTpItI3EVDGEI
    qXL3hfIHcHhpCpPg
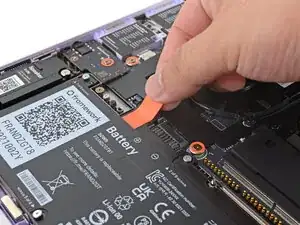
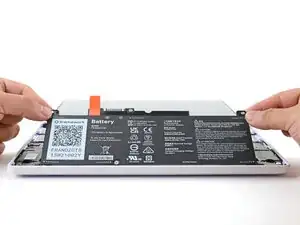
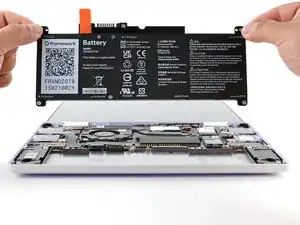
    • Grab the orange battery tab with your fingers and lift straight up to disconnect the battery.

    • The battery connector can be tight, requiring some force. If it feels like part of the battery won't come up, check that the battery screws are fully loosened.

  9. vBhTTUMPMdexvY2I
    vBhTTUMPMdexvY2I
    BpR3xLIgaPNfTJcs
    • Lift and remove the battery from the laptop.

  10. rjyuelYDOdlm4odT
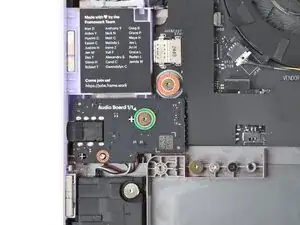
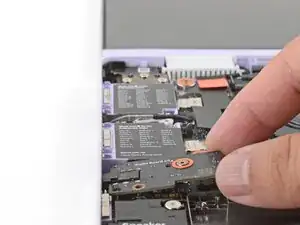
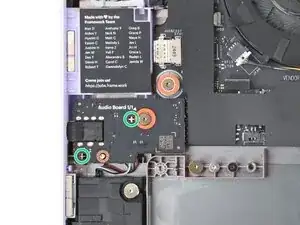
    • Use your Framework Screwdriver to loosen the captive T5 Torx screw securing the Audio Board, located near the left edge of the laptop.

  11. R2pA5DMcLEYUiFDt
    R2pA5DMcLEYUiFDt
    BYqTPPIMucGXAsBq
    PdACtvIdRjcbMgy5
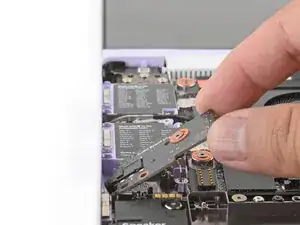
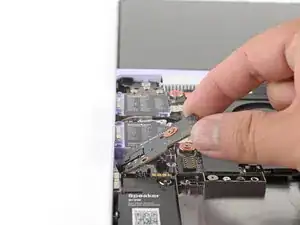
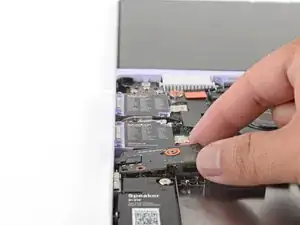
    • Use your fingers to lift the right edge of the Audio Board and pull it out of its recess.

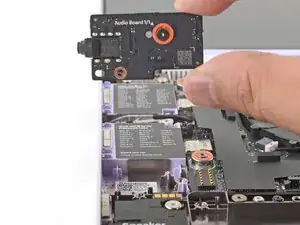
    • Remove the Audio Board.

  12. hsPs5MdTLCACIoUB
    hsPs5MdTLCACIoUB
    WQSDqP5SQDHR4sHd
    1FlpDnSCYalAm6Te
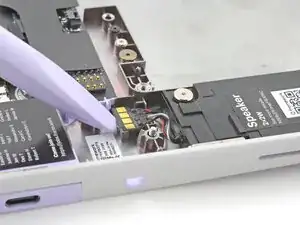
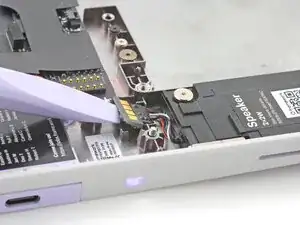
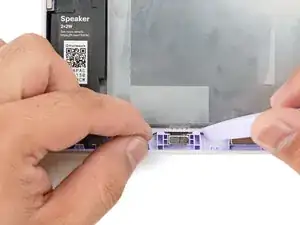
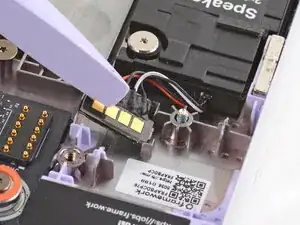
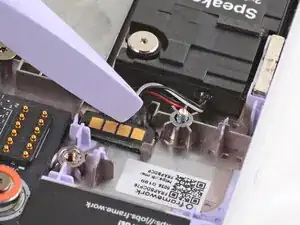
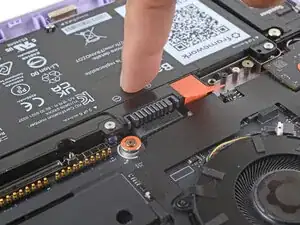
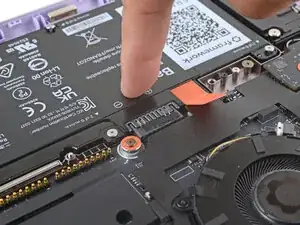
    • Use the flat end of your Framework Screwdriver to pry up the speaker connector from its recess near the top of the left speaker.

  13. YXH4jEQ1mjQhGS2i
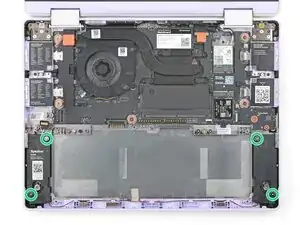
    • Use your Framework Screwdriver to loosen the four captive T5 Torx screws (two per speaker) securing the speakers.

  14. UrjMfbXAoaI4ALSN
    UrjMfbXAoaI4ALSN
    rTXBe2iBTJGok1TQ
    bYNHEbVVFNhnCAqR
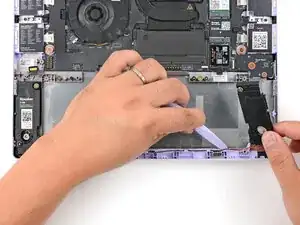
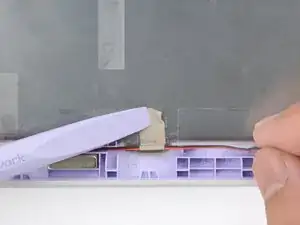
    • Use your Framework Screwdriver to lift and guide the wire connecting the two speakers out of the frame channel.

    • Use your Framework Screwdriver to lift the silver tape securing the center of the speaker wire to the frame.

    • If you're reusing the speakers, try to keep the silver tape intact.

  15. rFehKeBywiTsJojt
    • Remove the speakers.

  16. GFISPDuIsRdKxMhT
    • Congratulations on completing disassembly! The remaining steps will show how to reassemble your Framework Laptop.

  17. ENO3hHRwJLOGI4yT
    ENO3hHRwJLOGI4yT
    GEhoJy1GqqORnuAS
    QbdJORLXXJbxJVJx
    • Use your Framework Screwdriver to loosely screw the left speaker in place.

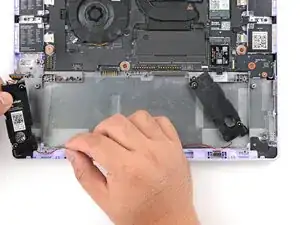
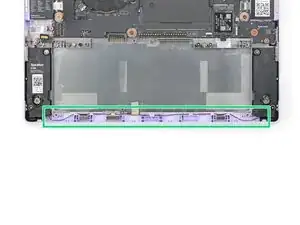
    • Starting near the left speaker, use your fingers and your Framework Screwdriver to carefully press and guide the speaker wire back into its channel.

    • Zoom in on the second image to see how the wire sits in its channel.

    • Press the silver tape to adhere the center of the wire to the frame.

  18. YXH4jEQ1mjQhGS2i
    • Use your Framework Screwdriver to tighten the four captive T5 Torx screws to secure the speakers.

    • The speaker screws have rubber bushings in them to dampen vibrations. Tighten the screws until they're snug. Don't over-tighten them, or you'll damage the bushings.

  19. F5pSHTu5dcbTuCqZ
    F5pSHTu5dcbTuCqZ
    EcHYVEV2aImOrPnp
    • Use the flat end of your Framework Screwdriver to press the speaker connector into its recess.

    • Make sure the gold contacts are facing up.

  20. ZttQrEQCBmJToPkQ
    ZttQrEQCBmJToPkQ
    fTr2nu5AqtEADemP
    MtdysKqghFjHWRZT
    • Insert the Audio Board into the laptop at an angle to help align the headphone jack.

    • Use the two plastic alignment pins on the laptop to help with final alignment.

  21. rjyuelYDOdlm4odT
    • Use your Framework Screwdriver to tighten the captive T5 Torx screw to secure the Audio Board.

  22. vBhTTUMPMdexvY2I
    • Lay the battery in its recess in the laptop.

  23. imAYGO4LaFApYYha
    imAYGO4LaFApYYha
    1vygrQS4WHMONa6d
    • Use your finger to push the battery down near its connector to reconnect it.

  24. geOhoFNlOEfYyTpp
    • Use your Framework Screwdriver to tighten the six captive T5 Torx screws to secure the battery.

    • Tighten the screws until they're snug. Don't over-tighten them, or you may strip the screws.

  25. HlXOsUPuPR5UTUnF
    HlXOsUPuPR5UTUnF
    euBDDIJMdxks34JT
    DPSECZI1O3LHVTTb
    • Angle the bottom edge of the Input Cover towards the base of the laptop.

    • Align and insert the bottom edge of the Input Cover into the base of the laptop.

    • Make sure the slots along the bottom edge of the Input Cover slide into the tabs in the base.

    • Lower the Input Cover's top edge onto the laptop until the magnets snap it in place.

    • Make sure the Input Cover sits neatly within the laptop frame and no corners are popping up.

  26. rk4BwMiYBUtyOqmu
    rk4BwMiYBUtyOqmu
    OKkxrqofAHaEk2Ul
    • Close the laptop lid.

    • Flip your laptop face-down on a clean work surface.

  27. uSiaYQJxHWQEtBTp
    uSiaYQJxHWQEtBTp
    4PYD5BWmLBijnqFr
    • Use your Framework Screwdriver to tighten the eight captive T5 Torx screws on the bottom of your laptop.

    • Tighten the screws until they're snug. Don't over-tighten them, or you may strip the screws.

Conclusion

You finished fixing your Framework Laptop!

Take your e-waste to an R2 or e-Stewards certified recycler.

If you need help, contact Framework support.

Arthur Shi

Member since: 03/01/18

296850 Reputation

0 comments