Introduction

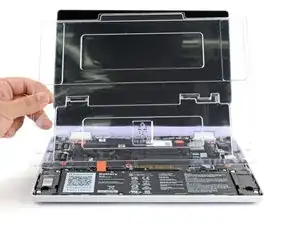
Congratulations on getting the Framework Laptop 12 DIY Edition! Follow this quick start guide to assemble your laptop and get it running.

If you got the pre-built Framework Laptop, follow this quick start guide instead.

You'll encounter some component terms in this guide:

  • The Input Cover is the part that contains the keyboard and trackpad.
  • The Framework Screwdriver is the nifty multi-tool that comes with your laptop.
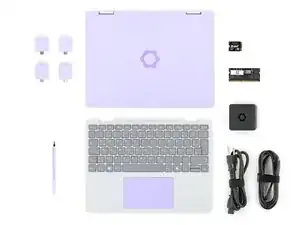
  1. mYdwmlthm5XVqxRn
    mYdwmlthm5XVqxRn
    lqICLEkwS1mNFBei
    • Unbox your Framework Laptop and make sure you've received the following items:

    • Input Cover of your choice

    • Framework Screwdriver

    • Additionally, make sure you've received the optional items you purchased with your Framework Laptop:

    • SSD

    • Memory module

    • Expansion Card(s)

    • Framework Power Adapter, USB-C Cable, and AC Cable

  2. NdiYh2tCQBVINiHR
    NdiYh2tCQBVINiHR
    vnjVXi26atXiHORt
    • Make sure your Framework Laptop is fully powered off. The indicator LEDs along the edges should be unlit. The laptop should be silent.

    • If you accidentally turn on the laptop during assembly, hold the power button down for 10 seconds to shut it down.

    • Set your laptop face-up on a clean work surface.

    • Make sure your Framework Screwdriver has the T5 Torx bit (labeled as T-5) facing outwards. If it's not, pull the bit out and flip it.

  3. MJYoSSAfygbKMlqC
    MJYoSSAfygbKMlqC
    Rc2EKcVHQOBwK4yg
    • Swing the lid open until the screen's tilted back slightly.

  4. OeOnaWLvSeXVHgNR
    OeOnaWLvSeXVHgNR
    YPkk22UOdNEuWLHJ
    • Use your fingers to lift and remove the clear protective cover from the laptop.

    • The protective cover is made of post-consumer recycled PET and is highly recyclable. Please recycle this with your household recycling.

  5. bvaxAXoxa41KITND
    bvaxAXoxa41KITND
    QFOHlbDpqribkSrc
    • The next two steps show how to install the storage (aka SSD, or Solid State Drive).

    • Your Framework Laptop 12 has one M.2 2230 NVMe SSD slot.

    • Hold the SSD by its edges. Don't touch the gold contacts with your fingers. If you do, wipe the contacts with a clean, lint-free cloth to remove any finger oils.

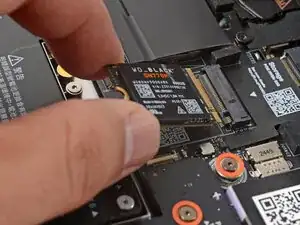
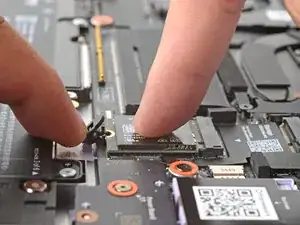
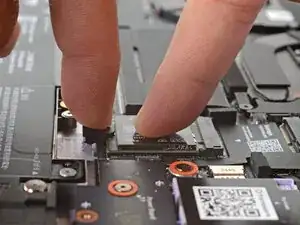
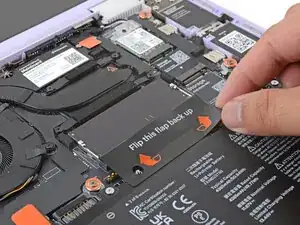
    • Align the SSD's gold contacts and notch with the socket.

    • Insert the SSD into the socket at a shallow angle. The gold contacts should be mostly covered by the socket.

    • The SSD fits into the socket in one orientation. If it doesn't feel like it fits, try flipping the module.

  6. qtX1MxCQskf5LMXF
    qtX1MxCQskf5LMXF
    pL3dNAn3fIsije5L
    RfYBY2K2M2RYbiQE
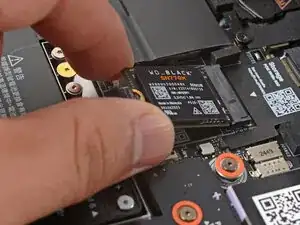
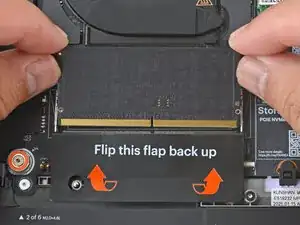
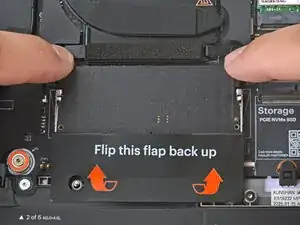
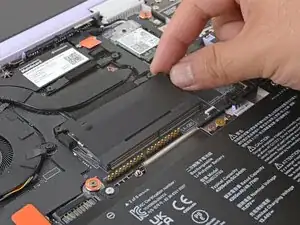
    • Use your finger to press the black SSD latch and keep it open.

    • Use another finger to press the SSD down until it lays flat.

    • If the SSD doesn't fit in the latch, you may need to insert the SSD further into its socket.

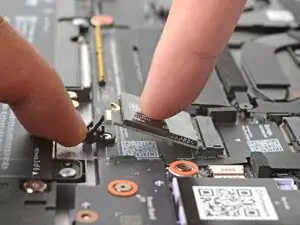
    • Use your finger to close the latch to secure the SSD in place.

    • You should hear a click, and the SSD should no longer pop up.

  7. kfDuxVBdtcBCQeaT
    kfDuxVBdtcBCQeaT
    PqC2Ah6IFByxCYmc
    • The next three steps show how to install the memory module.

    • Your Framework Laptop 12's memory slot supports up to 48 GB of DDR5 memory at DDR5-5200 speed.

    • Use your fingers to flip open the memory flap.

  8. b2pv1r51LtxI1wv4
    b2pv1r51LtxI1wv4
    usESRZ1YI32arYb5
    RoMGhs3KpgTYyJfv
    • Hold the memory module by its edges. Don't touch the gold contacts with your fingers. If you do, wipe the contacts with a clean, lint-free cloth to remove any finger oils.

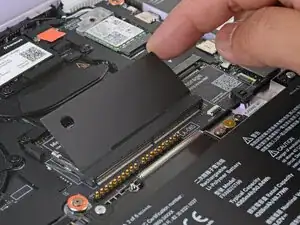
    • Orient the module with the label facing down and align the gold contacts and notch with the socket.

    • Insert the contact edge into the socket at a shallow angle. The gold contacts should mostly be covered by the socket.

    • The module fits into the socket in one orientation. If it doesn't feel like it fits, try flipping the module.

    • Press the edges of the memory module down until the side clips lock it in place.

    • If you need to remove or reposition the memory module, use your fingers to spread both clips apart to release the memory.

  9. HtFa5IwwSjx5yytM
    HtFa5IwwSjx5yytM
    DmlkKDPNgjUGQ5AY
    • Flip the memory flap back over the memory module.

  10. oMWGOfrqYbE5TnUE
    oMWGOfrqYbE5TnUE
    ooxKFYSDtn6PJGWD
    aiE2o6HQ2RMjlXLR
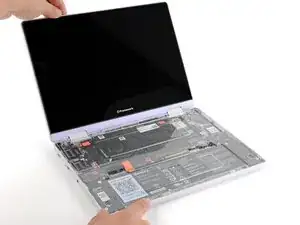
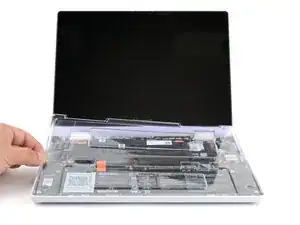
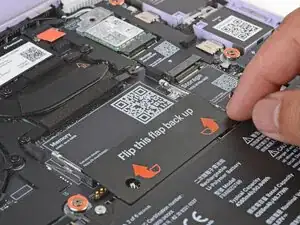
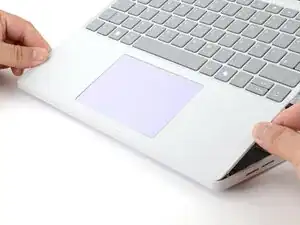
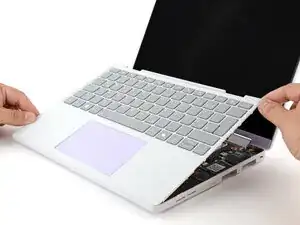
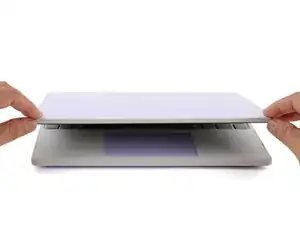
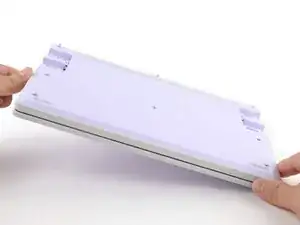
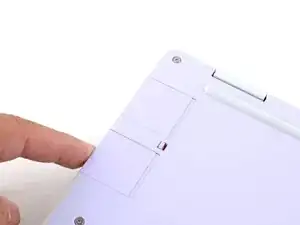
    • Hold the Input Cover over the laptop and angle the bottom edge of the cover towards the base of the laptop.

    • Align and insert the bottom edge of the Input Cover to the base of the laptop.

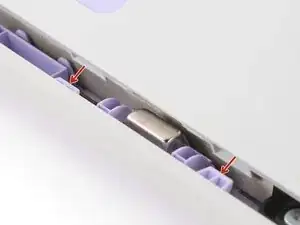
    • Make sure the slots along the bottom edge of the Input Cover slide into the tabs in the base.

  11. SX3eXVrXtcI2aHdO
    SX3eXVrXtcI2aHdO
    BS13EFXtkTe6Wthy
    • Lower the Input Cover's top edge onto the laptop until the magnets snap it in place.

    • Make sure the Input Cover sits neatly within the laptop frame and no corners are popping up.

  12. HWaNEJ6TyQAPLPPt
    HWaNEJ6TyQAPLPPt
    XQK2VOPOiMQlTsdu
    • Close the laptop lid.

    • Flip the laptop face-down.

  13. 6rt4qbsKNQNtR65J
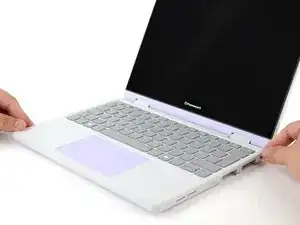
    • Use your Framework Screwdriver to tighten the eight captive T5 Torx screws on the bottom of your laptop.

    • Tighten these screws until they're snug. Don't over-tighten, or you may strip the screws.

  14. CrhBgLLRgjJrh1A4
    CrhBgLLRgjJrh1A4
    pHLMdeMvmuusPhBL
    wL2bRqNXFO4UunKE
    • The next two steps show how to install Expansion Cards.

    • You can charge and use your laptop without Expansion Cards. To charge, plug a USB-C cable directly into any unused Expansion Card slot. The slot's USB-C port is recessed, so not all cables may work.

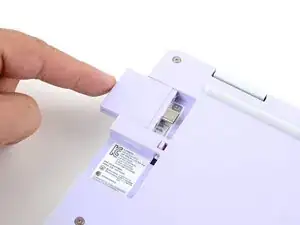
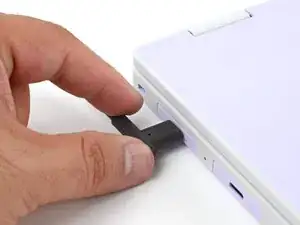
    • Slide an Expansion Card into an Expansion Card slot.

    • All official Expansion Cards work fully in all slots, so you can install them however you wish!

    • You don't need to unlock the latches to install the Expansion Cards—only when you want to remove them.

    • The Expansion Cards should click in place, and the front edge should be flush with the laptop.

    • Repeat the procedure with the remaining Expansion Cards.

  15. Rm2wIsZYXh6BwbCw
    Rm2wIsZYXh6BwbCw
    iTMTpVj1H4tqpgDO
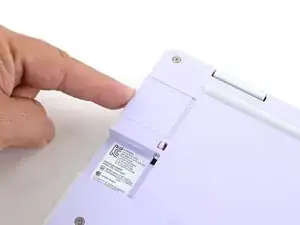
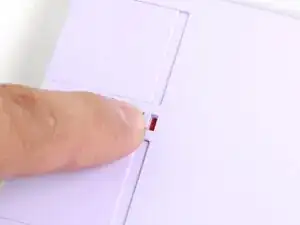
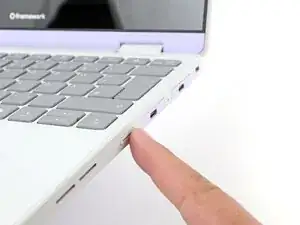
    • If there's a red bar showing under each Expansion Card latch, use your finger to flip the latch and lock the Expansion Card into its slot.

    • Locking the Expansion Card slots help keep the cards in place when you unplug cables from them.

  16. kEgcstGlft3rxyky
    kEgcstGlft3rxyky
    FY1jlNRVW2raBQe3
    btj1JyqDGFhuTb2y
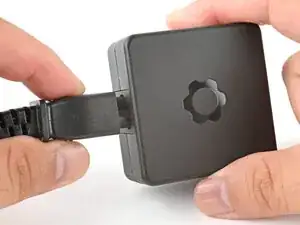
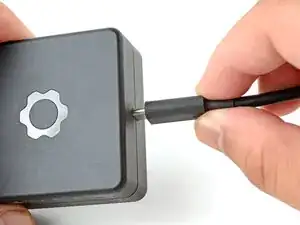
    • Plug the AC Cable into the Power Adapter.

    • Plug the USB-C Cable into the Power Adapter.

    • You can plug either end of the USB-C cable into the adapter.

    • Plug the AC Cable into a power outlet.

  17. 2wsrr1YEjorK2YBy
    • Your Framework Laptop ships in shipping mode, where the battery is disabled until you plug the laptop in for the first time.

    • Plug the USB-C Cable into any USB-C port on your laptop.

  18. ThLHZsWUOJ25q6iC
    • You're done assembling your Framework Laptop! Now, you'll need to install an OS.

    • If you're installing Microsoft Windows, check out this guide.

    • If you're installing Linux, check this page for more details.

    • After installing new memory, the laptop will take longer to start up for the first time, and the screen will turn on slower. This is normal—the system is performing memory training.

Conclusion

For drivers, firmware, and software updates, check out this page.

If you need help, contact Framework support.

Arthur Shi

Member since: 03/01/18

296850 Reputation

0 comments