Introduction
-
-
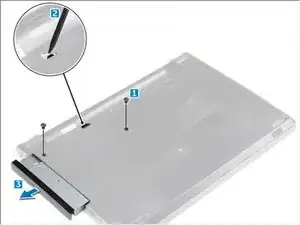
Remove the screw that secures the optical drive to the computer [1].
-
Using a plastic scribe, push the tab to release the optical drive [2].
-
Slide the optical drive out of the computer [3].
-
-
-
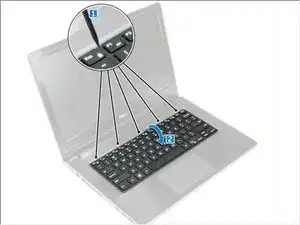
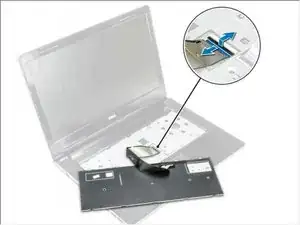
Release the keyboard by prying on the keyboard release tabs using a plastic scribe [1].
-
Slide and lift the keyboard to access the keyboard connector cable under the keyboard [2].
-
-
-
Disconnect the keyboard cable from the system board.
-
Lift the keyboard cable to remove it from the computer.
-
-
-
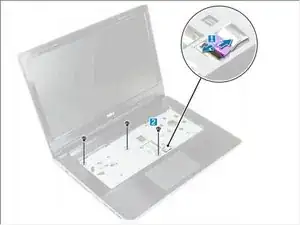
Disconnect the optical drive connector and lift it to remove it from the system board [1].
-
Remove the screws inside the palmrest [2].
-
-
-
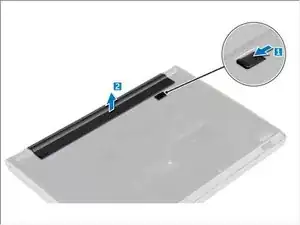
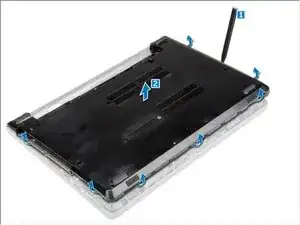
Pry the edges of the base cover [1].
-
Lift the base cover and remove it from the computer [2].
-
-
-
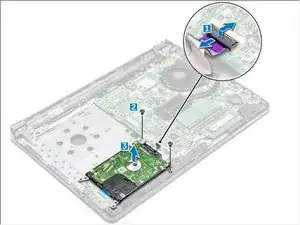
Disconnect the hard drive cable from the connector on the system board [1].
-
Remove the screws that secure the hard drive assembly to the computer [2].
-
Lift the hard drive assembly away from the computer [3].
-
To reassemble your device, follow these instructions in reverse order.