Introduction
Tools
Parts
-
-
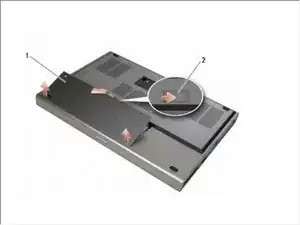
Remove the two M2 x 3-mm screws.
-
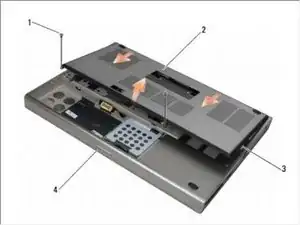
Slide the cover toward the front of the computer to release the tabs from the base assembly.
-
Remove the cover from the base assembly.
-
-
-
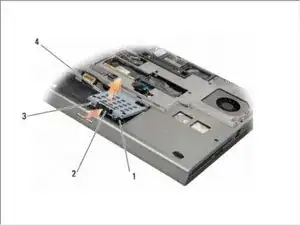
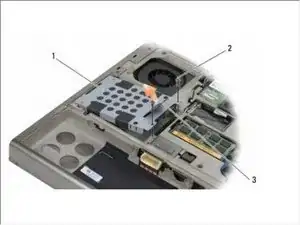
Loosen the two captive screws on the HDD1 carrier, and remove the carrier.
-
Push in, then pull up on the safety loop to remove the cover.
-
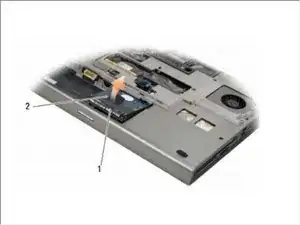
Use the pull tab to disconnect the HDD1 from the connector on the system board, and remove the HDD1 from the computer.
-
-
-
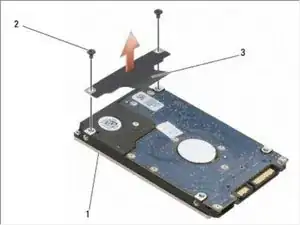
Remove the two M3 x 3-mm screws that secure the pull tab to the HDD1.
-
Set the pull tab aside to use with the replacement HDD1.
-
-
-
Remove the two M3 x 3-mm screws that secure the carrier to the computer.
-
Pull up on the pull tab to remove the carrier.
-
-
-
Remove the two M3 x 3-mm screws that secure the carrier to the HDD2.
-
Remove the carrier from the HDD2. If your computer does not have an HDD2, remove the hard drive place-holder from the carrier.
-
Remove the interposer from the HDD2 or the place-holder, and set the interposer aside.
-
To reassemble your device, follow these instructions in reverse order.