
Introduction
If you have a Dell Precision 3580 PC that is either not holding a charge when unplugged or swelling near middle of the keyboard, there is most likely an issue with your battery. This guide will demonstrate the process of replacing the battery for a Dell Precision 3580 in detail.
In the event of a swollen battery, remember to exercise caution when attempting to remove and dispose of it.
For your safety, discharge your battery below 25% and shut down the laptop before disassemby.
Parts
-
-
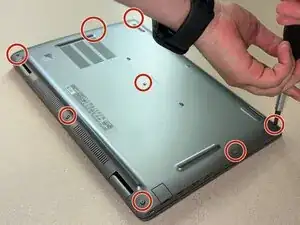
Insert a pry tool into the seam between the lower case and chassis.
-
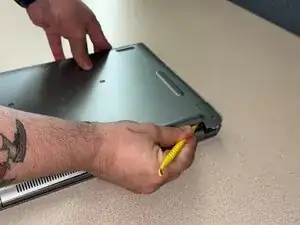
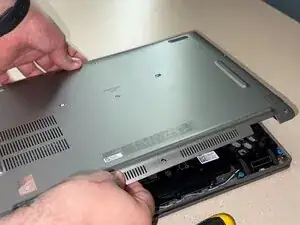
Slide the pry tool around the entire perimeter of the lower case, prying every couple of centimeters, until the lower case fully releases.
-
Remove the lower case.
-
-
-
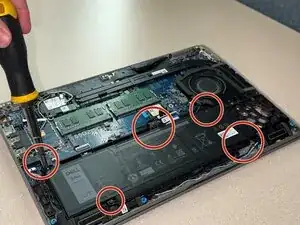
Remove all five Phillips screws securing the battery.
-
Lift the battery up and out of the chassis.
-
-
-
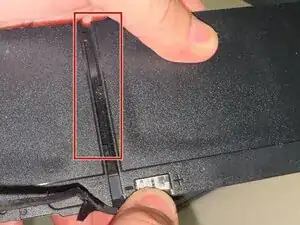
Flip the battery and peel the tape that holds its cable in place to remove it.
-
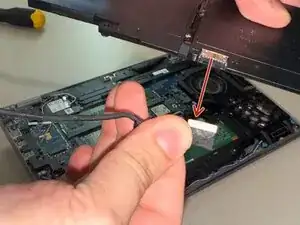
Disconnect the end of the cable connected to the battery so it can be moved to the replacement.
-
-
-
Connect the cable to your replacement battery.
-
Align the cable with the groove on the underside of the battery and secure it using the tape.
-
-
-
Install the replacement battery gently and replace all five of the screws that secure it in place.
-
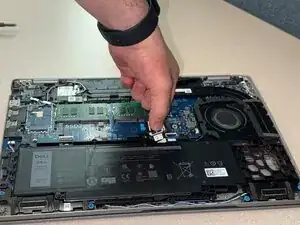
Gently reconnect the battery connector to its motherboard socket.
-


For optimal performance, after completing this guide, calibrate your newly installed battery.
Take your e-waste to an R2 or e-Stewards certified recycler.
Repair didn’t go as planned? Try some basic troubleshooting or ask our Answers community for help.