Introduction
Because the latitude E6400 has just one screw to remove to access the upgradable guts, this process takes no more than 5 minutes to do. It's also very easy.
Pictures and text written by ouimetnick.
Tools
-
-
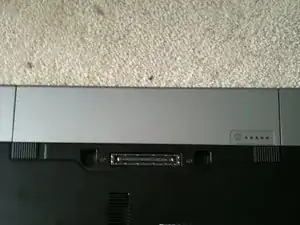
Simultaneously slide the battery latches (outlined by the red box) to the dock connector in the middle.
-
This will release the battery. Just slide the battery away from the computer.
-
Open up the computer and press and hold the power button for 5 seconds. This drains any power left inside the computer.
-
This is important, as if electricity remains in the notebook, it can shock you and damage the logic board.
-
-
-
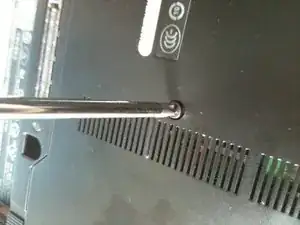
Loosen the center screw with a philips screw driver. This is the only screw that needs to be loosened.
-
It can't be removed as it is captive the the bottom plate.
-
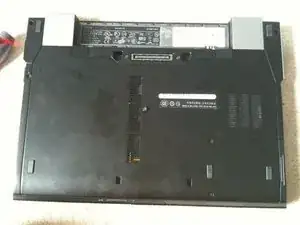
Now slide the plate away from the dock connector.
-
-
-
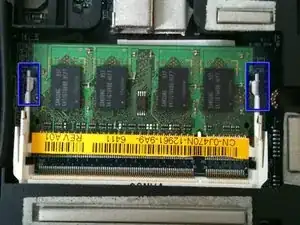
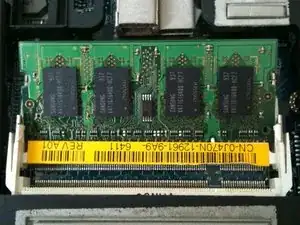
Locate the RAM slot.
-
the system can hold 2 RAM modules.
-
This unit has 1 module. It is a 1GB one.
-
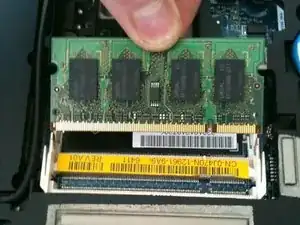
Push the metal spreaders (shown in the blue rectangle) straight away from the RAM module.
-
The RAM module should pop up to a 45 degree angle.
-
-
-
Pull the RAM module straight out from the way it was raised. (Once it pops up to a 45 degree angle, pull it straight out from its current position).
-
Insert the new RAM into the empty slot, ensuring that the notch in the RAM lines up with the slot (see picture).
-
-
-
Slide the bottom plate on.
-
Slide it to the rear of the notebook. (battery compartment)
-
tighten the screw.
-
Do not over-tighten. Doing so will strip the screw.
-


To reassemble your device, follow these instructions in reverse order.