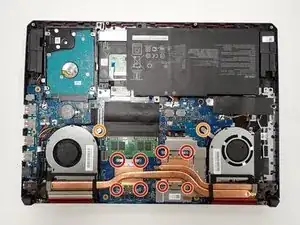
Introduction
-
-
Turn off the laptop.
-
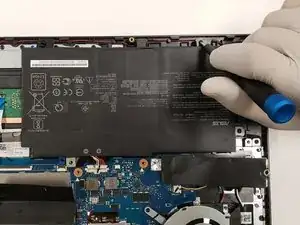
Disconnect the charging cable.
-
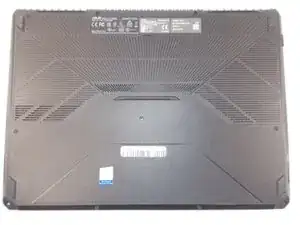
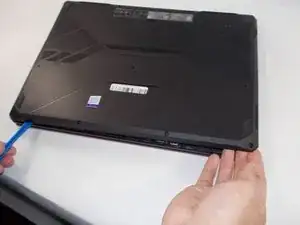
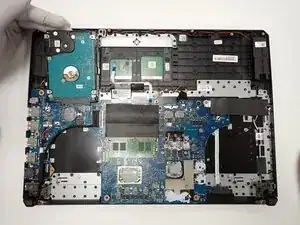
Flip the laptop so the back is facing up.
-
-
-
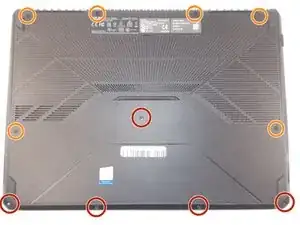
Use a Phillips #1 screwdriver to remove the five 6 mm screws that secure the back panel.
-
Use the same screwdriver to remove the six 13 mm screws securing the back panel.
-
-
-
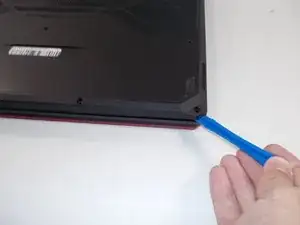
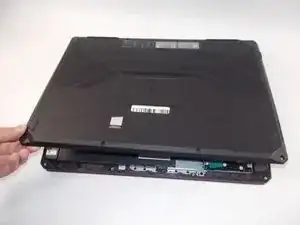
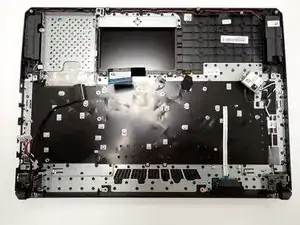
Insert the plastic opening tool at a corner and pry up along the edges, leaving the back side with the hinges for last.
-
-
-
Gently lift up the back panel to release any remaining clips on the side with the hinges and remove the panel.
-
-
-
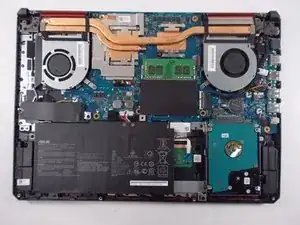
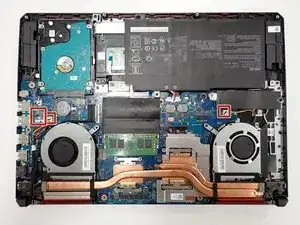
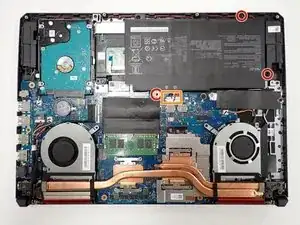
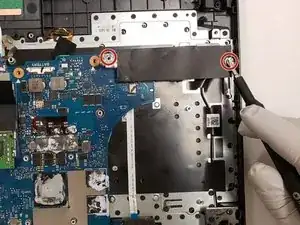
With a Phillips 0-bit screwdriver, remove eight 5.0 mm screws on the silver brackets
-
With a Phillips 0-bit screwdriver, remove two 5.0 mm screws holding the edge of the fans in place
-
-
-
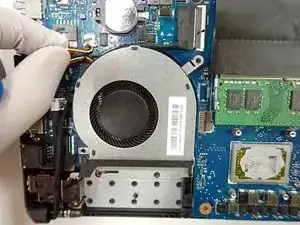
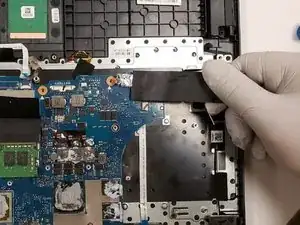
Gently remove all power cables connecting the fans to the motherboard.
-
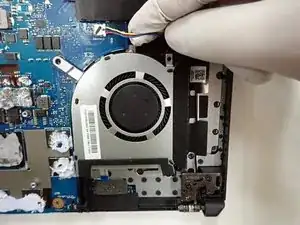
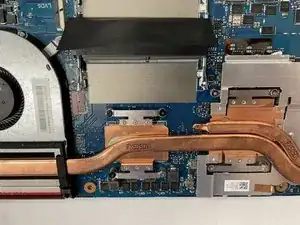
Once all cables and screws are removed, carefully lift up and remove the fans and heat sink
-
-
-
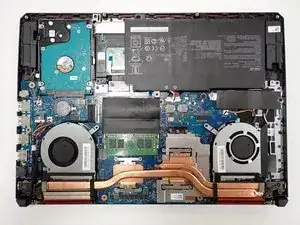
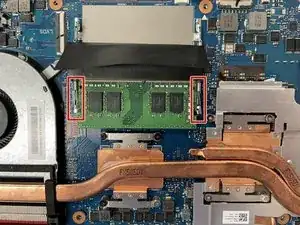
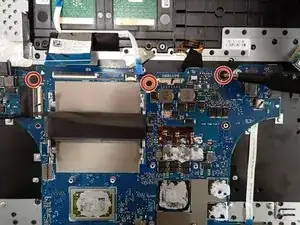
With a Phillips 0-bit screwdriver, unscrew four 5.0 mm screws.
-
Disconnect the primary connector cable located at the bottom left and carefully remove the module.
-
-
-
Removing the ram, push down unto the ram and move the metal locking tabs to the side by lifting upward slightly then moving each to their outside.
-
Pull the ram out toward the angle when the ram is sticking up at an angle when released.
-
-
-
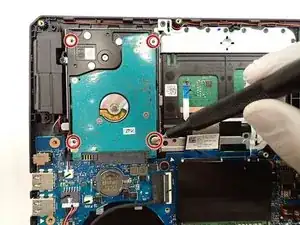
With a Phillips 0-bit screwdriver, unscrew four 5.0 mm top screws holding the hard drive in place.
-
Pinch the top left corner with your finger and slide the harddrive out of its casing.
-
-
-
With a Phillips 0-bit screwdriver, unscrew two 5.0 mm screws holding SSD down to the motherboard on the right side of the board
-
Slide module out of protective casing to remove piece.
-
-
-
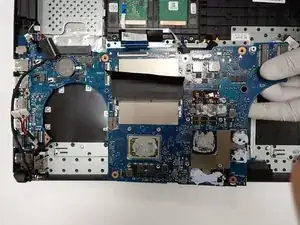
With a size 0 Phillips screwdriver, unscrew three center 5 mm screws securing the board in place.
-
Carefully lift the board and place in a safe area.
-


To reassemble your device, follow these instructions in reverse order.

One comment
Can I change the motherboard of my laptop? I have the model FX505DY (Ryzen 5 3550H, Radeon RX 560X, 17.3 inches). I would like to change it for the FX505DT model (Ryzen 7 3570H, GTX 1650, 17.3 inches)
Luis Nox -