Introduction
Prerequisites 1. Follow the procedure in Before working inside your computer.
-
-
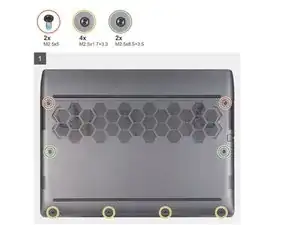
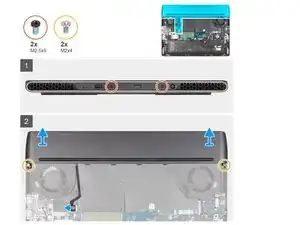
Remove the two screws (M2.5x5) that secure the base cover to the palm-rest and keyboard assembly.
-
New line. Loosen the two captive screws (M2.5x8.5+3.5) that secure the base cover to the palm-rest and keyboard assembly
-
Loosen the four captive screws (M2.5x1.7+3.3) that secure the base cover to the palm-rest and keyboard assembly.
-
-
-
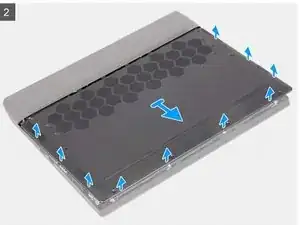
Using your fingertips, pry open the base cover from the middle of the front edge of base cover, and then pry the left and right sides of the base cover.
-
Lift the base cover off the palm-rest and keyboard assembly.
-
-
-
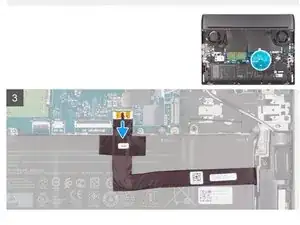
Disconnect the battery cable from the system board.
-
Turn your computer over and press the power button for 20 seconds to drain the flea power
-
-
-
Remove the two screws (M2x4) that secure the rear I/O-cover to the palm-rest and keyboard assembly.
-
Remove the two screws (M2.5x5) that secure the rear I/O-cover to the palm-rest and keyboard assembly.
-
Disconnect the Tron light cable from the system board.
-
Firmly grasp the sides of your computer with both hands and push the rubber feet on the rear I/O-cover outwards with yourthumbs to release the rear I/O-cover from the palm-rest and keyboard assembly.
-
Slide the rear I/O-cover away from the palm-rest and keyboard assembly.
-
-
-
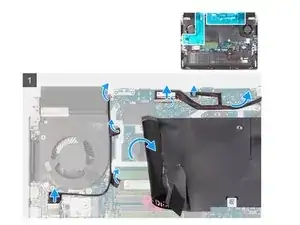
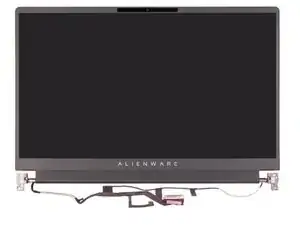
Open the latch and disconnect the display cable from the system board.
-
Disconnect the Alienhead LED cable from the system board.
-
Disconnect the RGB-IR camera cable from the USB board.
-
Lift the system board Mylar and peel the tapes that secure the RGB-IR camera cable to the system board.
-
Lift the RGB-IR camera cable off the system board.
-
Turn the computer over and place the computer on a clean and flat surface.
-
Remove the display cable from the routing guides on the palm-rest and keyboard assembly.
-
Remove the RGB-IR camera cable from the routing guides on the palm-rest and keyboard assembly.
-
-
-
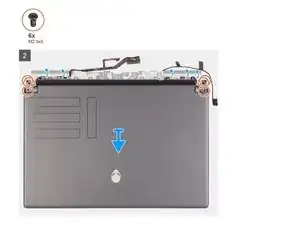
Remove the six screws (M2.5x5) that secure the display hinges to the palm-rest and keyboard assembly.
-
Lift the display assembly off the palm-rest and keyboard assembly.
-
To reassemble your device, follow these instructions in reverse order.

One comment
How do you replace the LCD ribbon cable? It seems to be glued to the screen. I just need to replace that cable because it broke when I had to disconnect it to replace the charging port. :(