Introduction
This guide contains instructions on removing the battery from your Acer Aspire ES1-711-P1UV. If your battery is faulty, it may result in your computer not turning on or randomly turning off during use. By replacing the battery, these issues should be resolved.
-
-
Place the laptop face down on a flat, clean surface.
-
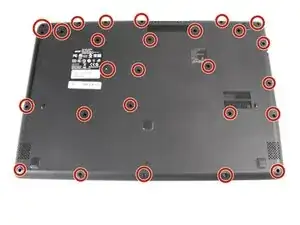
Remove all twenty-seven 7 mm screws on the back cover of the laptop with a Phillips #0 screwdriver. Screws are circled in red on the diagram.
-
-
-
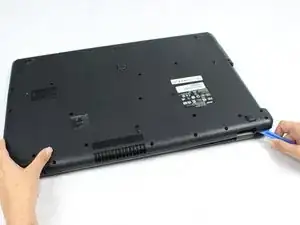
Use the iFixit opening tool to pry open the four corners of the back cover of the laptop. You may need to use your hands to fully remove the cover.
-
Be sure to evenly apply pressure when removing the back cover.
-
-
-
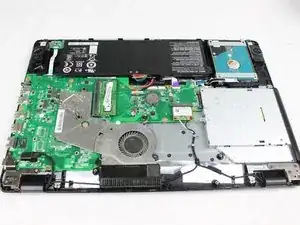
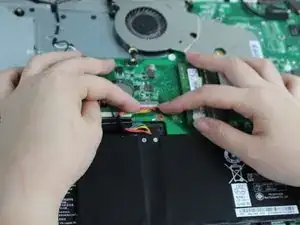
Disconnect the colored bundled cable connectors from the motherboard. To do this, pull on the wires to disconnect the cable and remove the battery.
-

To reassemble your device, follow these instructions in reverse order.
2 comments
Excellent instructions, Thxz.
Wuen i reassemble my laptop doesnt power on…
mk Bane -